Lesson Category: All Machines

Removing Adhesive Backing from Acrylic

Spray Backing

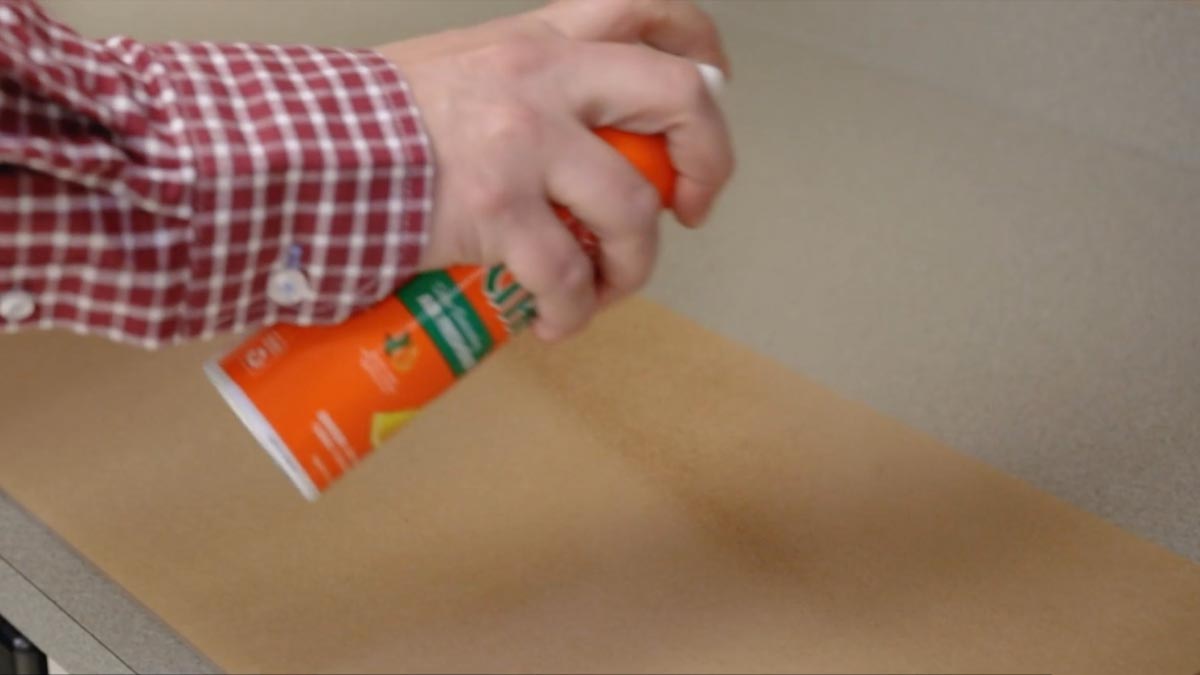
Spray the adhesive backing with Pure Citrus air freshener and let it sit for 30 seconds.

Wipe the sheet clean with a rag or towel

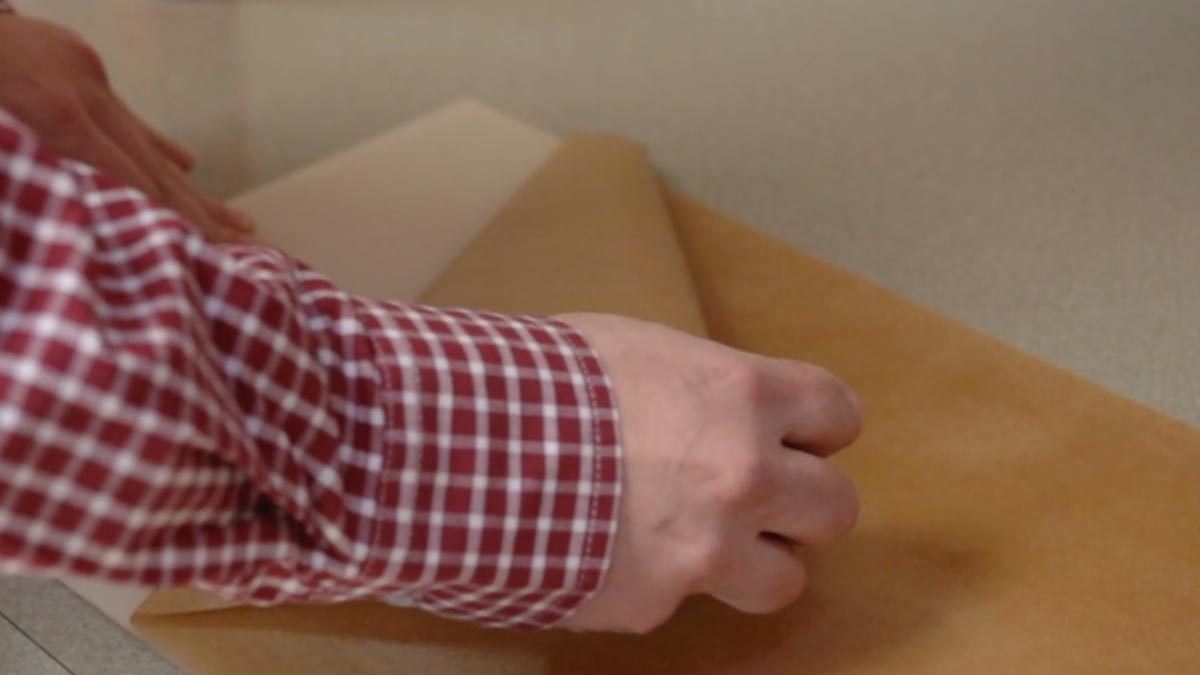
Peel Backing

Now the adhesive backing should be quick and easy to remove from your acrylic.

Easily peel away adhesive backing

Wipe Clean

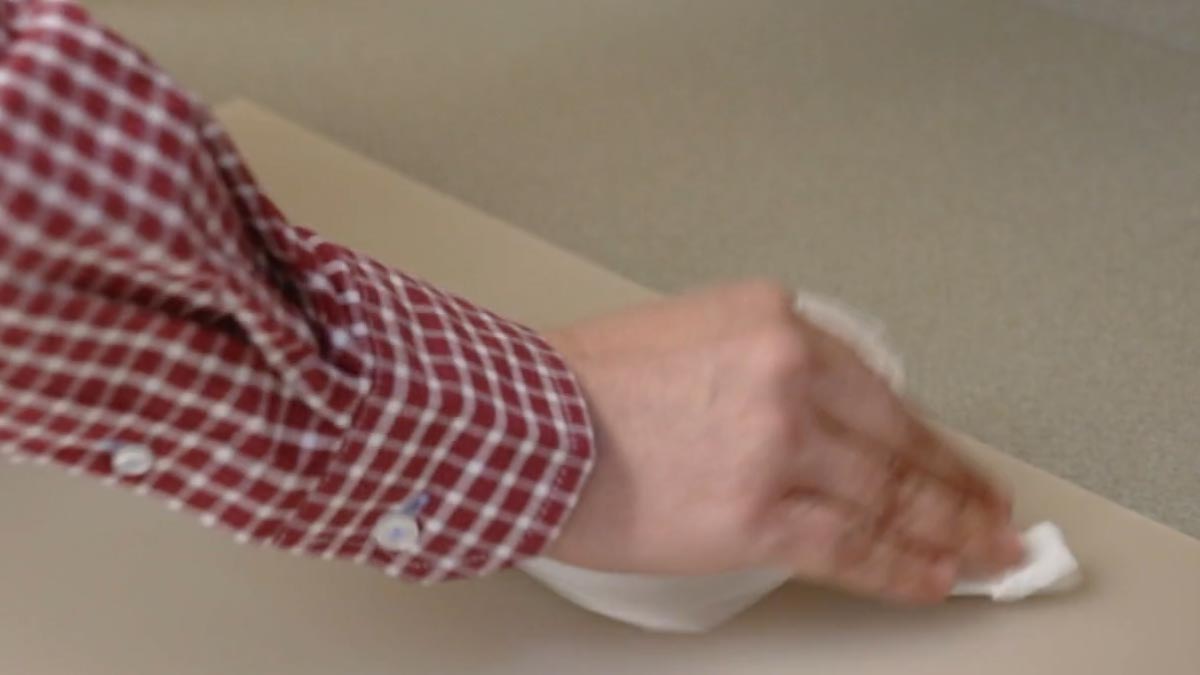
Wipe off the remaining residue and you’re ready to engrave or cut your acrylic!

Wipe the sheet clean with a rag or towel

Use a Jig to Pre-Engrave an Item for Customization Later

Setup the Artwork

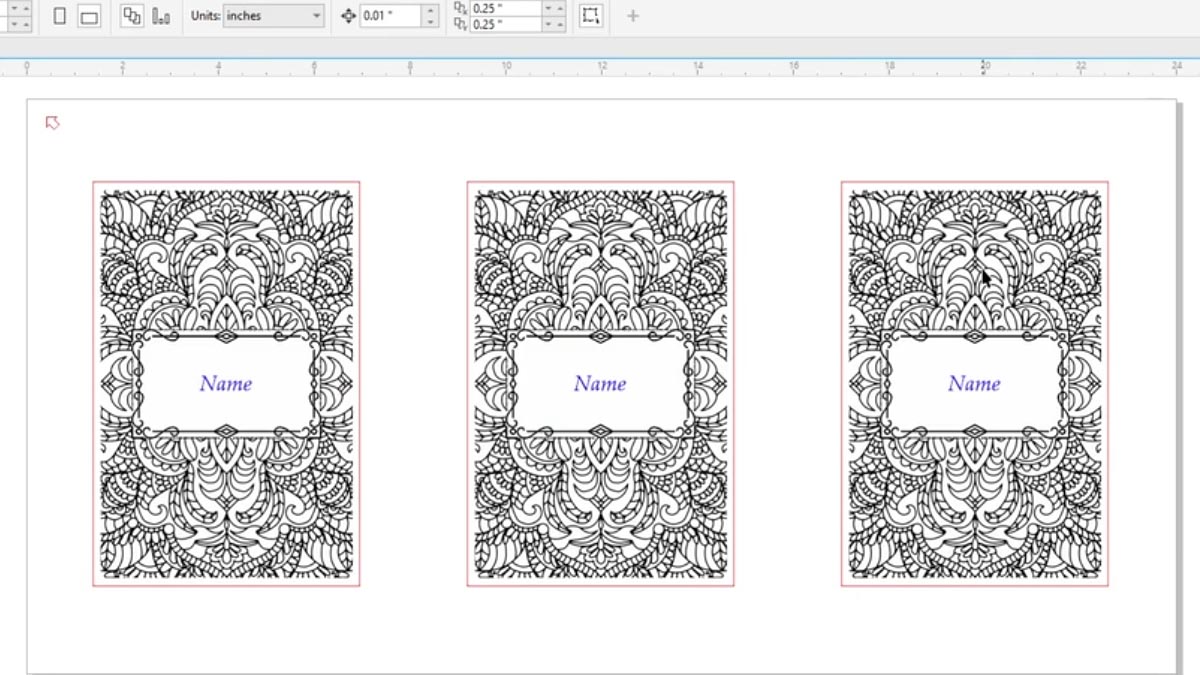
Here we are creating a jig to pre-engrave four leather notebooks.

We’ll add customized names to each one later.

The red lines are the outlines of the notebooks we’ll cut out in a jig.

We’ll cut an arrow at the top left corner so we know how to arrange the jig in the laser later.

Print the file to the laser.

Dashboard Settings

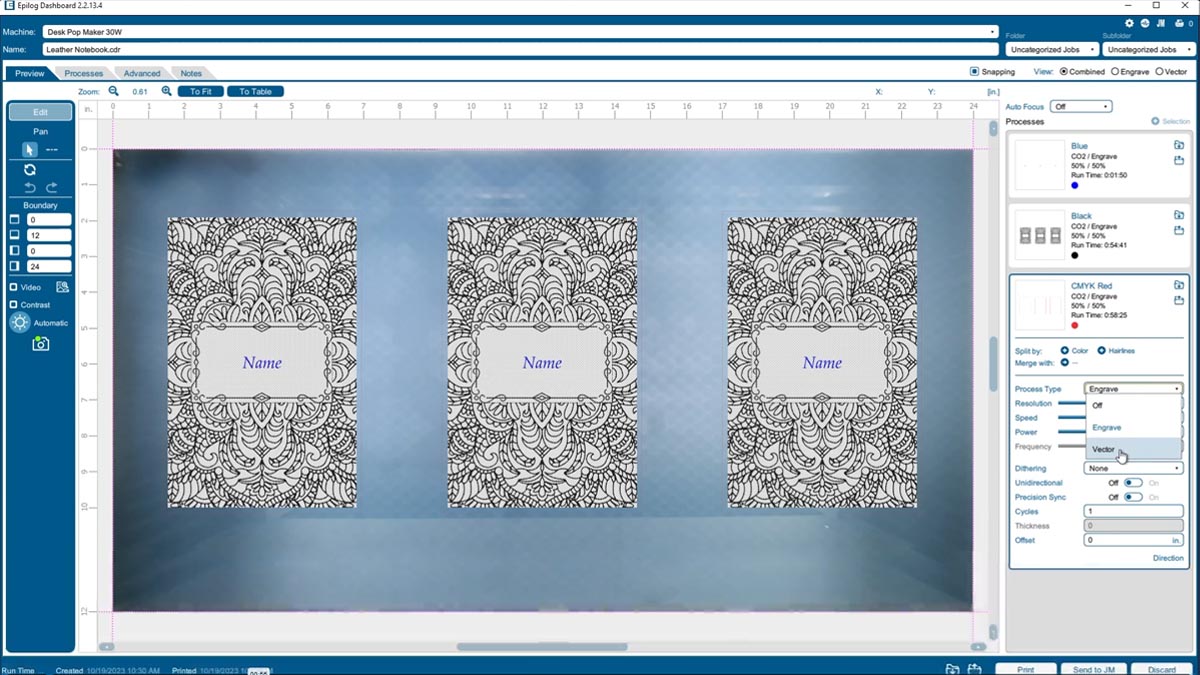
We’ve set up our Laser Dashboard to automatically split by color.

You can see three processes based on the colors in the file.

Blue for the names, black for the design, and red for the jig cutouts.

Change the red process to Vector.

setup the dashboard and split by color

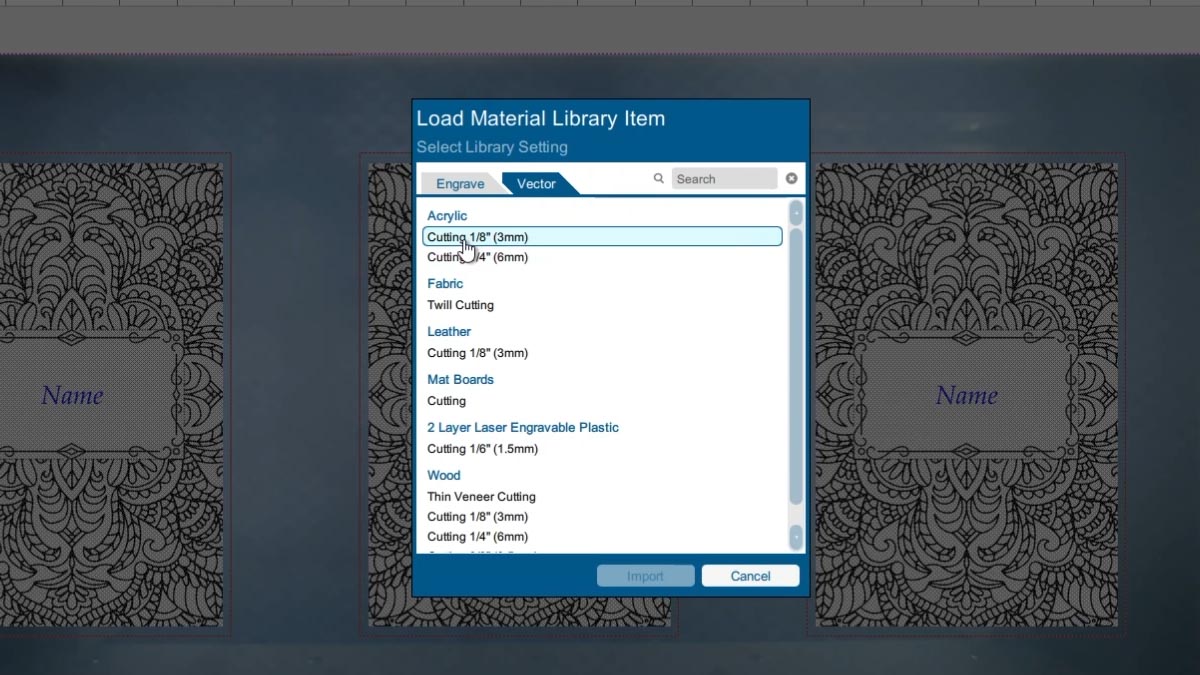
Import the settings for cutting 1/8” acrylic.

import the settings for acrylic cutting 1/8

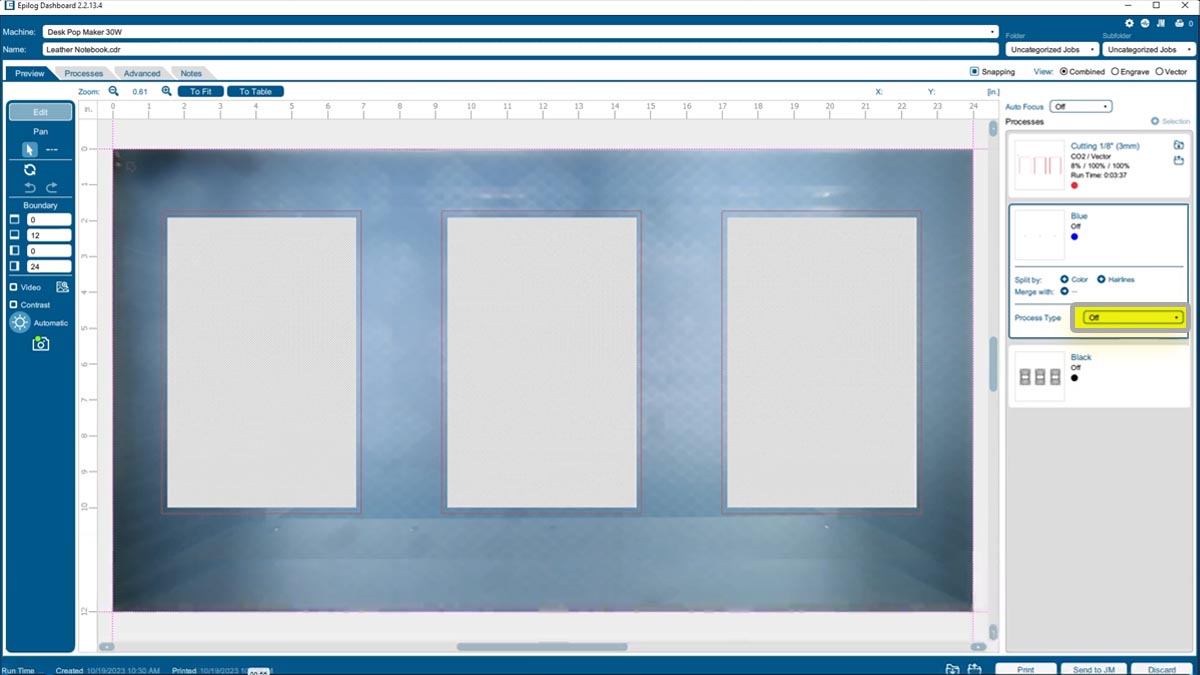
Turn off the black and blue processes.

turn off the black and blue processes

Print the job to the laser.

Cut out the Jig

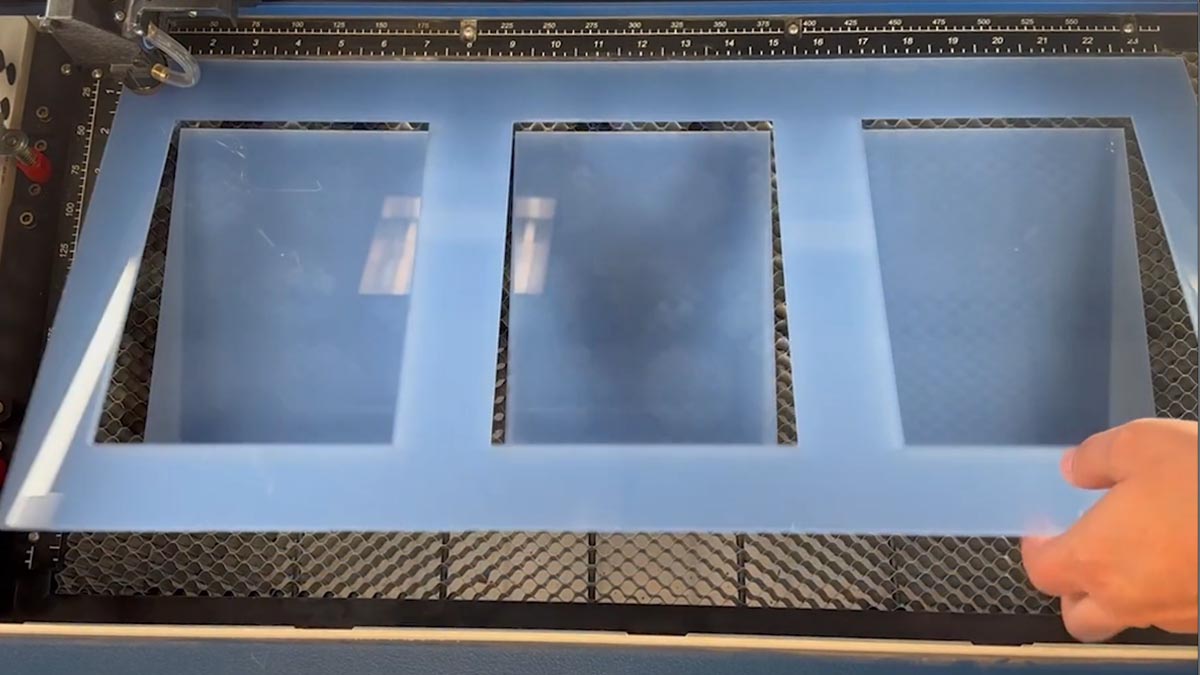
load the laser with the desired jig material. For this lesson, we are using a sheet of acrylic.

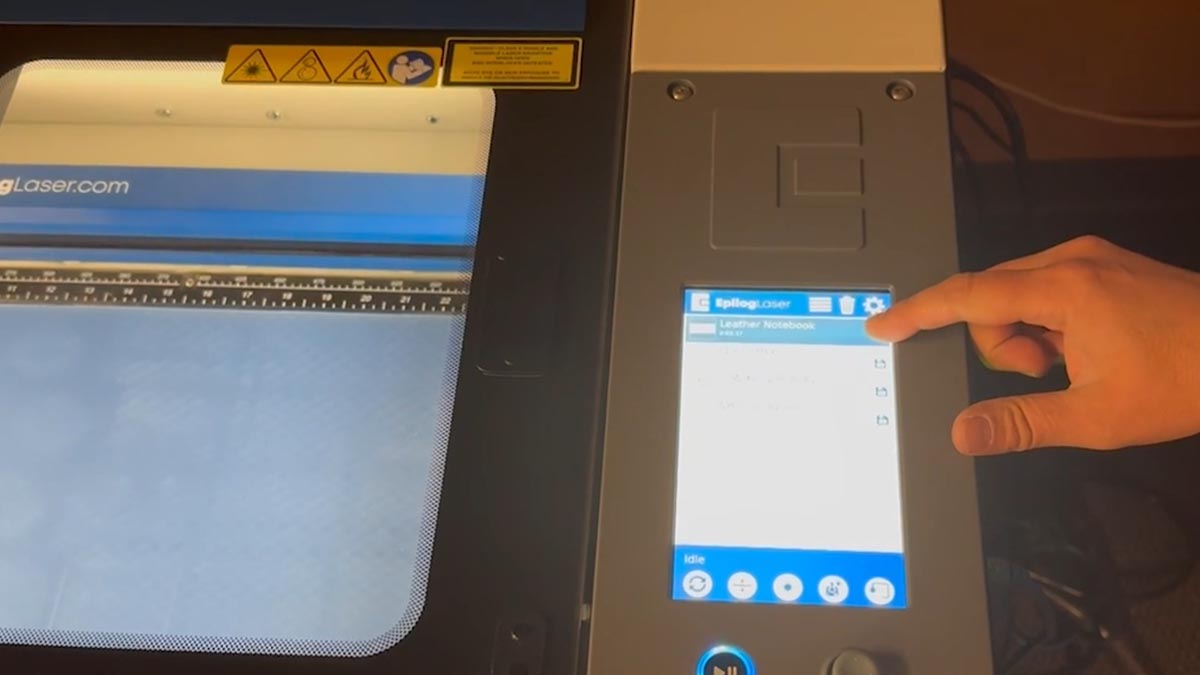
Select the file at the laser and press the start button.

select the file and start the laser

You now have a jig to use over and over.
cut out the jig
remove cut-outs from the jig

Load the Jig

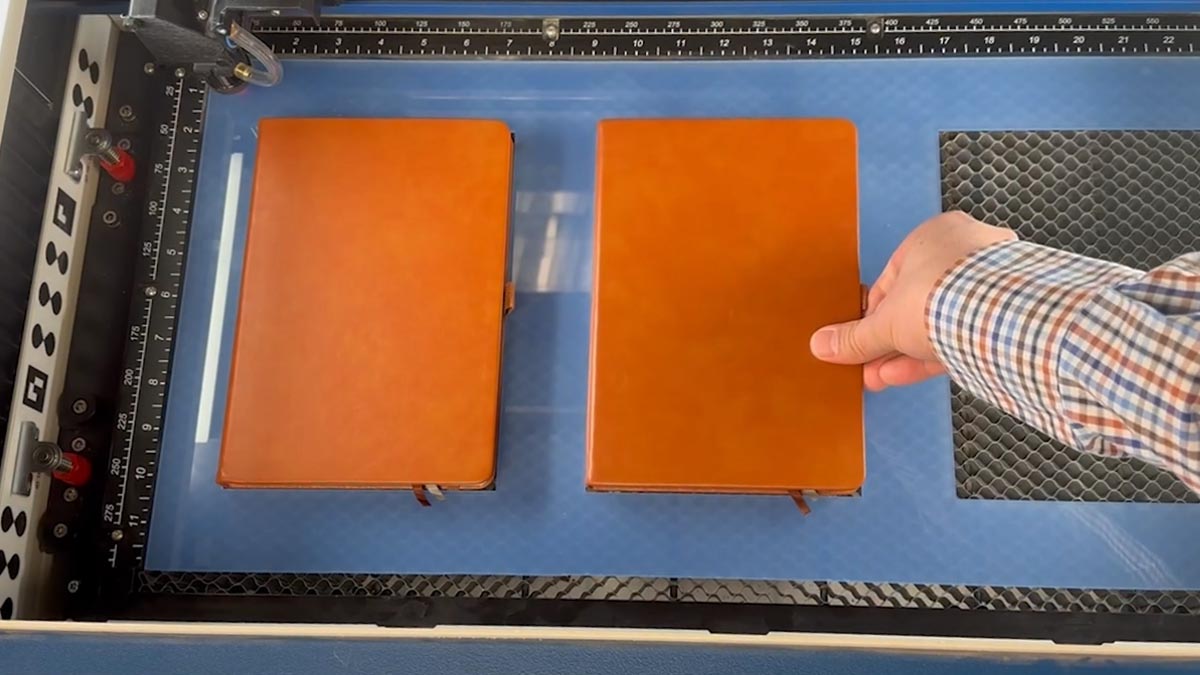
When you’re ready to use the jig place it with the arrow at the top left corner of the table.

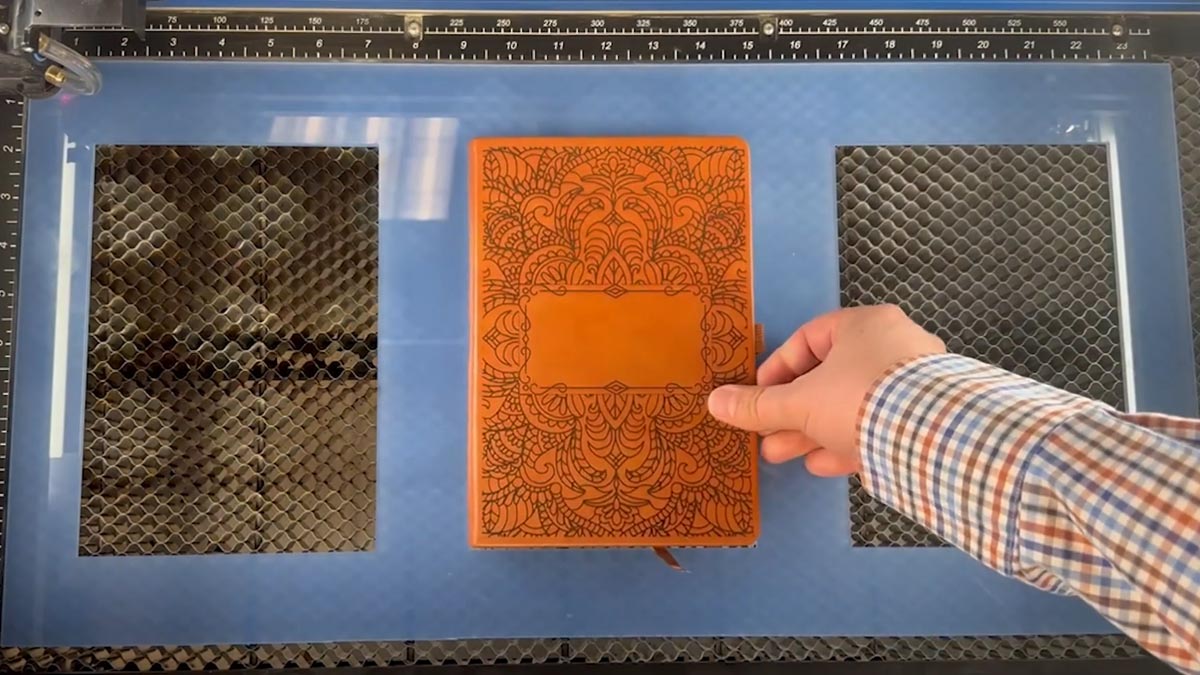
Line up your leather notebooks in the cutouts.

load the jig with blank notebooks

Pre-engrave Notebooks

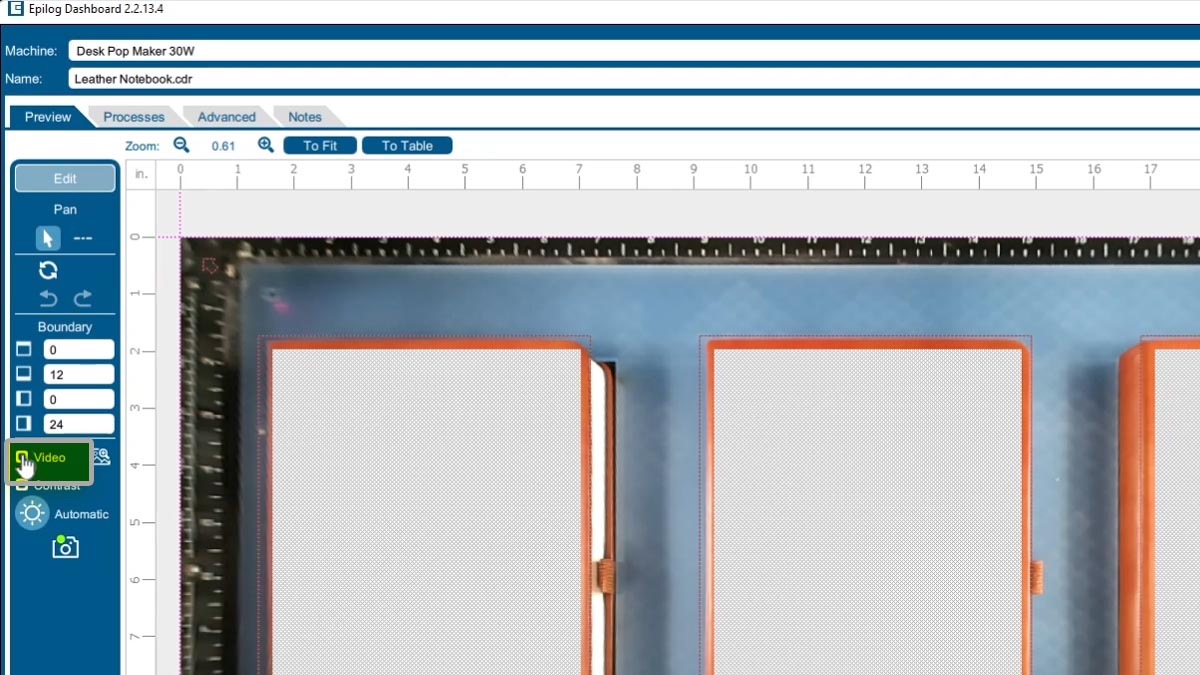
Back at the computer we’ll turn off the camera so we can see the design better.

turn off the camera

Turn off the red cutting layer.

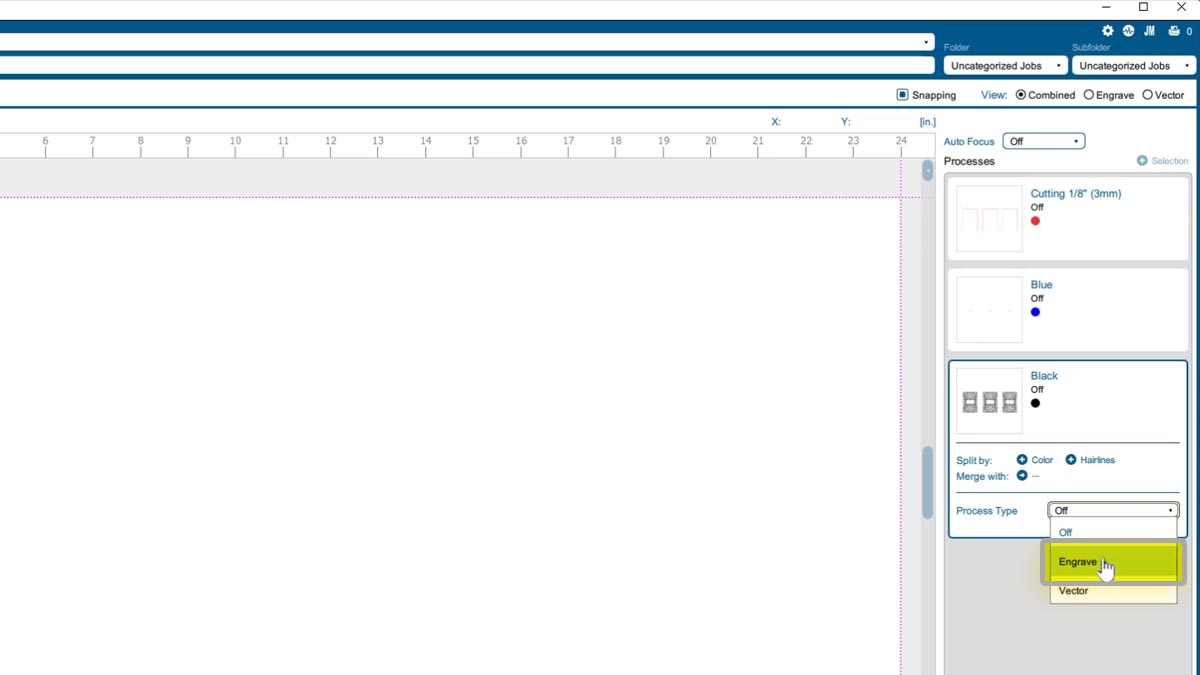
And change the black layer’s process type to Engrave.

adjust color layers

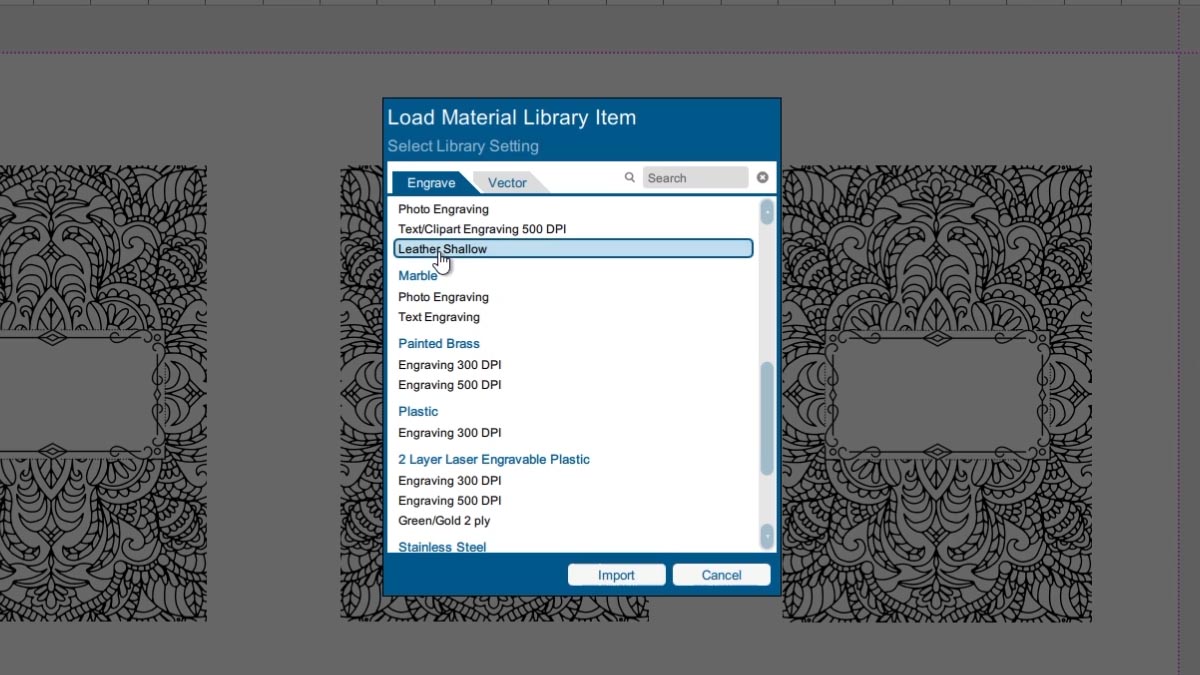
We’ll import our settings for leather shallow engraving.

use the material preset and select leather shallow engrave

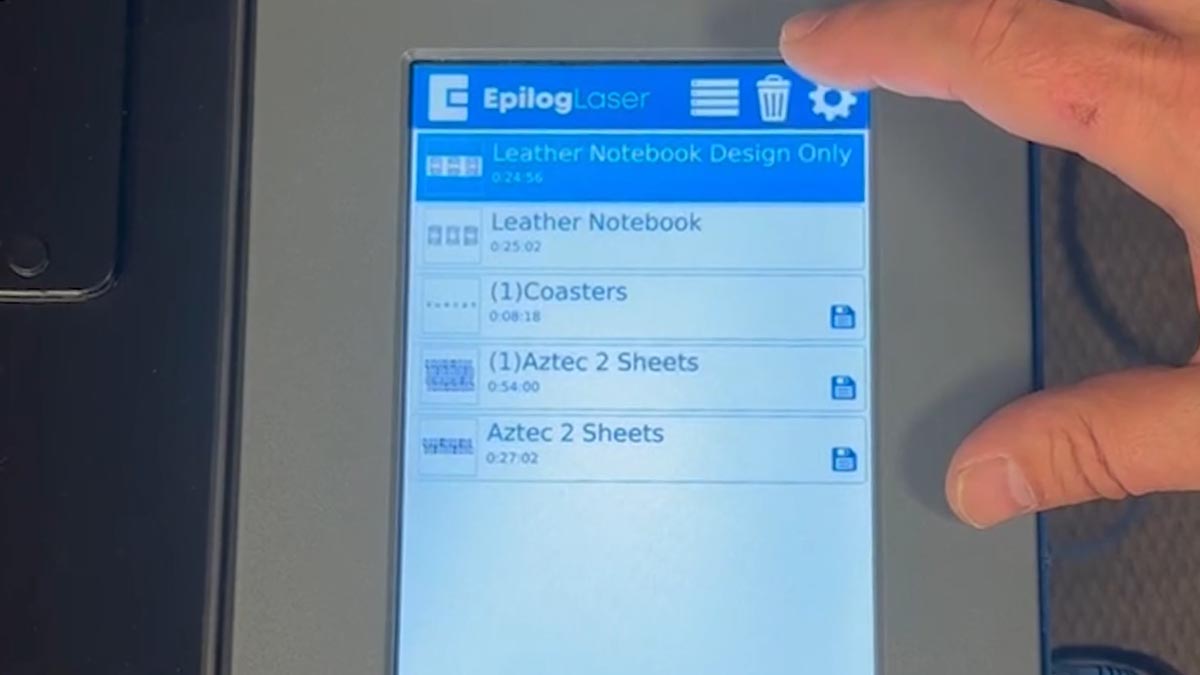
We’ll also change the file name to Leather Notebook Design Only.

And print it to the laser.

If this is a file we’ll run often, we can permanently save it at the laser for easy access.

Permanently Save the renamed file and print when ready

When you’re ready, start the job.

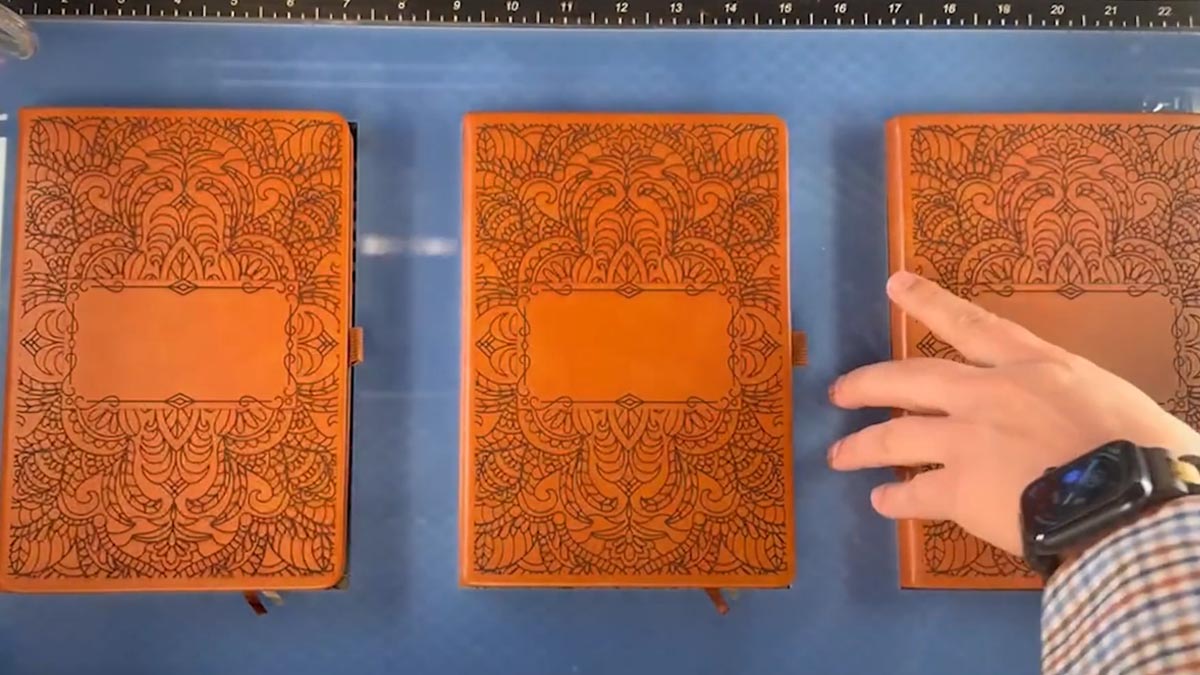
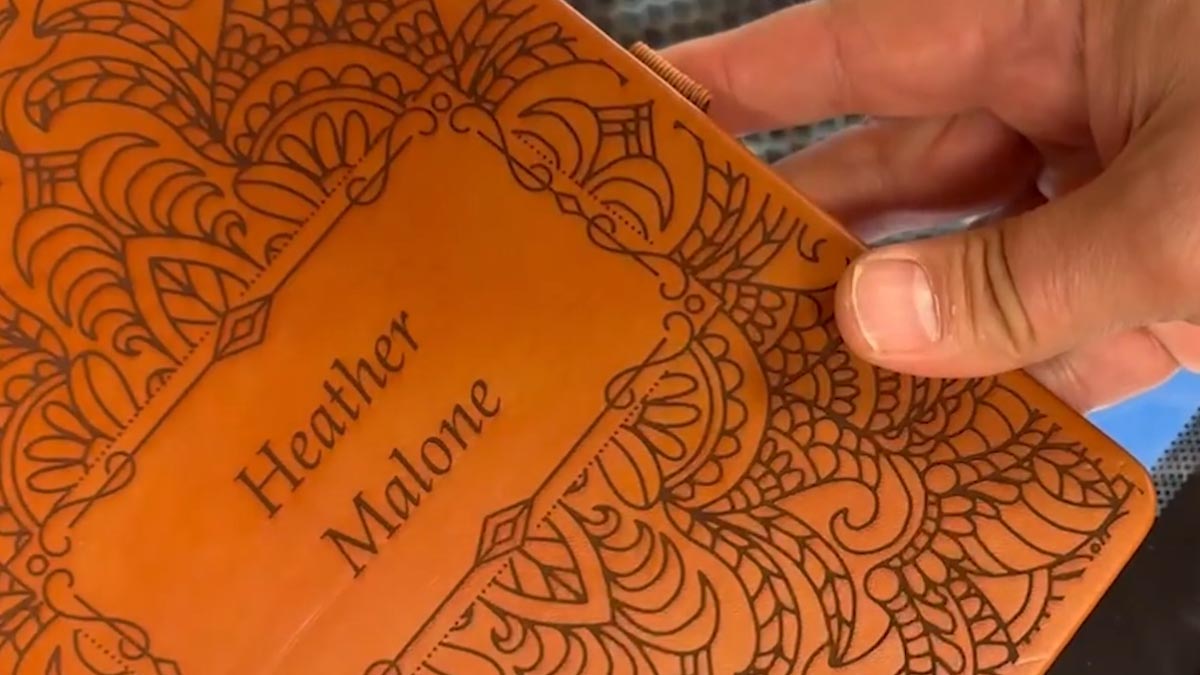
Now we have pre-engraved products ready for customization later!

now we have pre-engraved products ready for later engraving

Add Customizations

When a customer order is ready, place the jig back in the laser and the pre-engraved item in one of the spaces.

load the jig when the time is right and add pre-engraved notebook

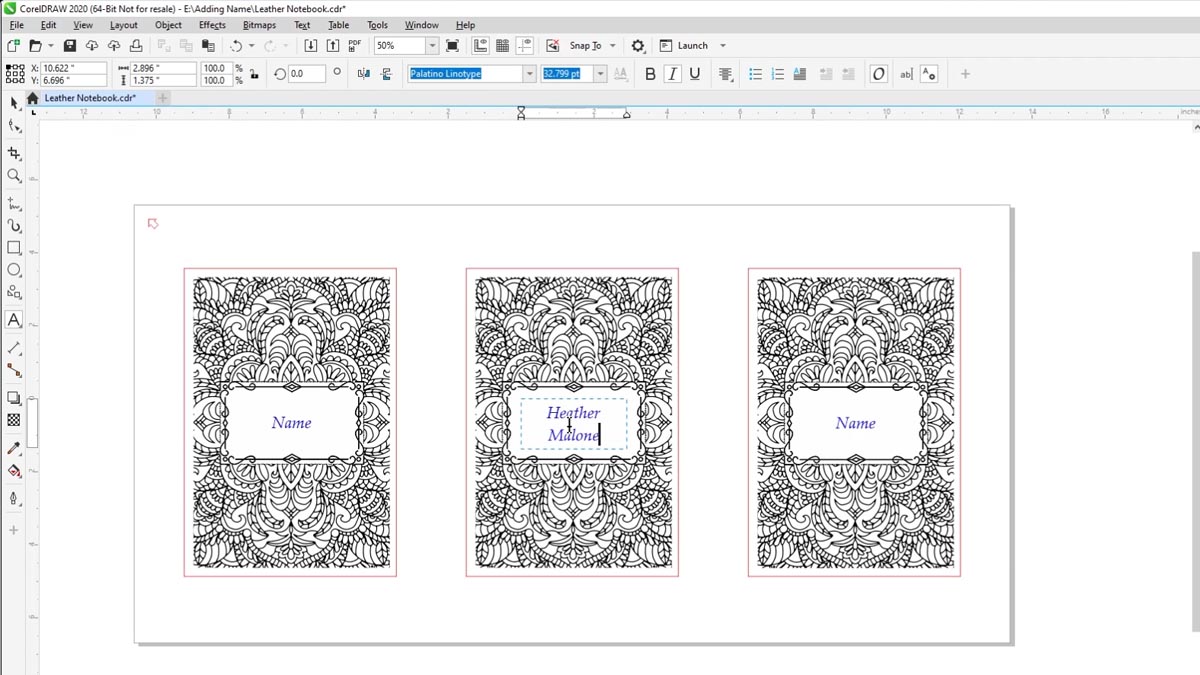
Simply type the name in the field of the notepad.

type the name in the art file and print

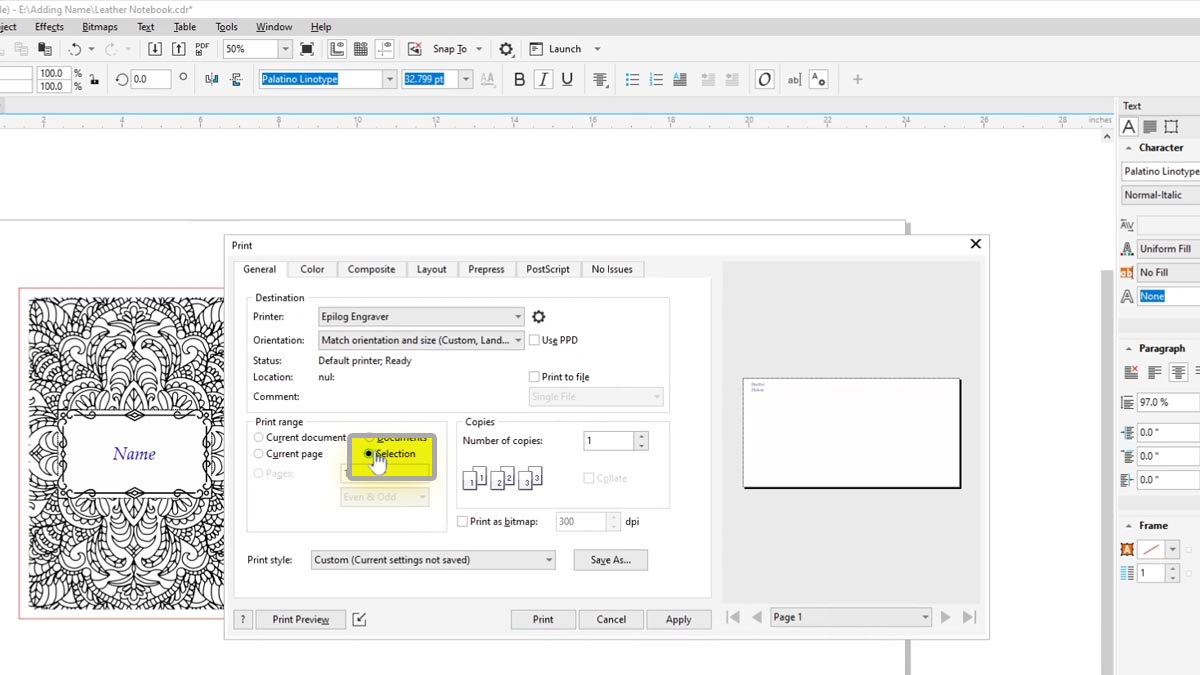
Print the file to the laser and choose selection only.

choose selection only

Choose our Leather Shallow engraving settings and print the file to the laser.

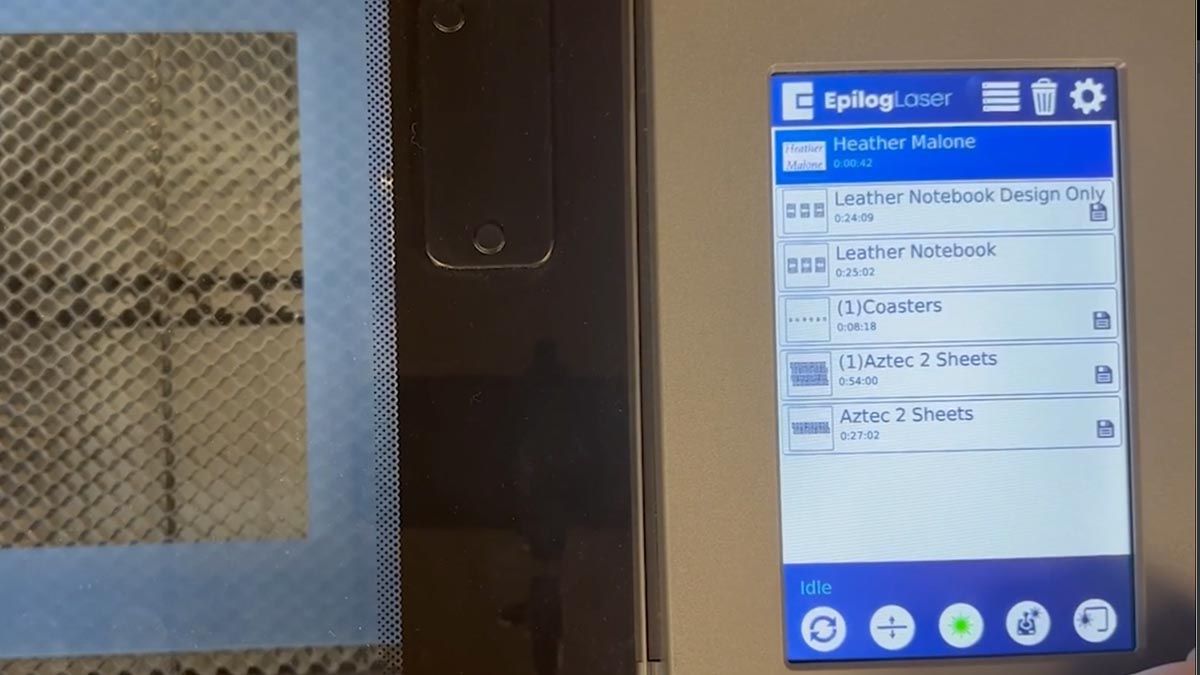
Select the file at the laser and press the start button.

select the file at the laser

In under a minute your custom notebook is ready for delivery!

finish the notebook by adding the customized name

Using Color Mapping in the Epilog Software Suite

Prepare the Artwork

It’s easy to color map with the Epilog Dashboard.

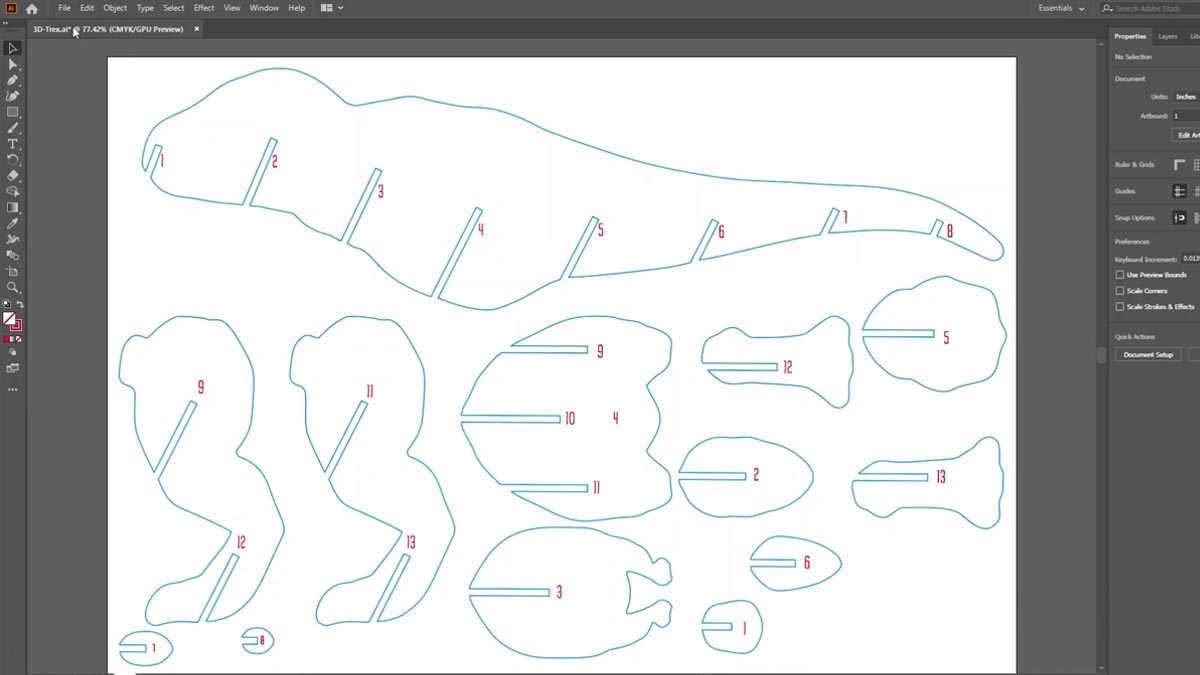
For this file, we want to score the red numbers and cut out the blue outlines.

setup the art file using different colors for different passes

Once the artwork is ready, Print the file to the laser.

Split by Color

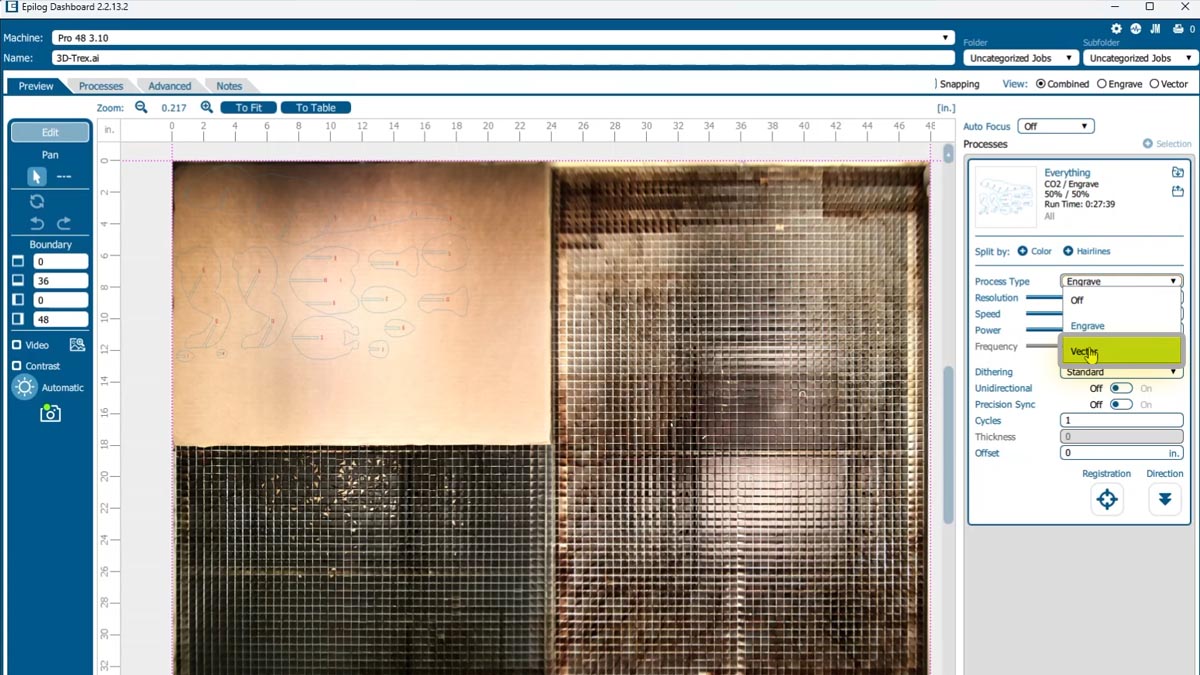
Everything has come over in a single process to the software.

First change the process from Engrave to Vector.

change prcess to vector

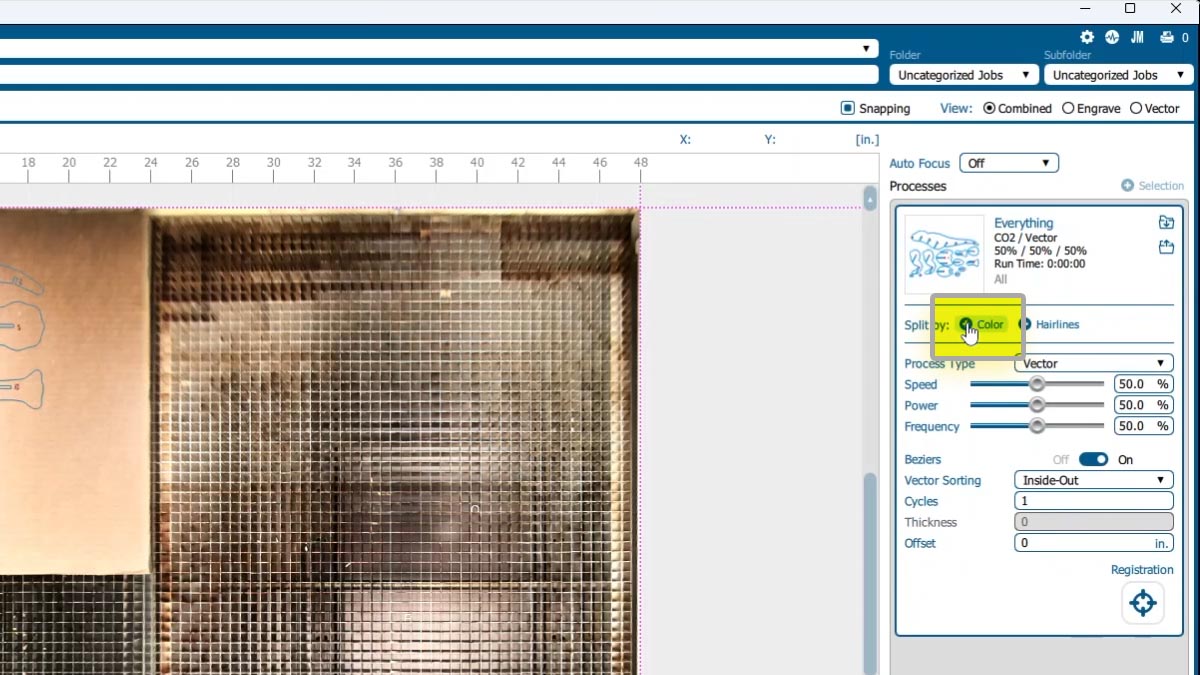
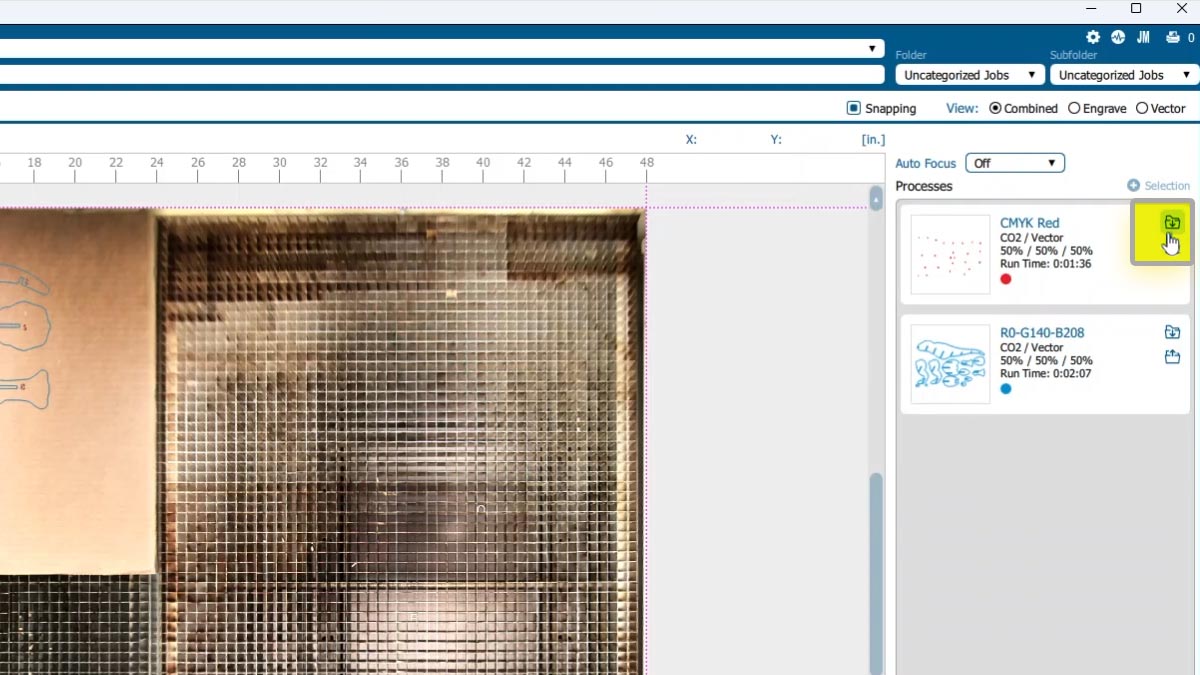
To color map, just click Split by Color

click split by color

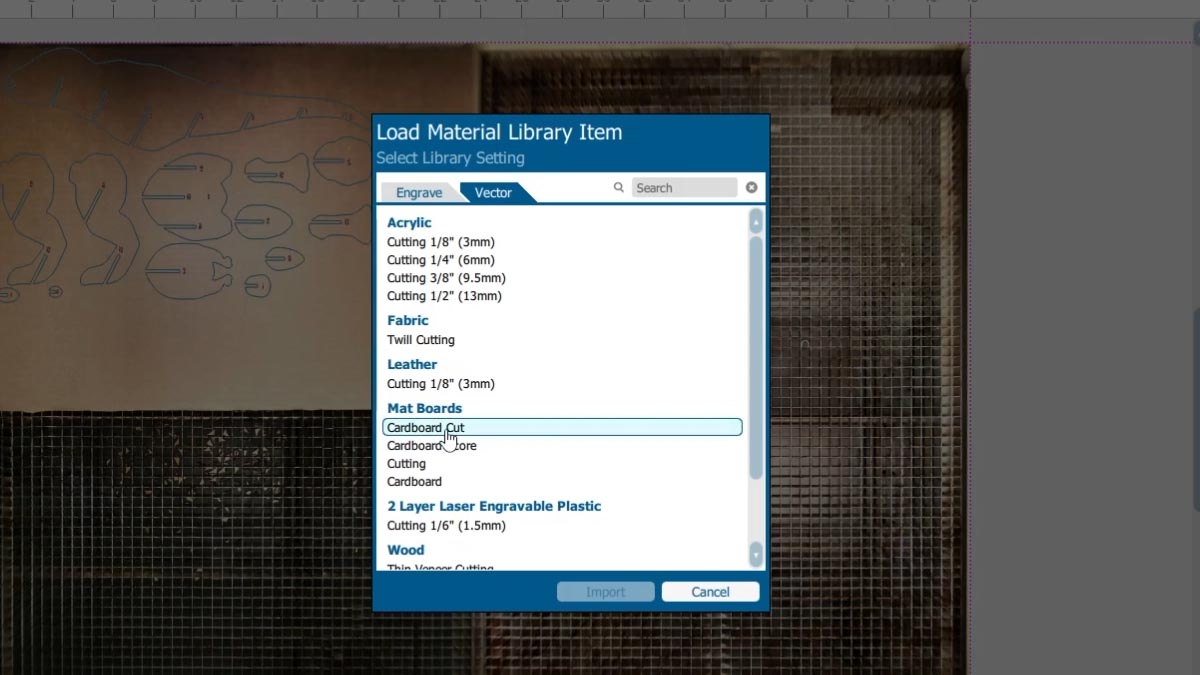
Import the settings for scoring and cutting the cardboard on each process.

click the material preset icon to import settings
Set preset to cardboard score
Set preset to cardboard cut

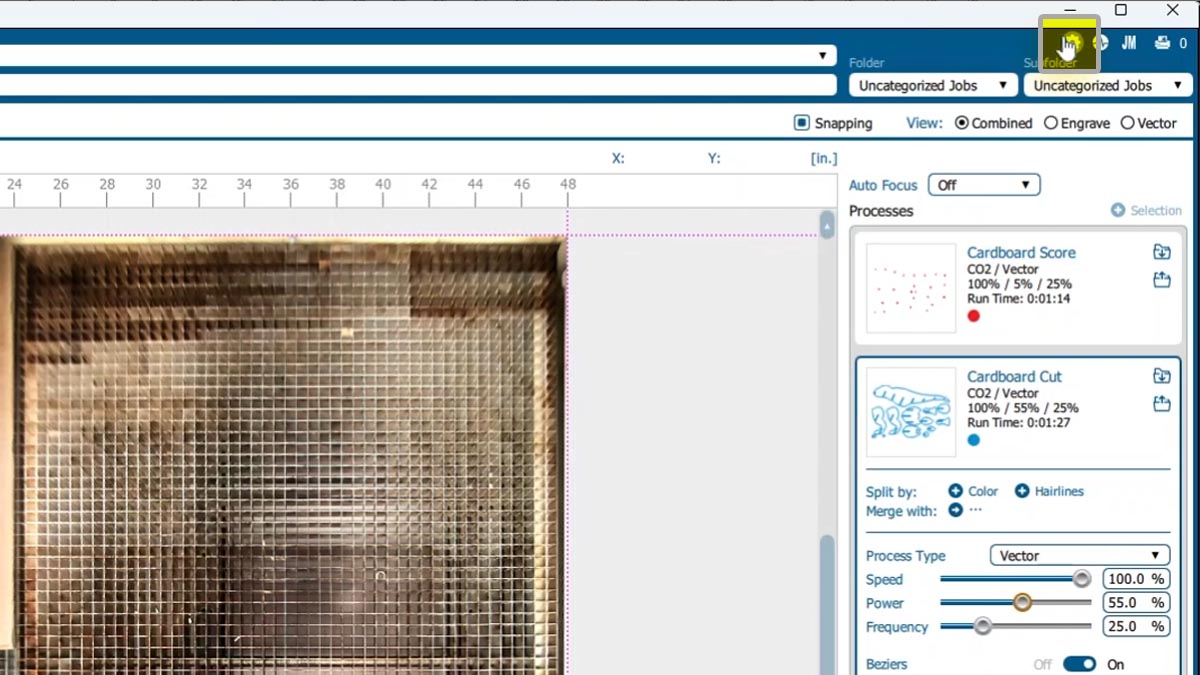
You can also adjust your settings as you need.

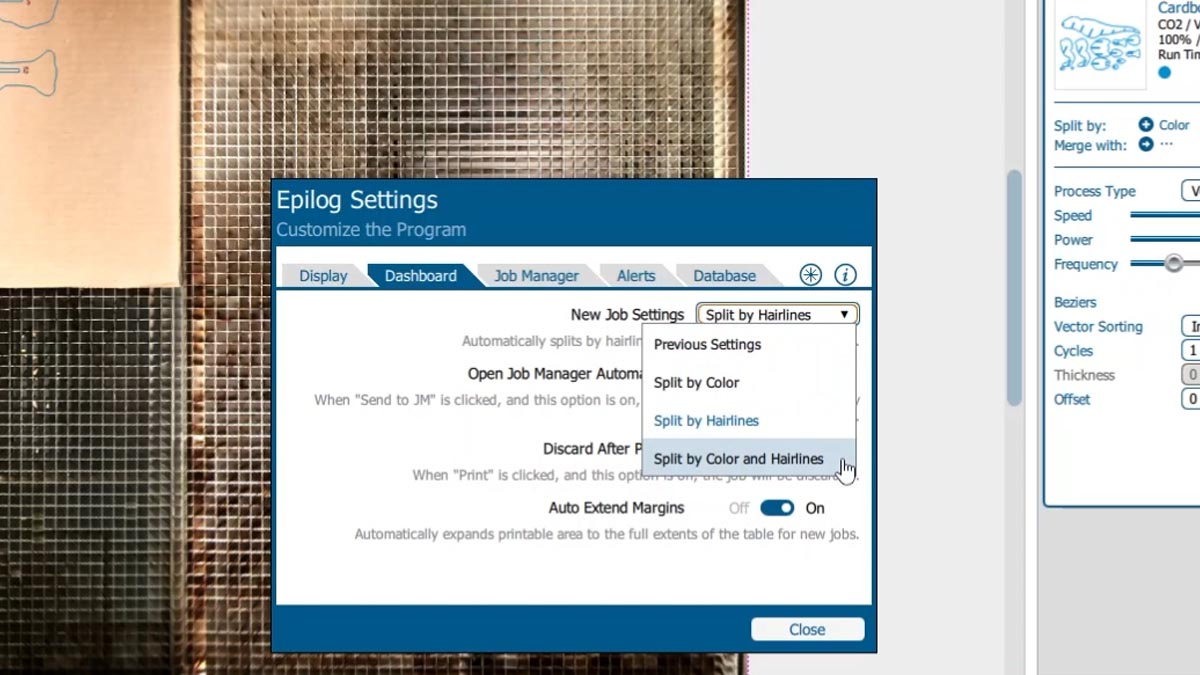
Pro tip! If you do a lot of color mapping you can change the settings to default to split by color, use the previous settings, split by hairlines, or even both color and hairline.

Set preset to cardboard cut

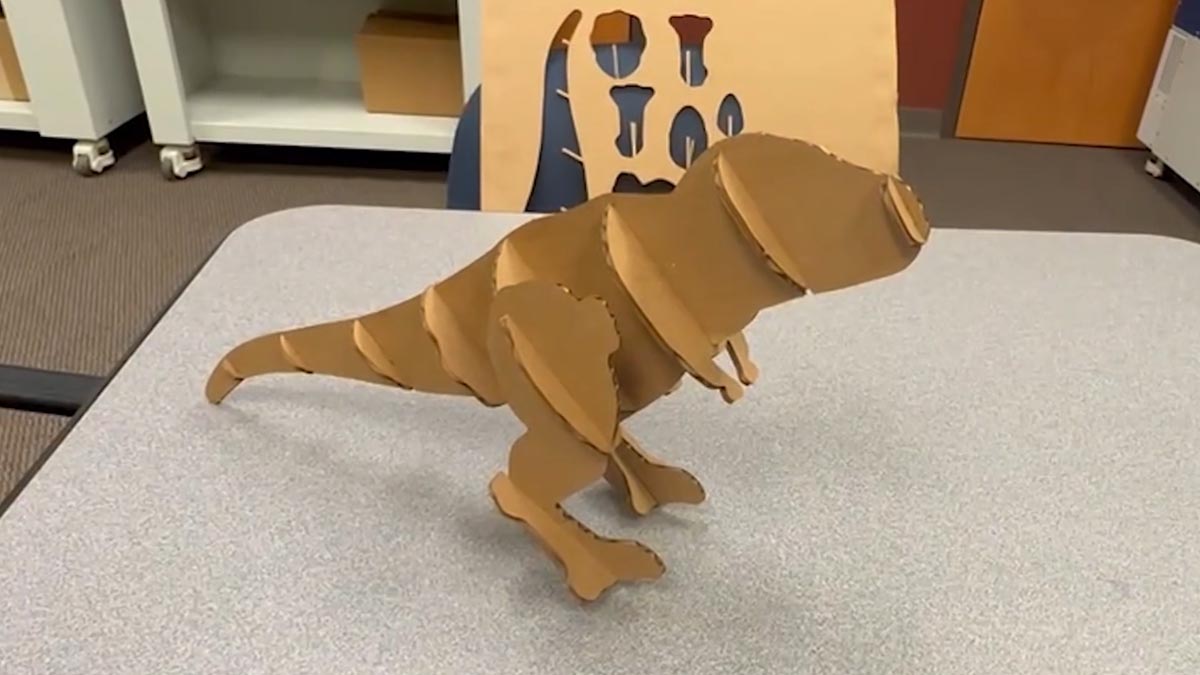
Print the file to the laser, assemble, and you’re done!

the finished product is a completed dinosaur assembly

Using Margins to Preview Your Engraving

Prepare the Artwork

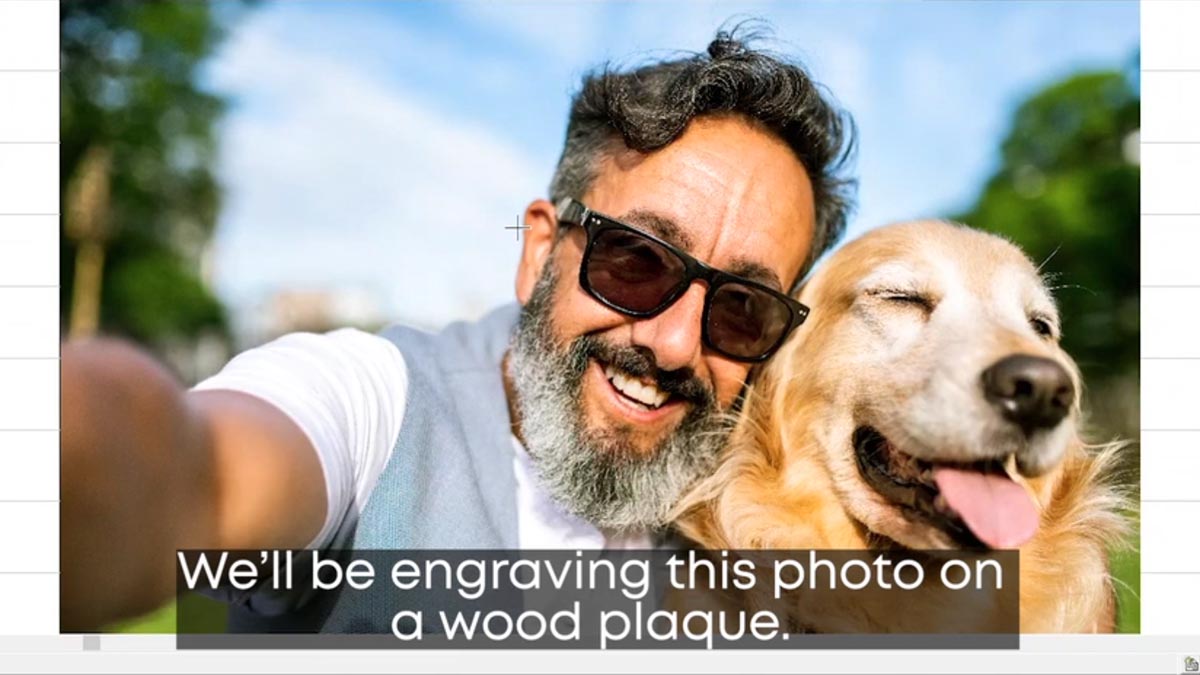
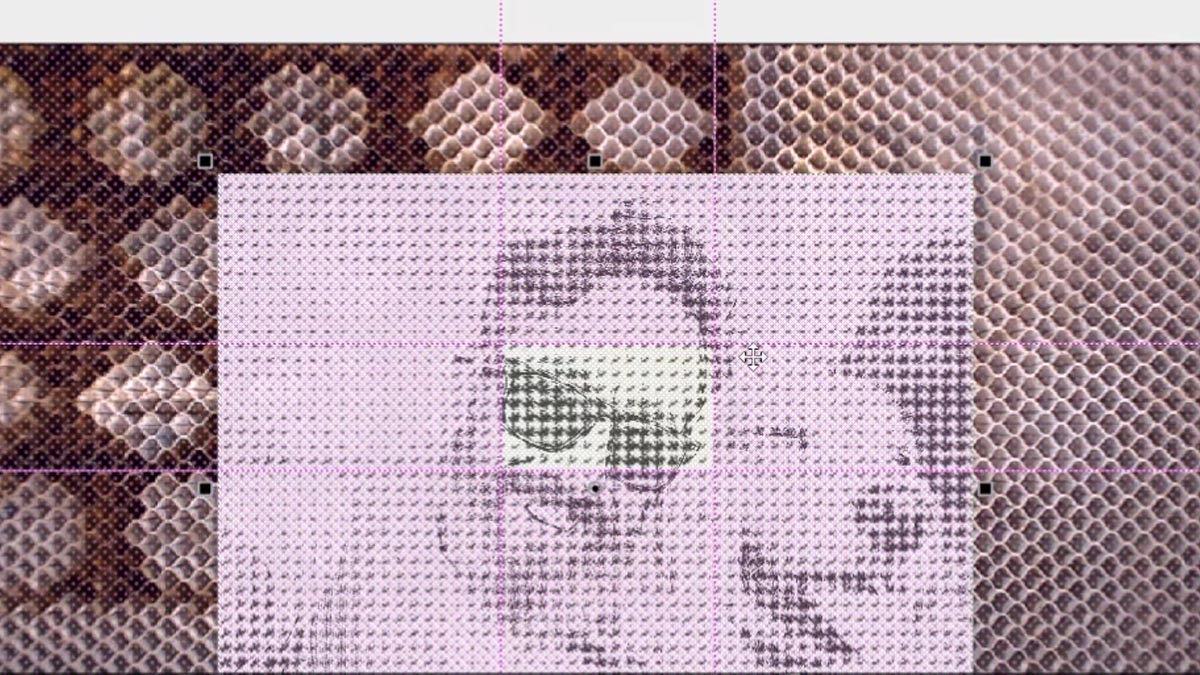
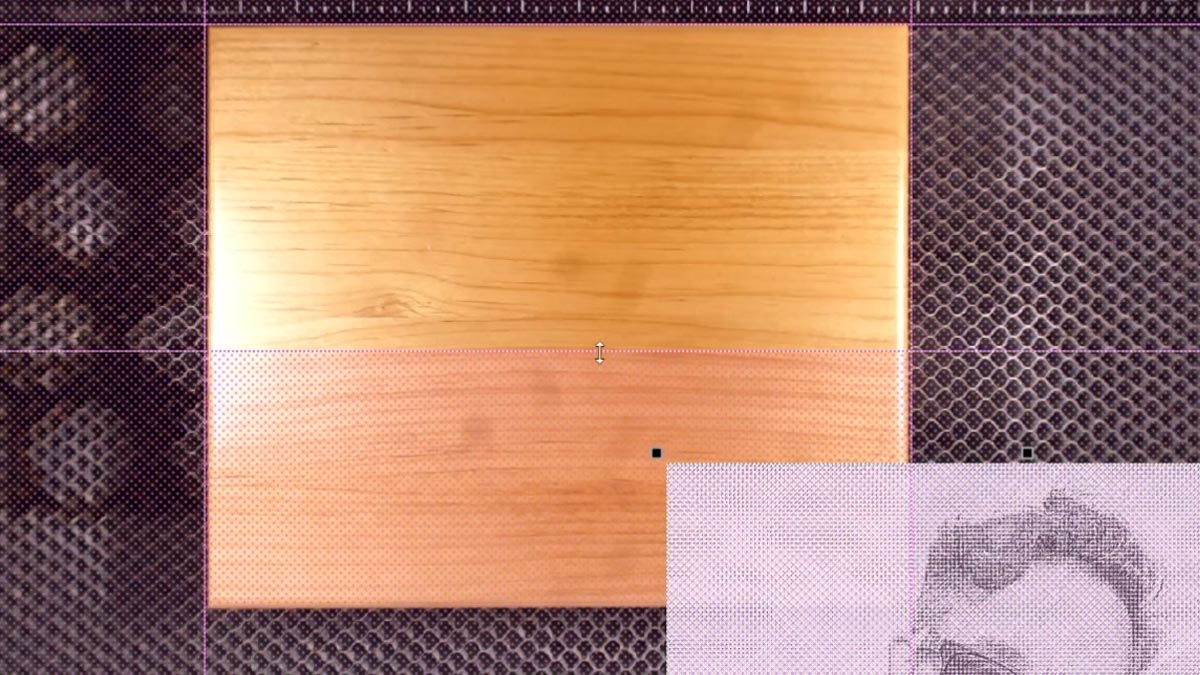
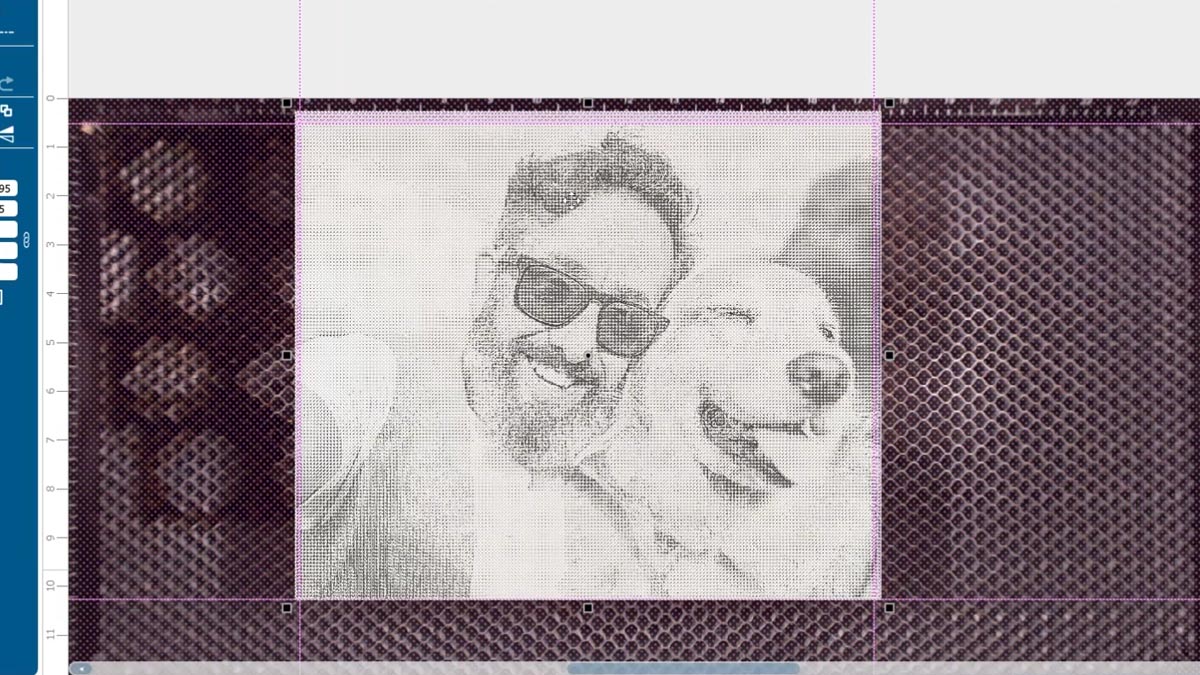
We’ll be engraving this photo on a wood plaque.

we will be engraving this photo of a man and his dog

For a helpful tip, we’ll show how to use margins in the Epilog Dashboard to preview the engraving to make sure our photo quality is ideal.

First, we’ll process the photo in PhotoLaser Plus.

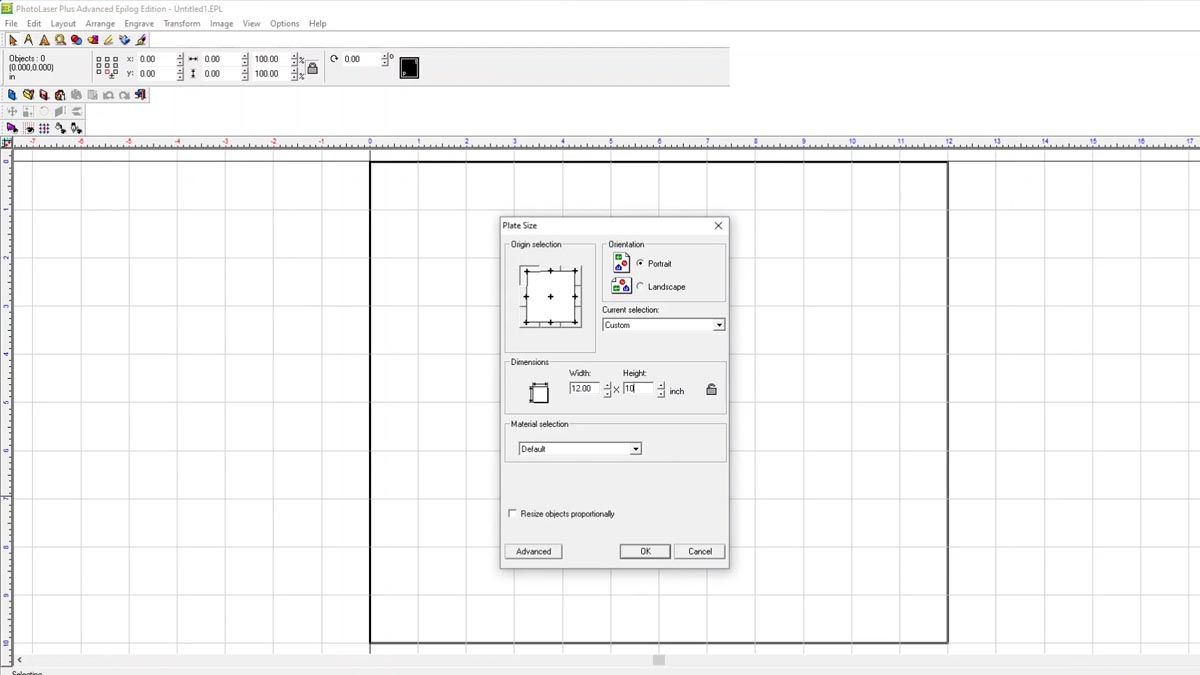
Import the image onto a 12” x 10” page.

resize the image

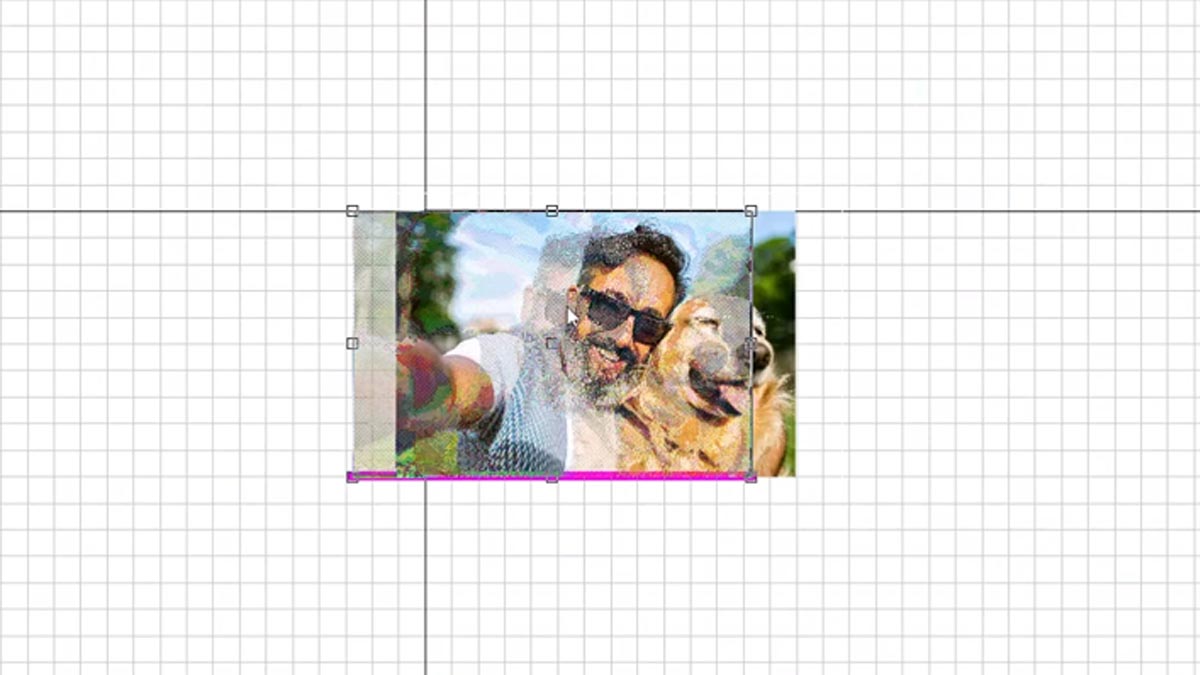
Resize the image so it fits the entire plaque size.

Move the photo so the part we want engraved is placed on the plaque.

position the image

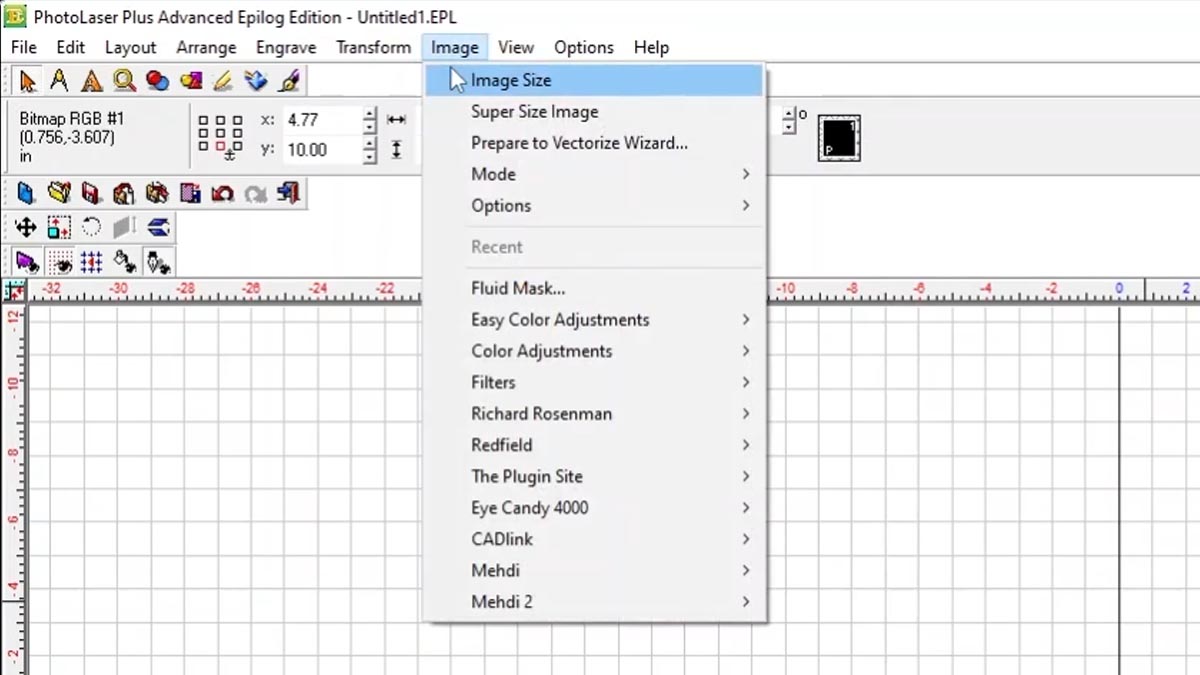
Select Image > Image Size.

change image size

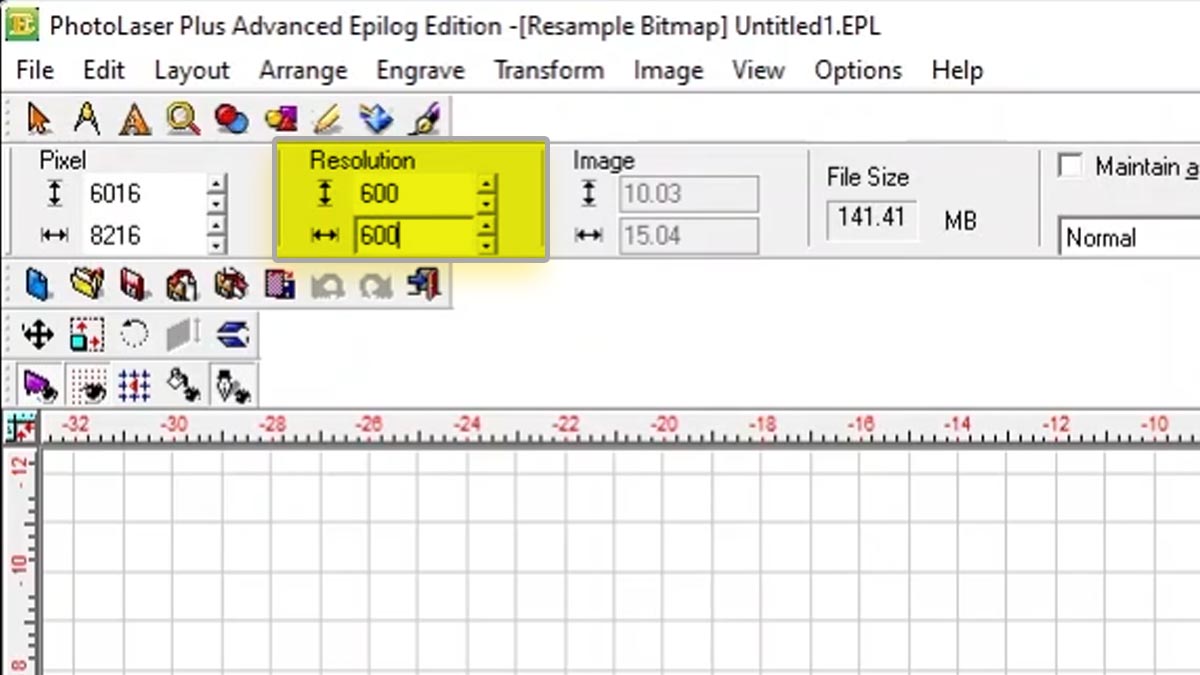
Set the Resolution to 600 x 600 to match the dpi we’ll use to engrave the photo.

change the resolution to match the dpi

Click Apply.

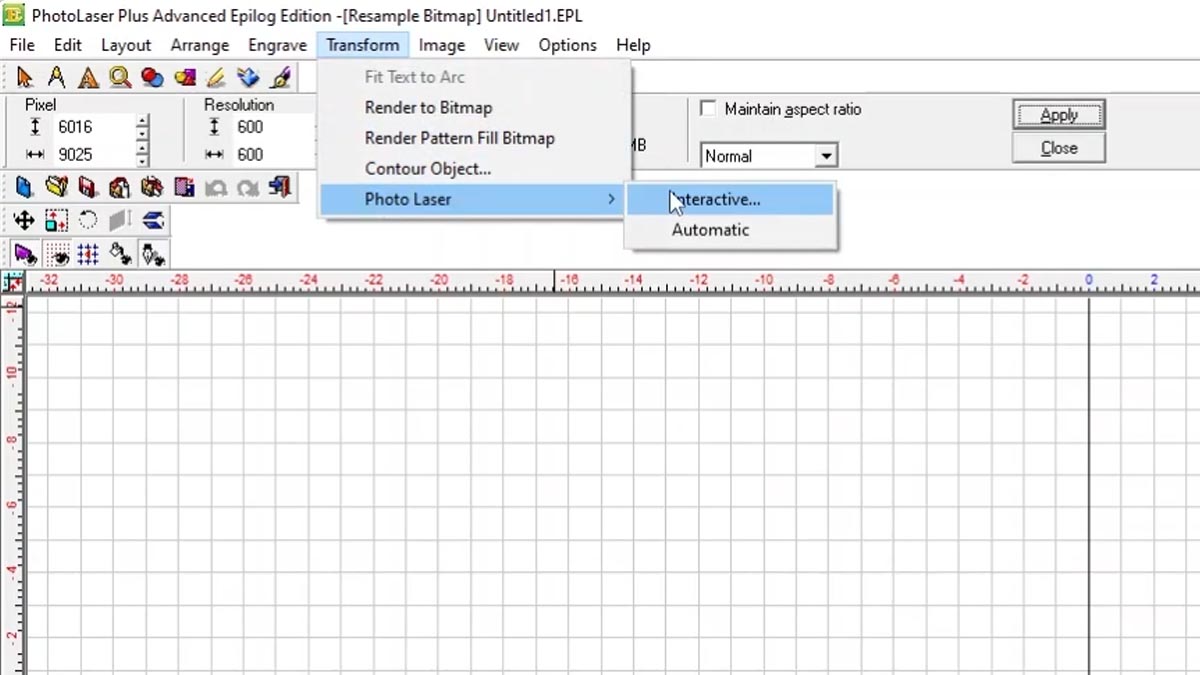
Select Transform > PhotoLaser > Interactive.

select the interactive setting

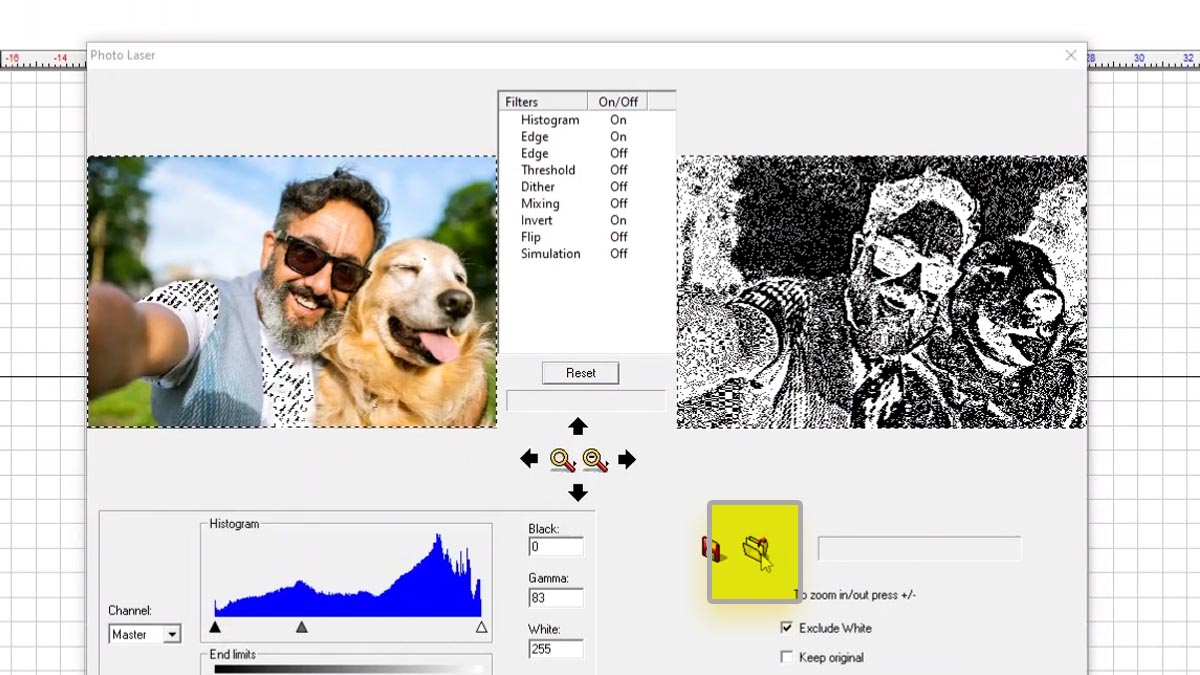
Select the materials folder.

select the materials folder

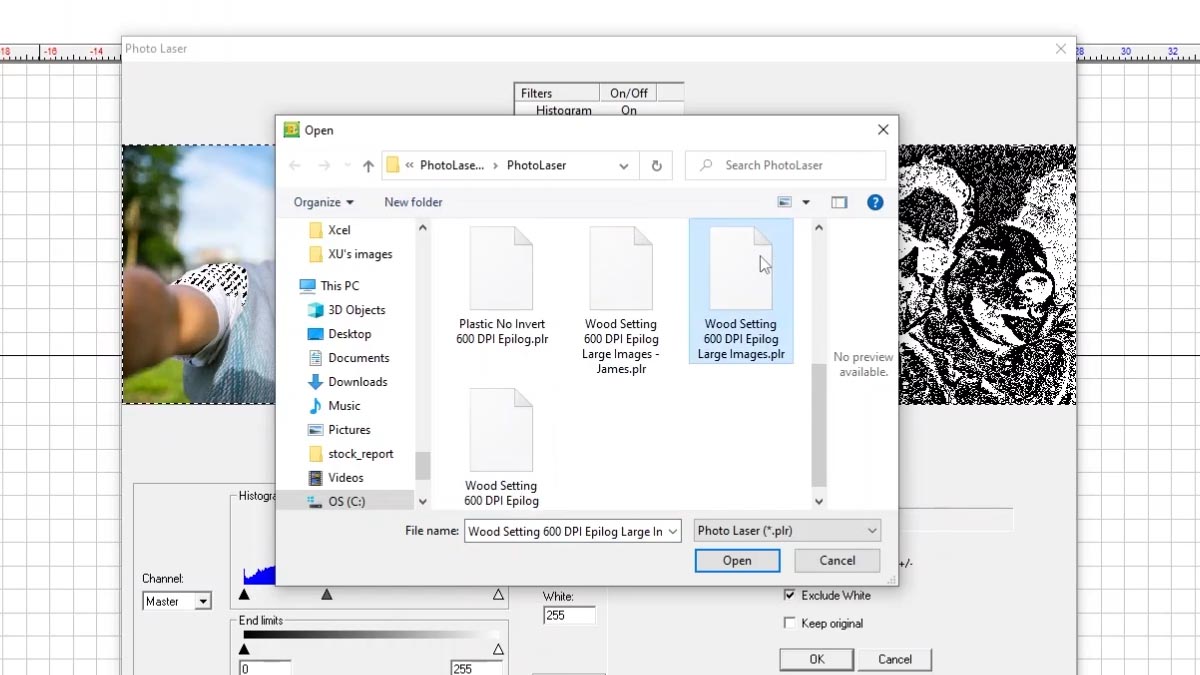
Choose Wood Setting 600 DPI Epilog Large Images and Open.

select wood setting

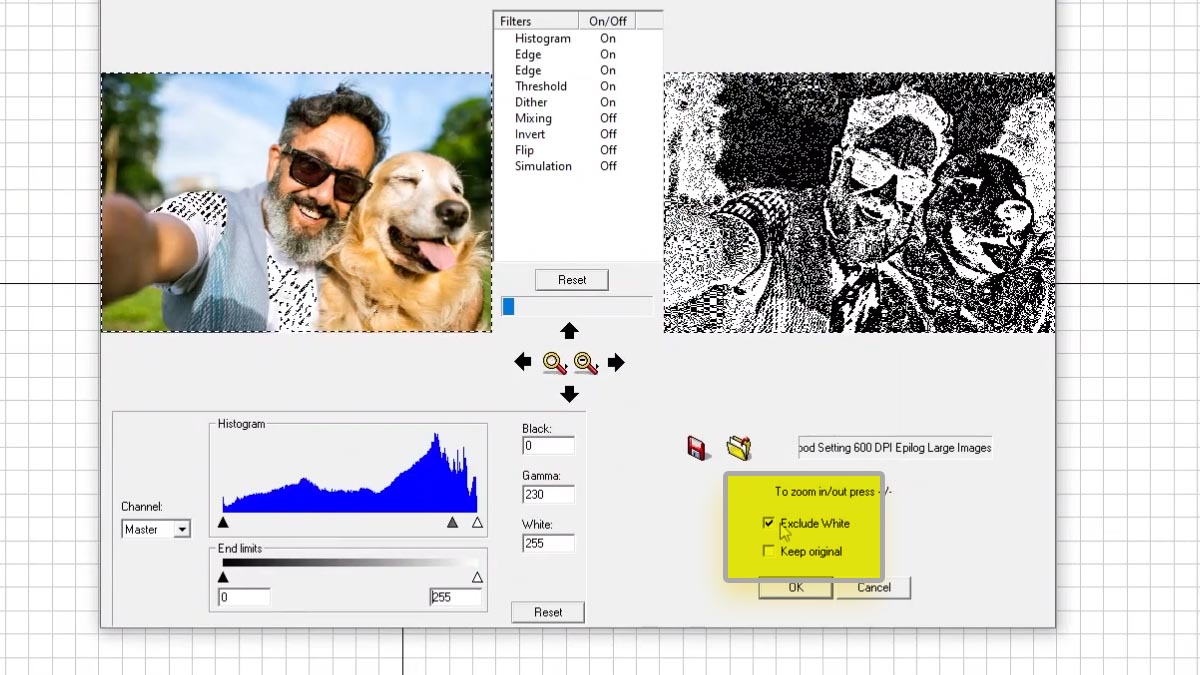
Unselect Exclude White and press OK.

remove the checkbox for exclude white

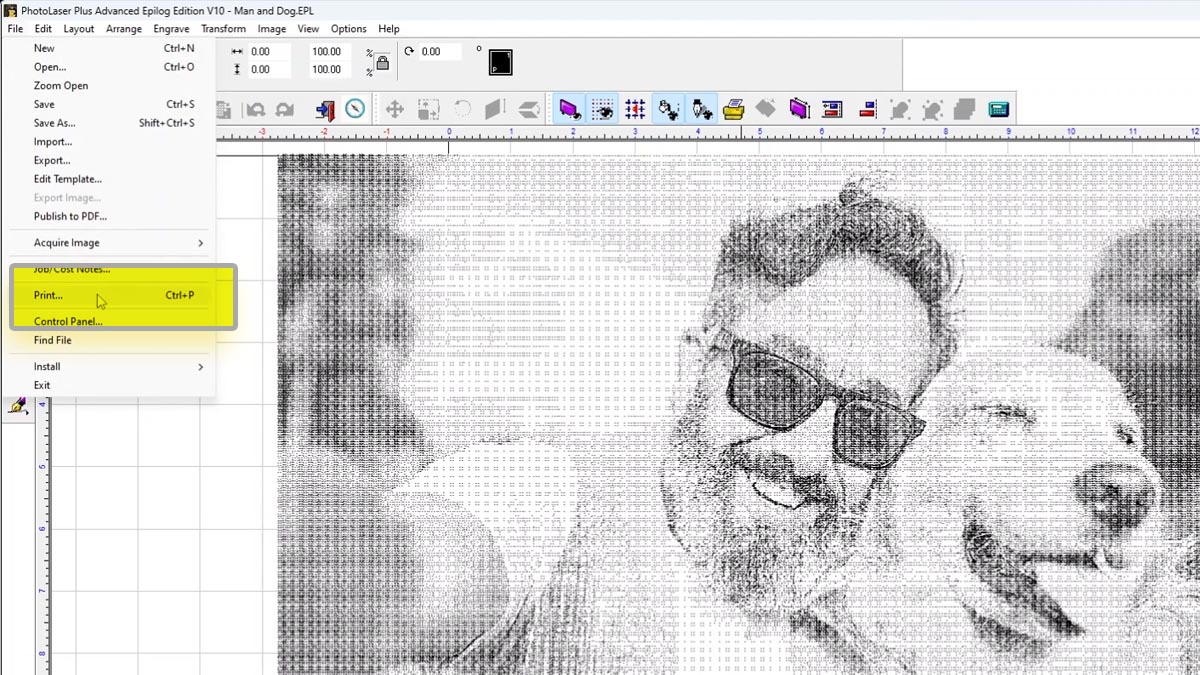
When the photo has been process, print the file to the laser.

Print to the laser

Test Engraving

Now we’ll engrave a small piece of the whole engraving on a piece of scrap wood.

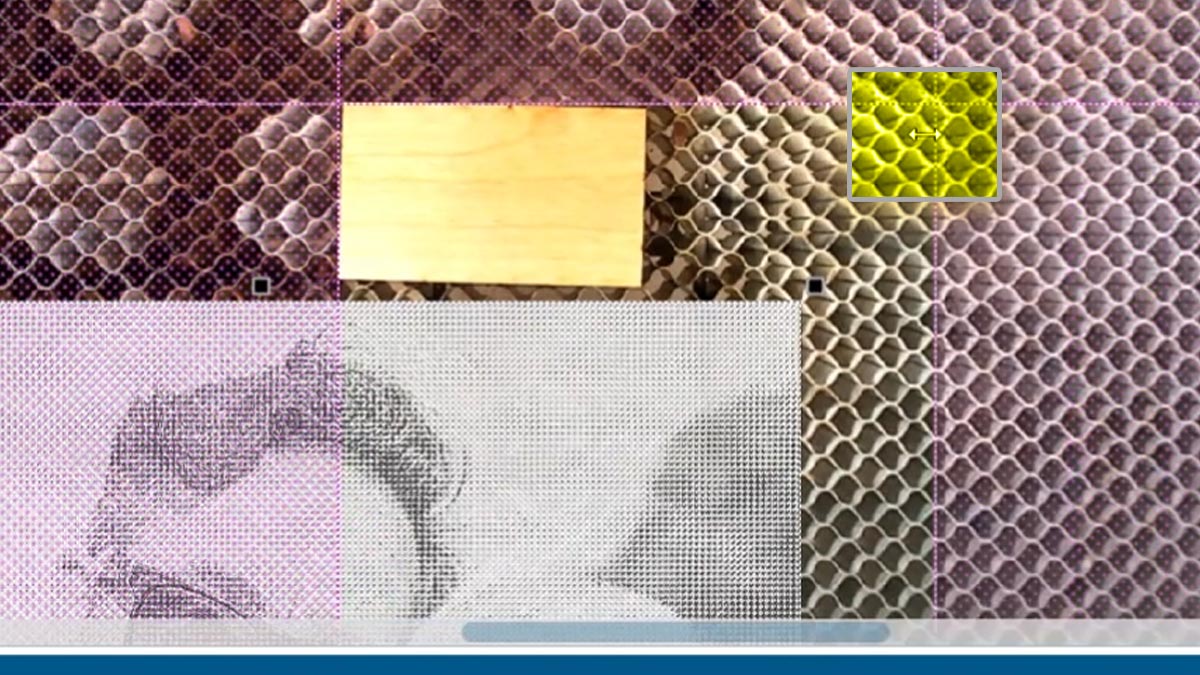
Pull the margins from each side to the edge of the piece of scrap wood.

Slide margins to wrap around scrap wood

Move a dark part of the engraving over the wood.

align the image to test engraving

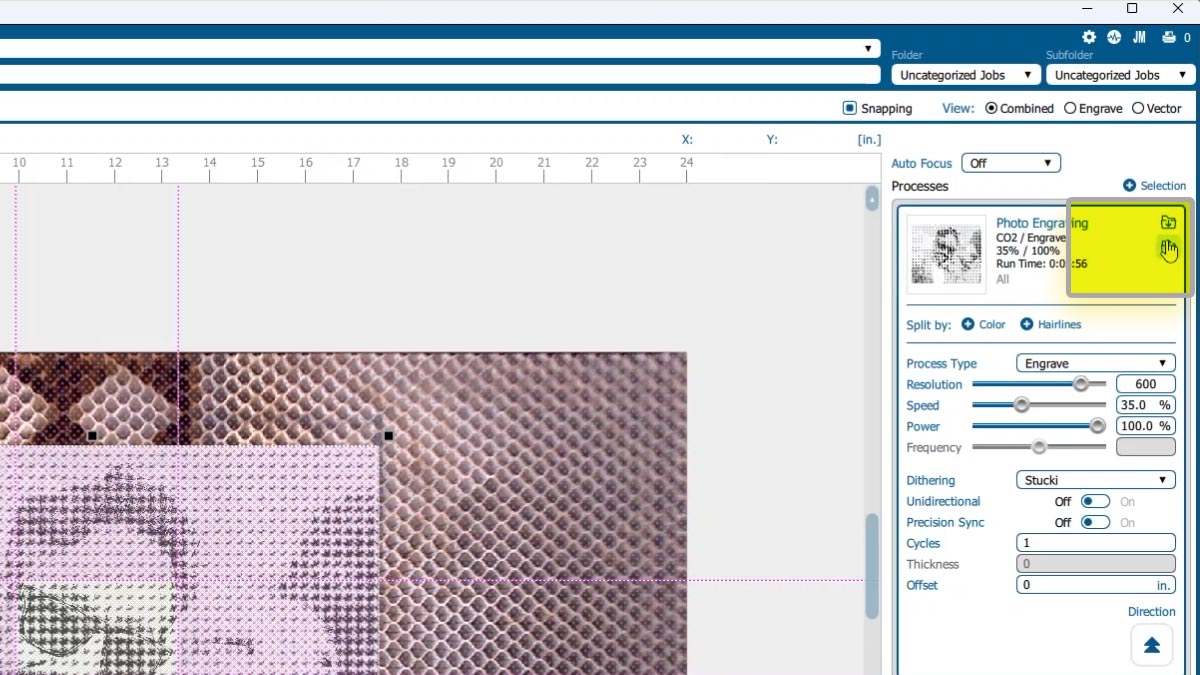
Choose the wood photo settings.

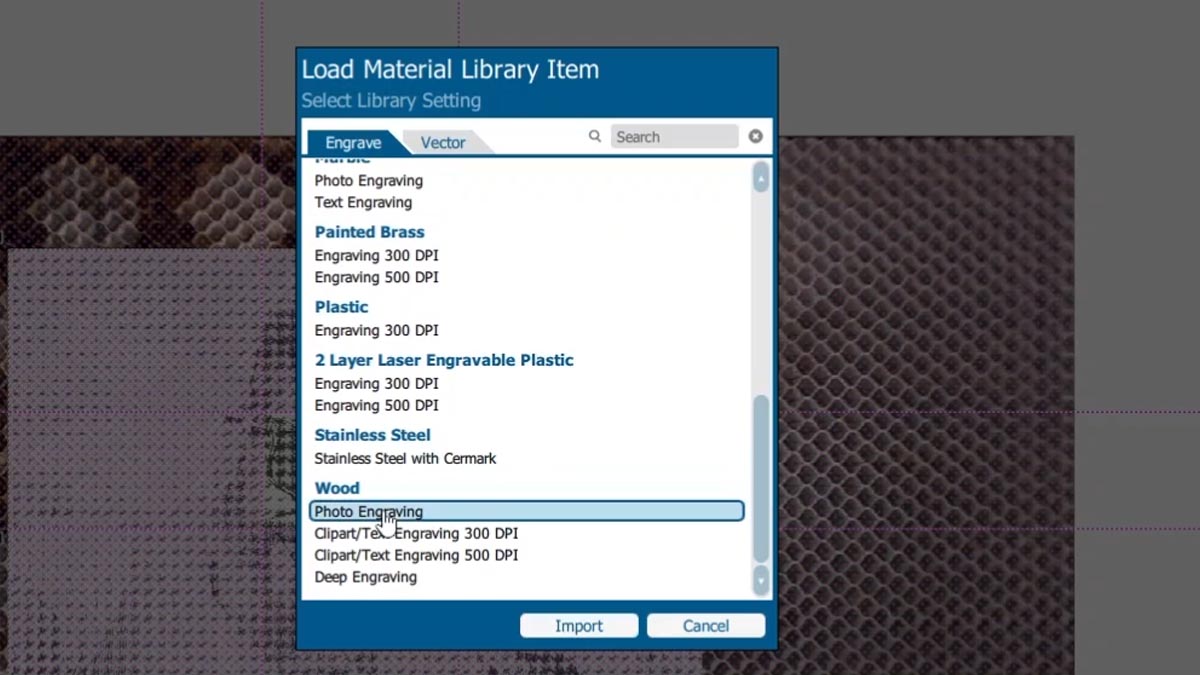
select the material library icon
select the wood photo engraving setting

We’ll change it to 600 dpi to match our settings in PhotoLaser Plus.

Increase the speed to 50%.

And set it to bottom-up engraving.

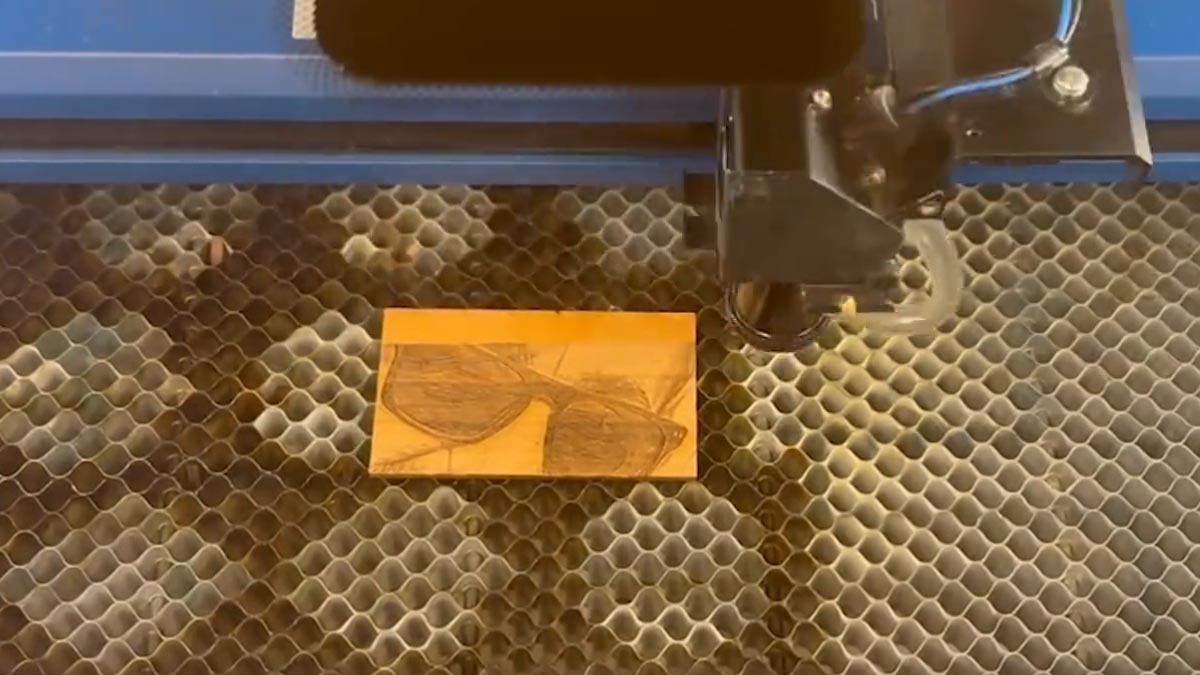
Start the job at the laser and see if the results meet your expectations.

Engrave and inspect your settings

Good contrast, and the laser is seeing lots of detail. Looks good!

Final Engraving

Now we’re ready to engrave our full plaque. Pull the margins out to the edges of the plaque.

Set margins for final engraving

Our photo is slightly larger than the plaque, so position it on screen as you’d like it engraved.

position the engraving on the plaque

Print it to the laser.

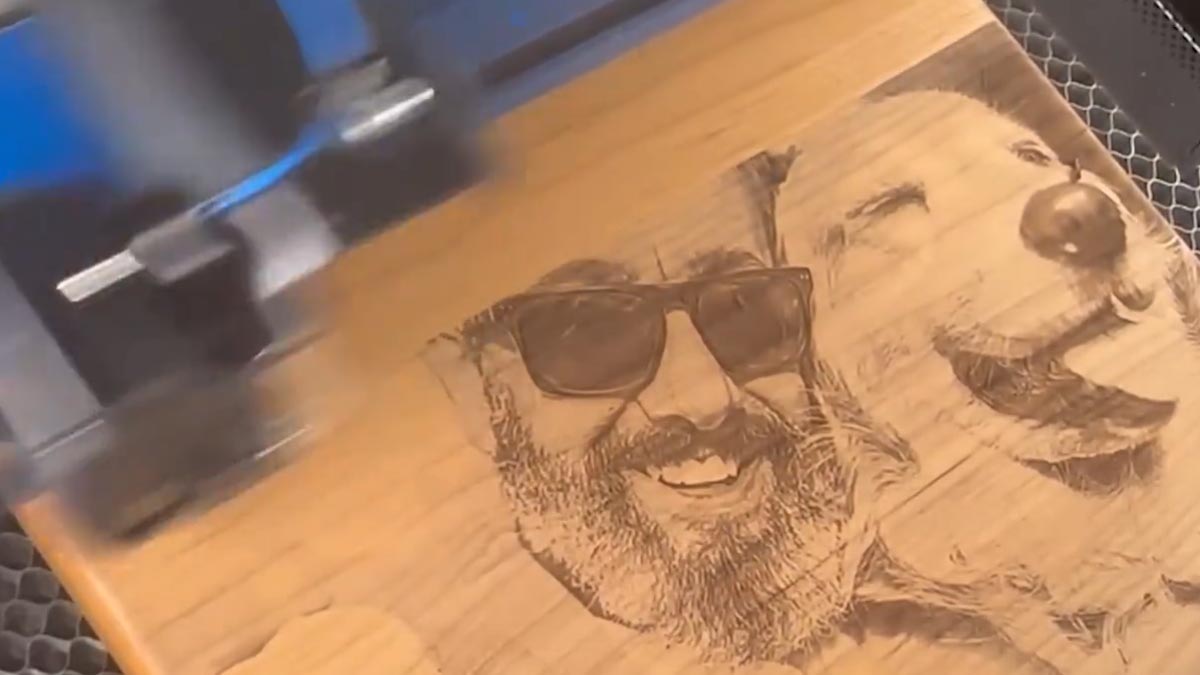
Now we can engrave our full plaque with confidence in our engraving settings, positioning, and quality!

engrave the plaque with confidence

Creating a 3D Sphere Design for Laser Engraving

Setup the Artwork

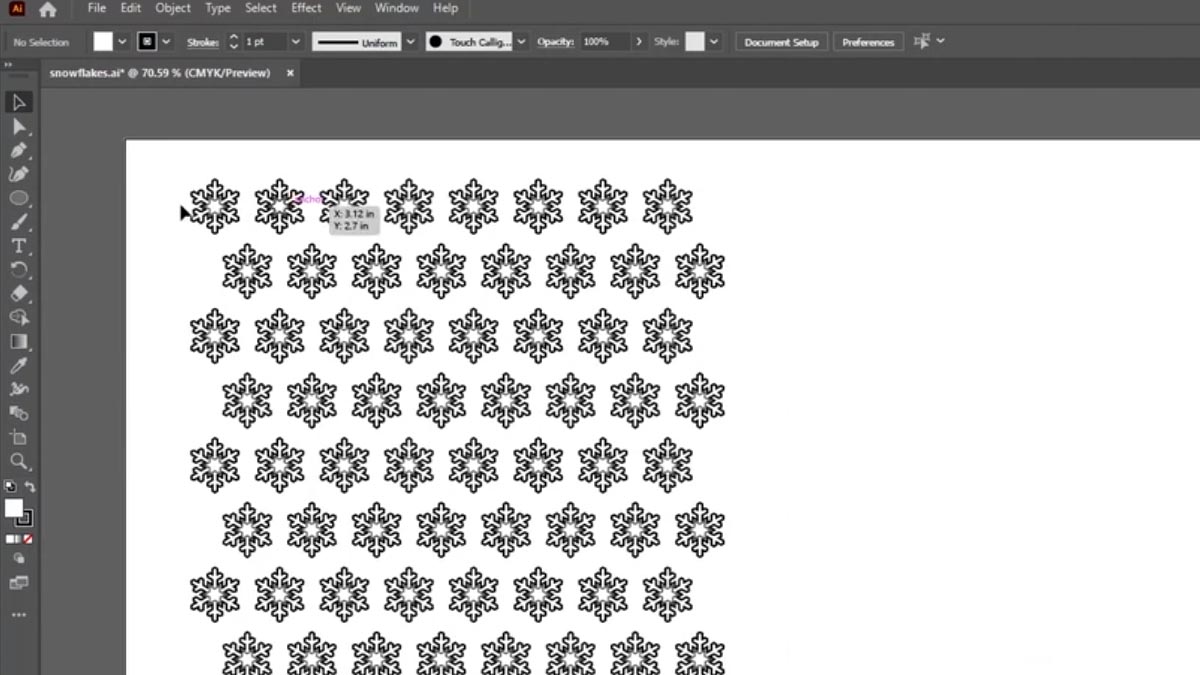
Here we have a snowflake design that we’ve replicated in an offset grid pattern.

snowflake design in grid pattern

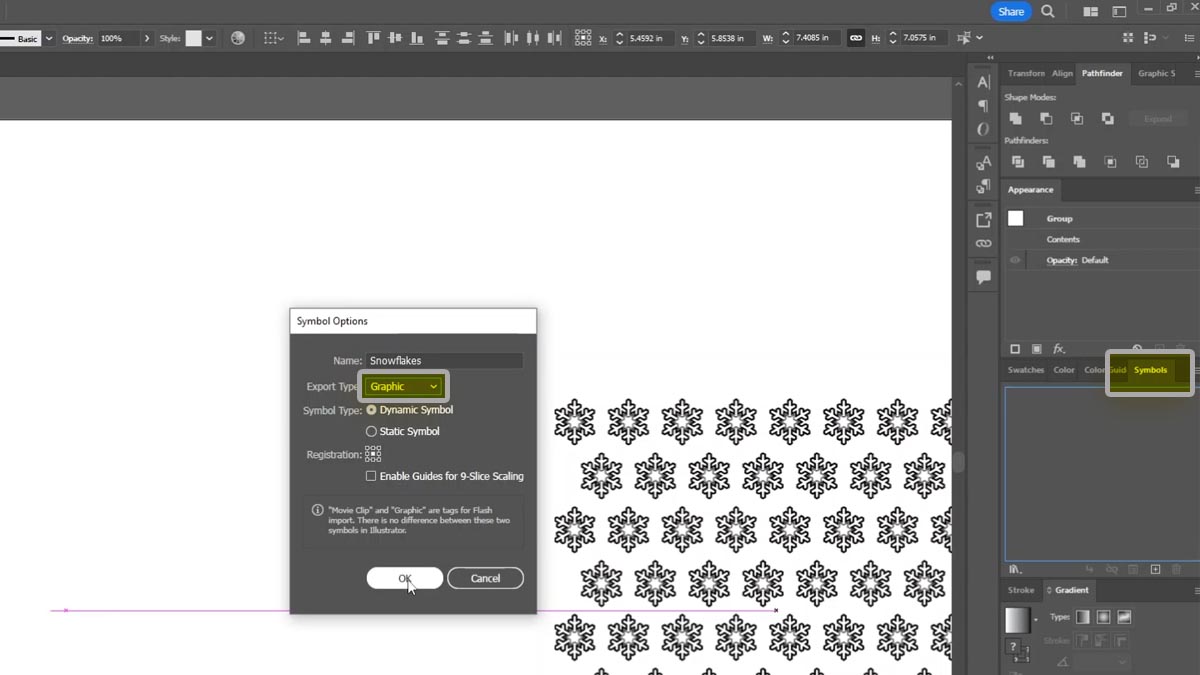
Select the design and drag it into the Symbols tab.

Name the design

And set the export type to graphic.

drag design into the symbols tab and create new symbol

Delete the design.

Create 3D Effect

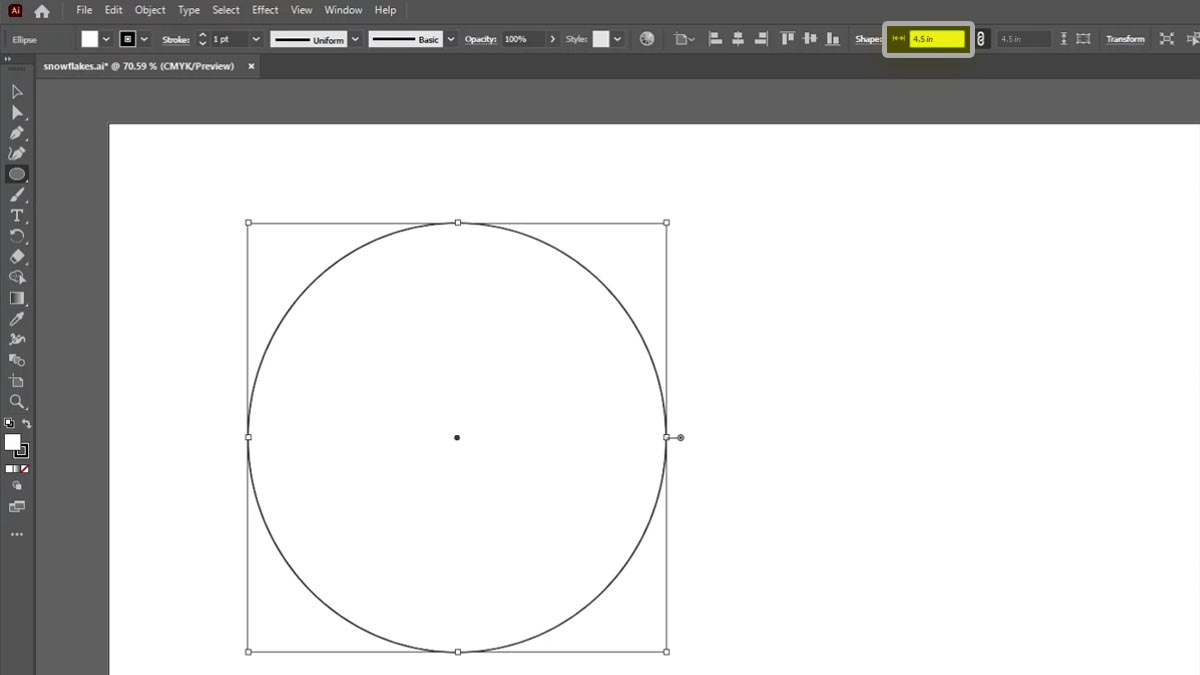
Using the Ellipse tool, create a 4.5” circle.

create 4.5 inch circle with the ellipse tool

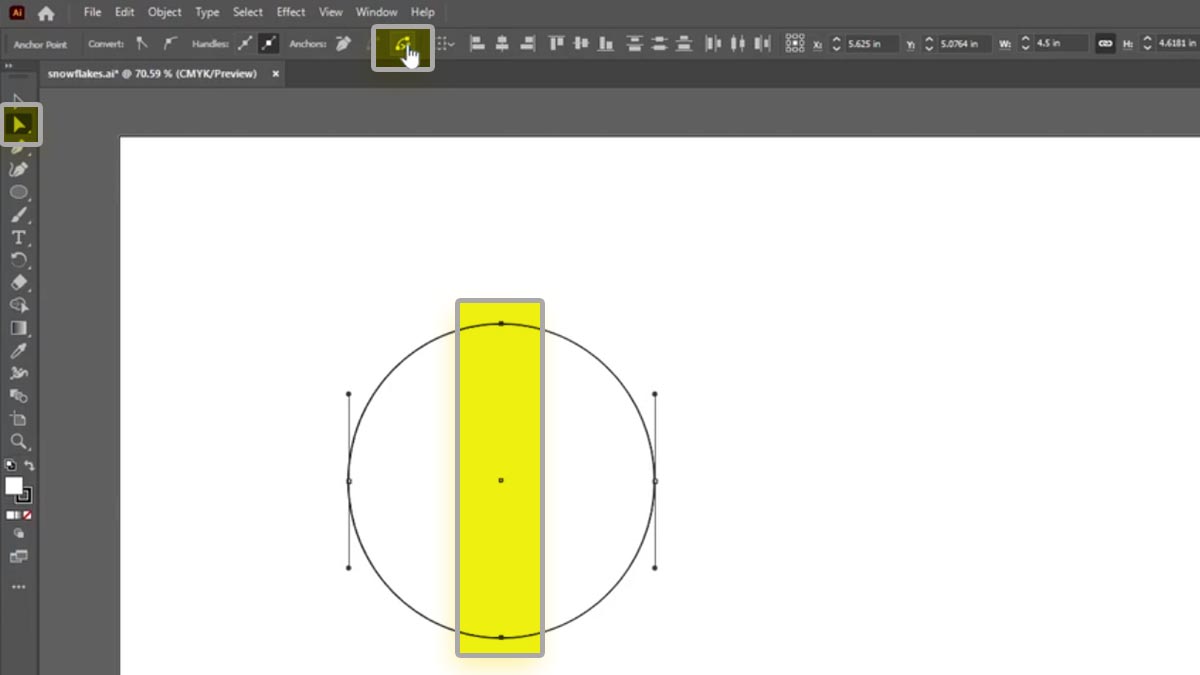
With the circle selected, click on the filled arrow Direct Selection tool.

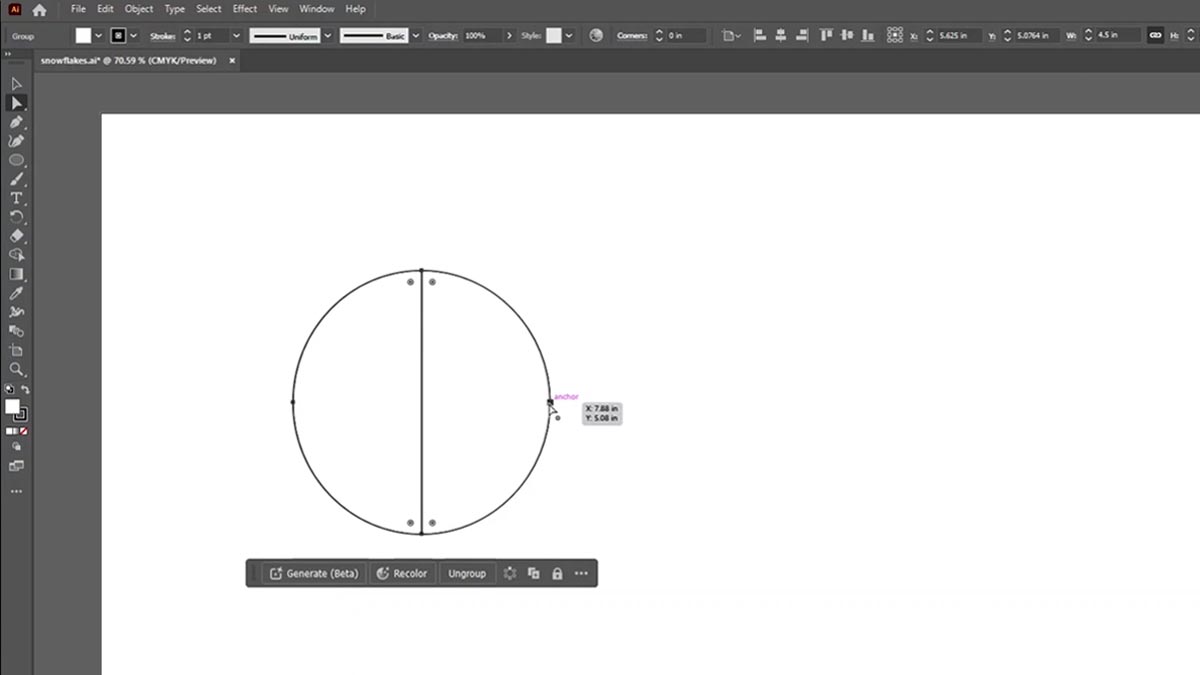
Highlight the top and bottom nodes of the circle.

Select the Cut Path at Selected Anchor Points tool from the menu bar.

After selecting the top and bottom anchor points, cut the path

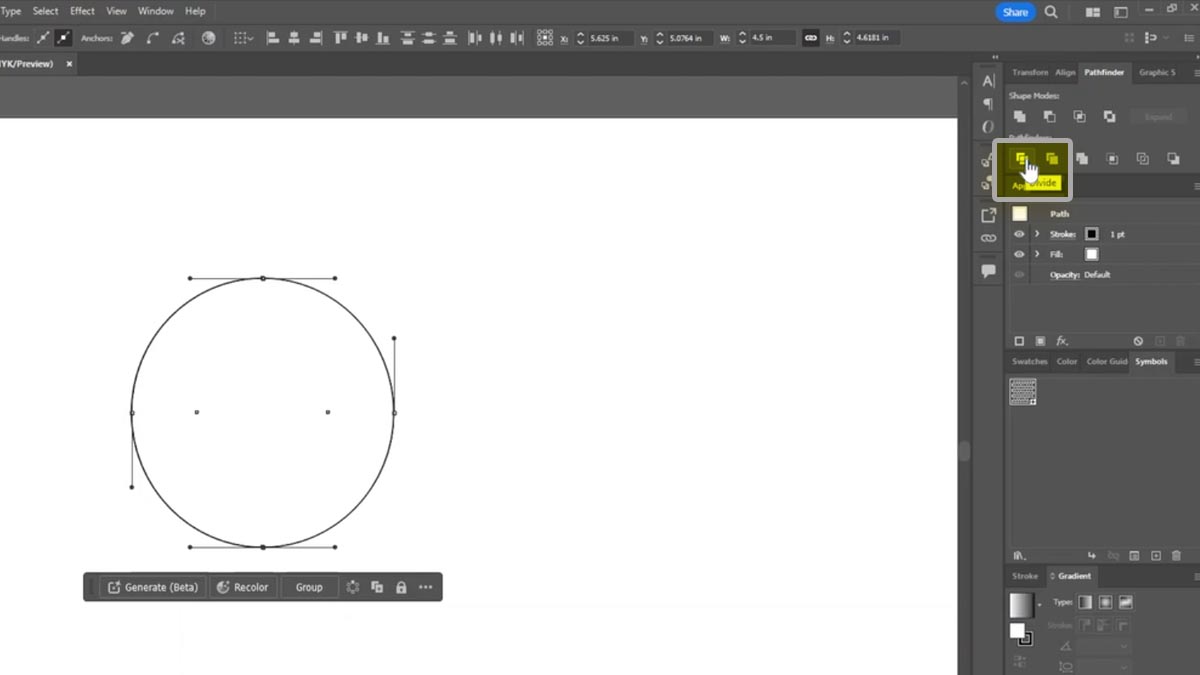
Under the Pathfinder tab, select the Divide tool.

Click Divide Path

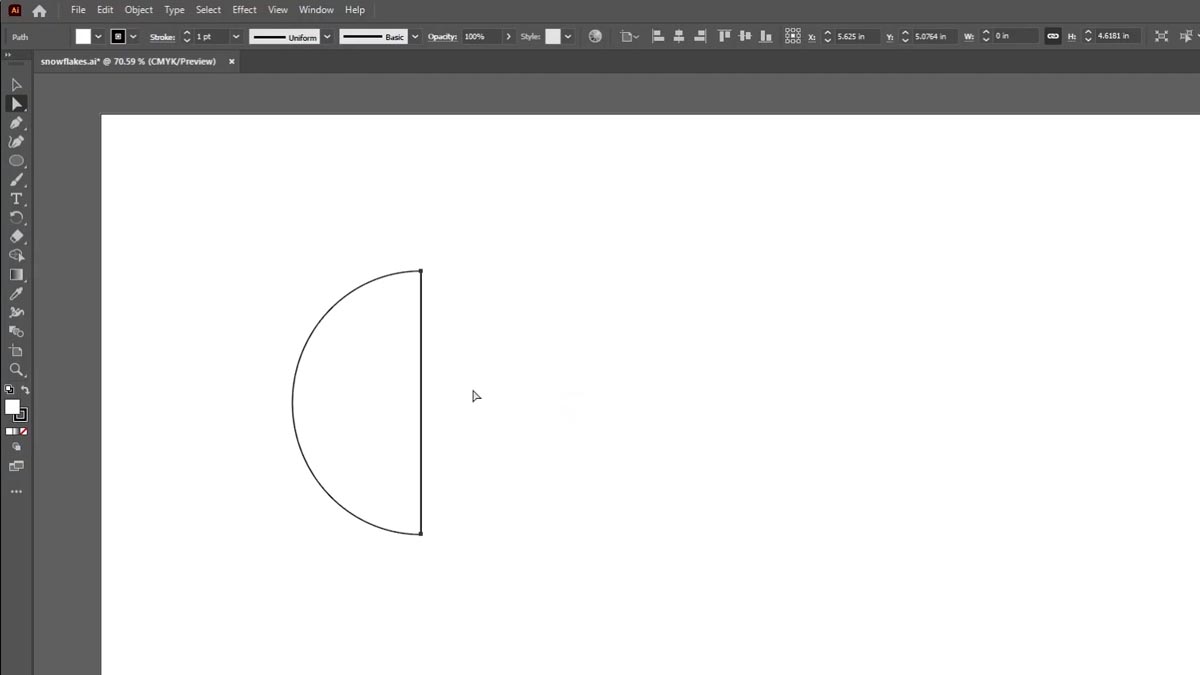
Delete the right node.

Select right shape
Delete right shape

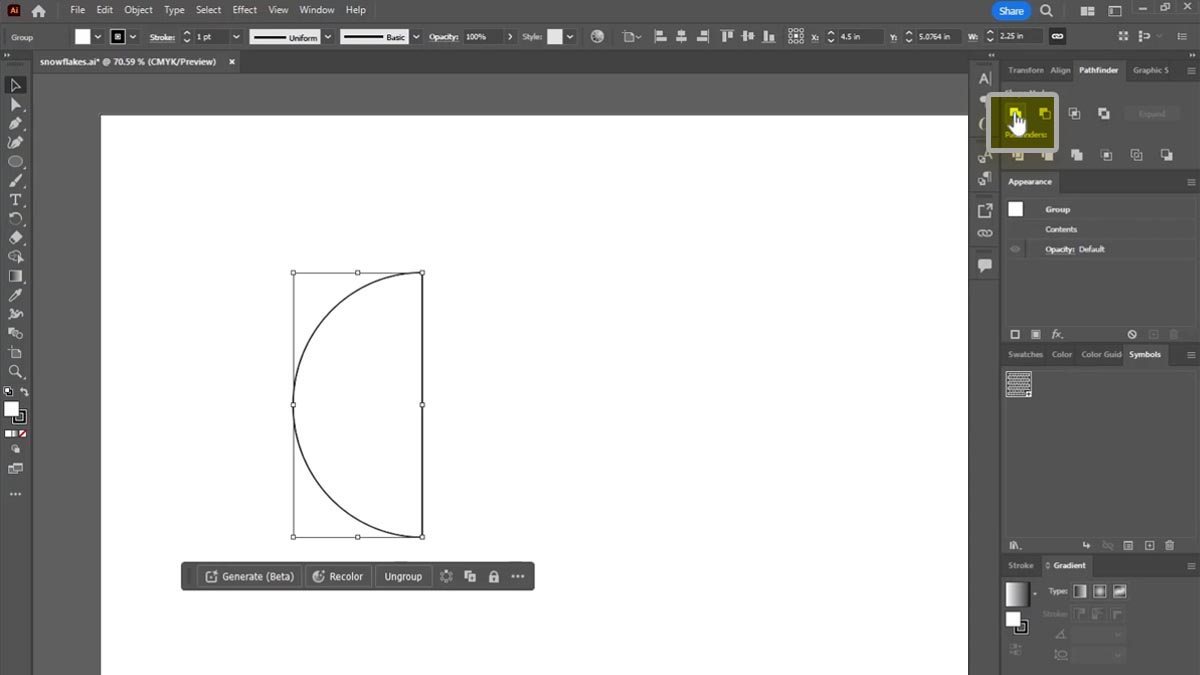
Select the half circle and click the Unite tool in the Pathfinder tab Shape Modes.

unite shape

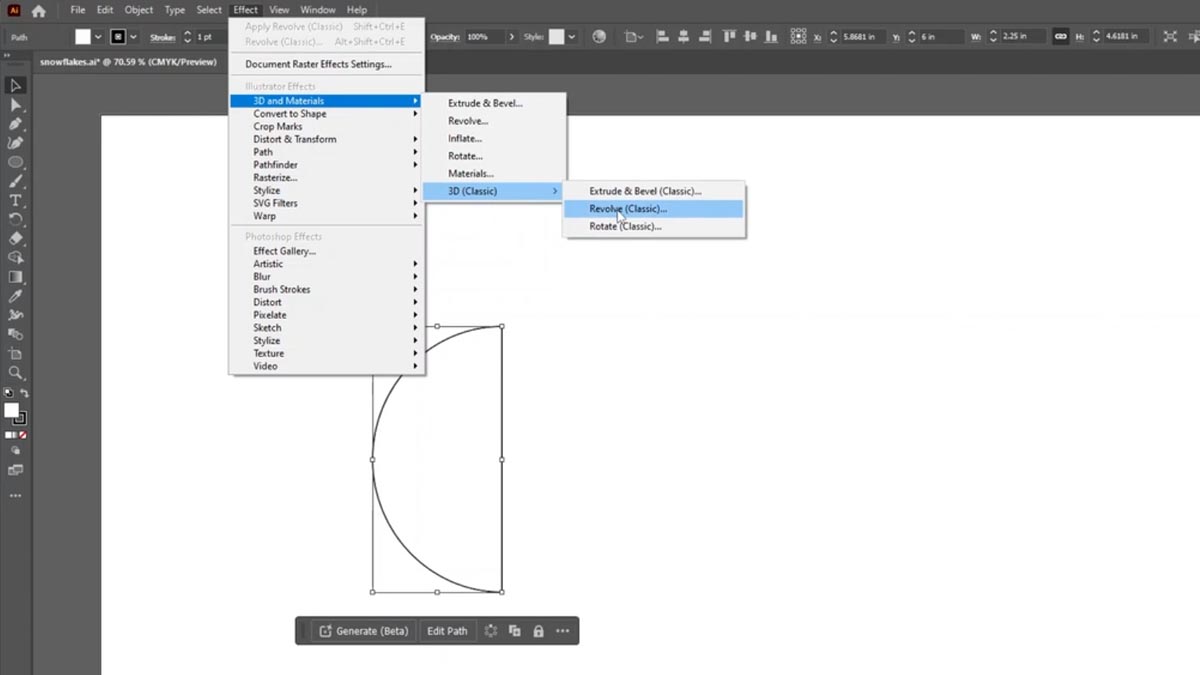
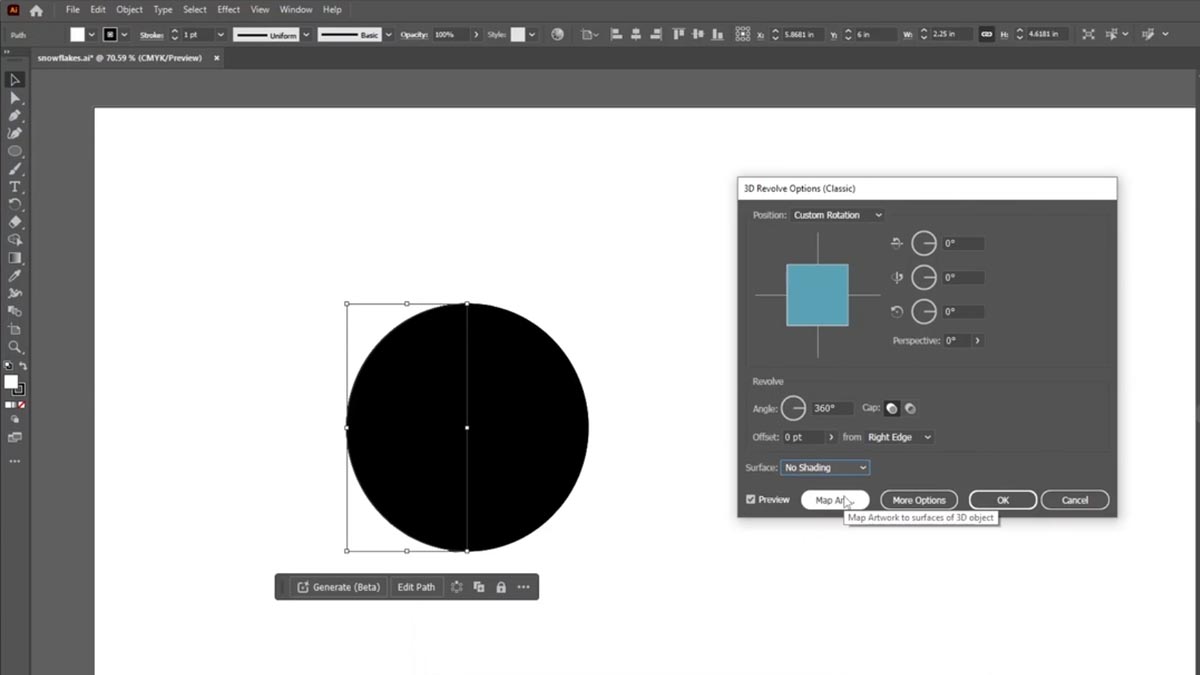
Select the Effect menu > 3D and Materials >3D (Classic) > Revolve (Classic)

Revolve (Classic)

Set the three angles to 0 degrees. Next to Offset, select Right Edge. Set the Surface to No Shading. Click the Map Art button.

Set the Revolve options

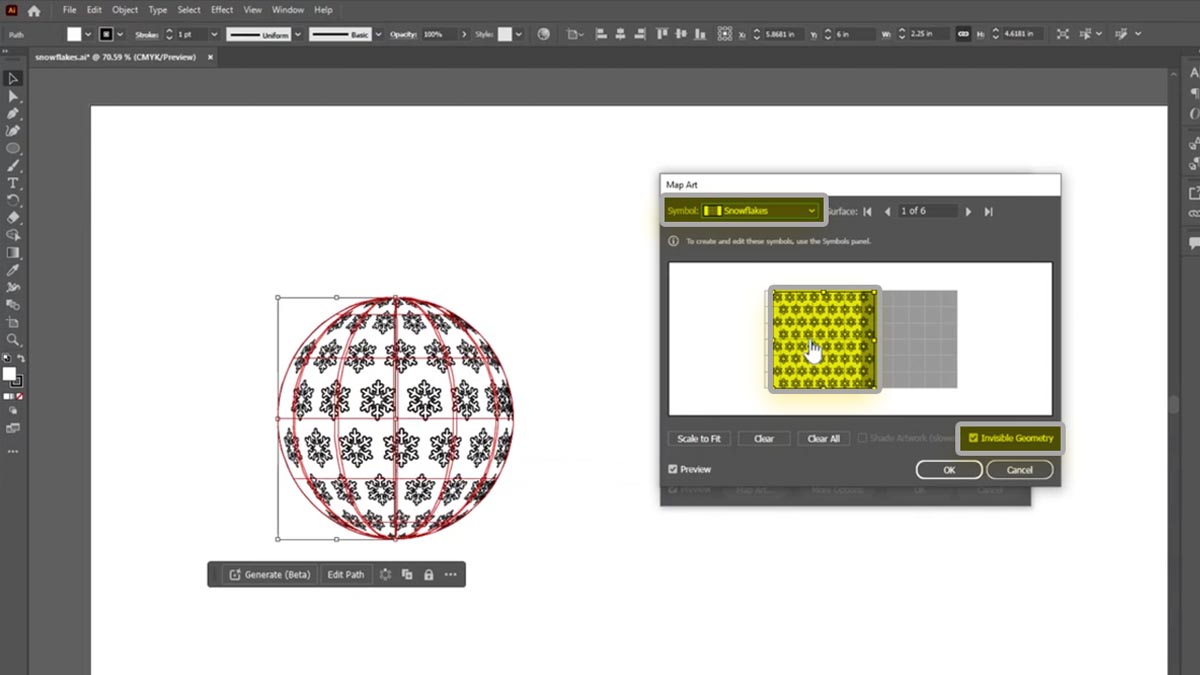
Click Invisible Geometry. Next to Symbol, select the symbol we created earlier. Now drag the graphic so it is only over the white section of file area.

Map the symbol pattern to the 3d shape

Click OK.

And OK again.

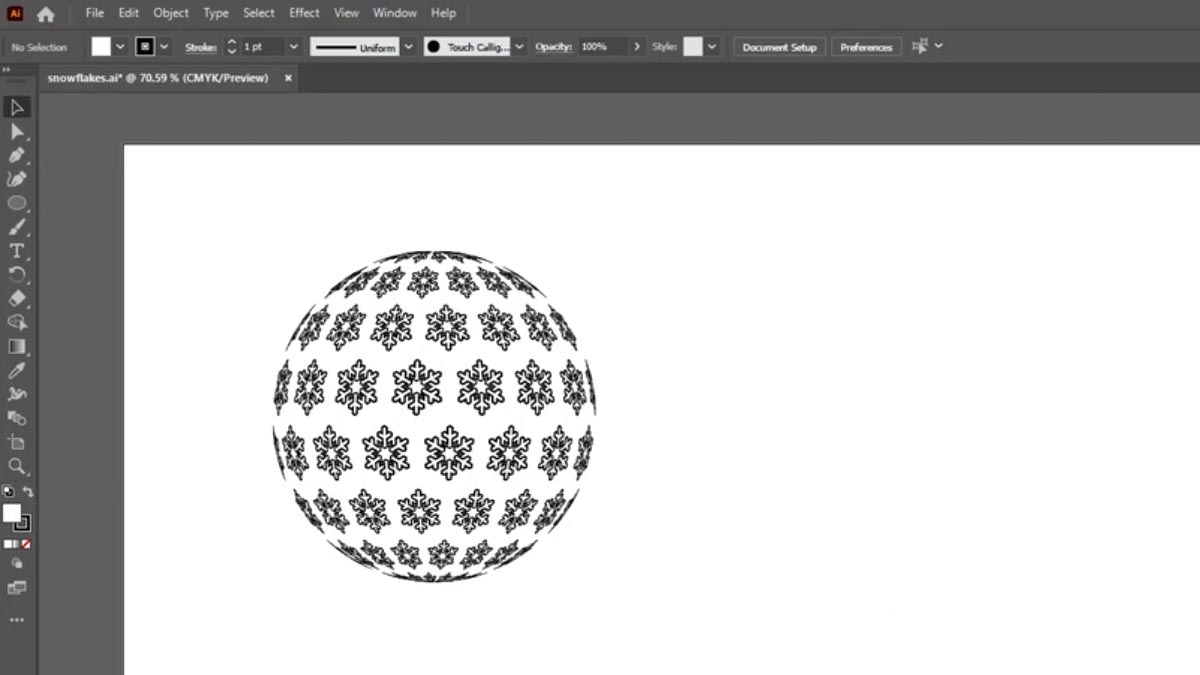
We now have our 3D sphere design laid out across our file.

3D Design is complete

Add Customizations

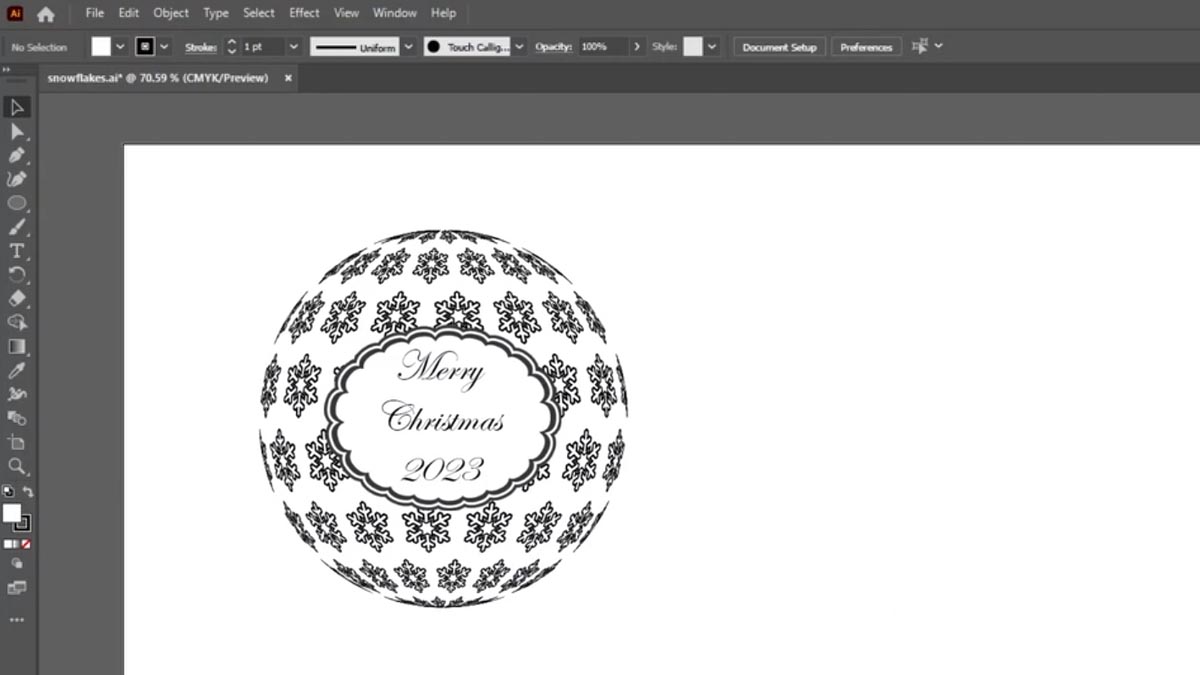
Now we can further customize the design.

Finish customizing the design with text

We’ll add a border image to the file.

And add our custom text.

Engrave the Design

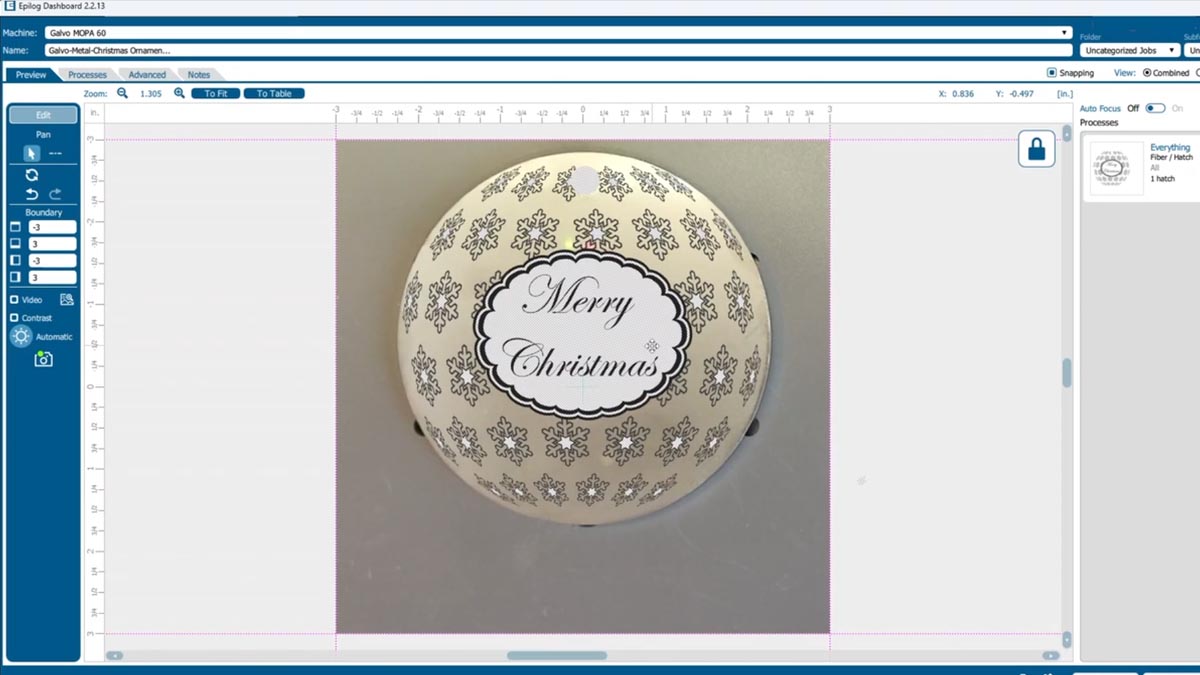
We’re ready to place our artwork in the Laser Dashboard.

Lineup the artwork and enter engraving settings

When it’s perfectly aligned, select your material setting.

And print it to the laser.

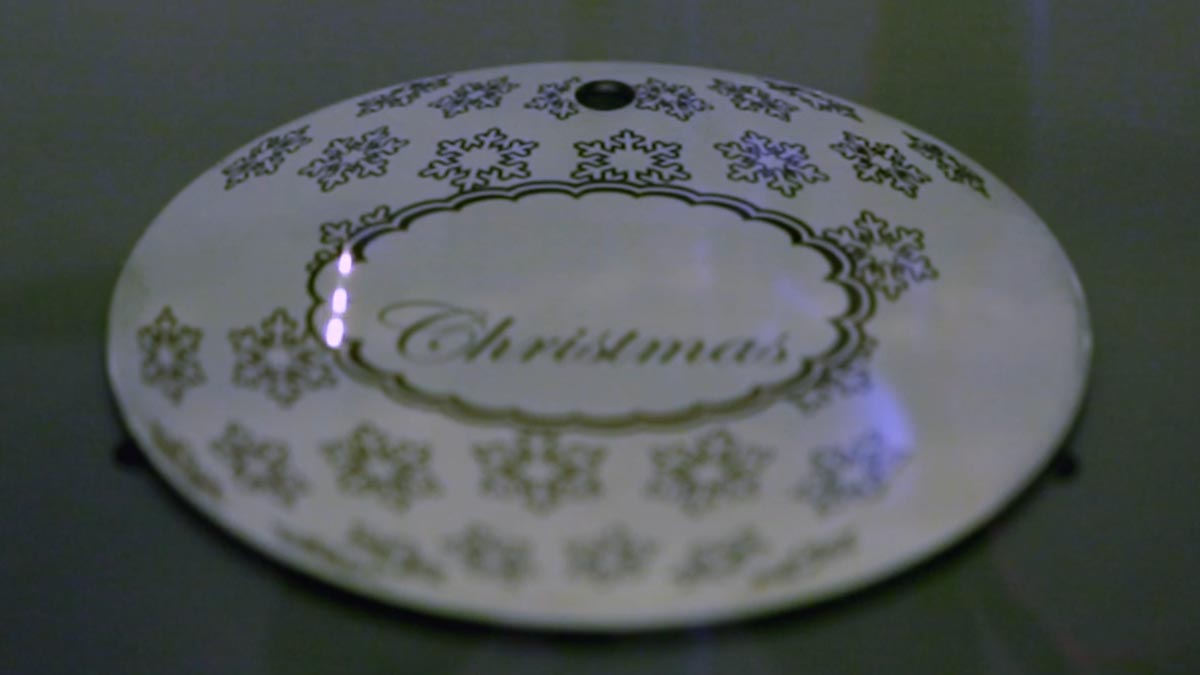
Engrave on metal using the Fusion Galvo
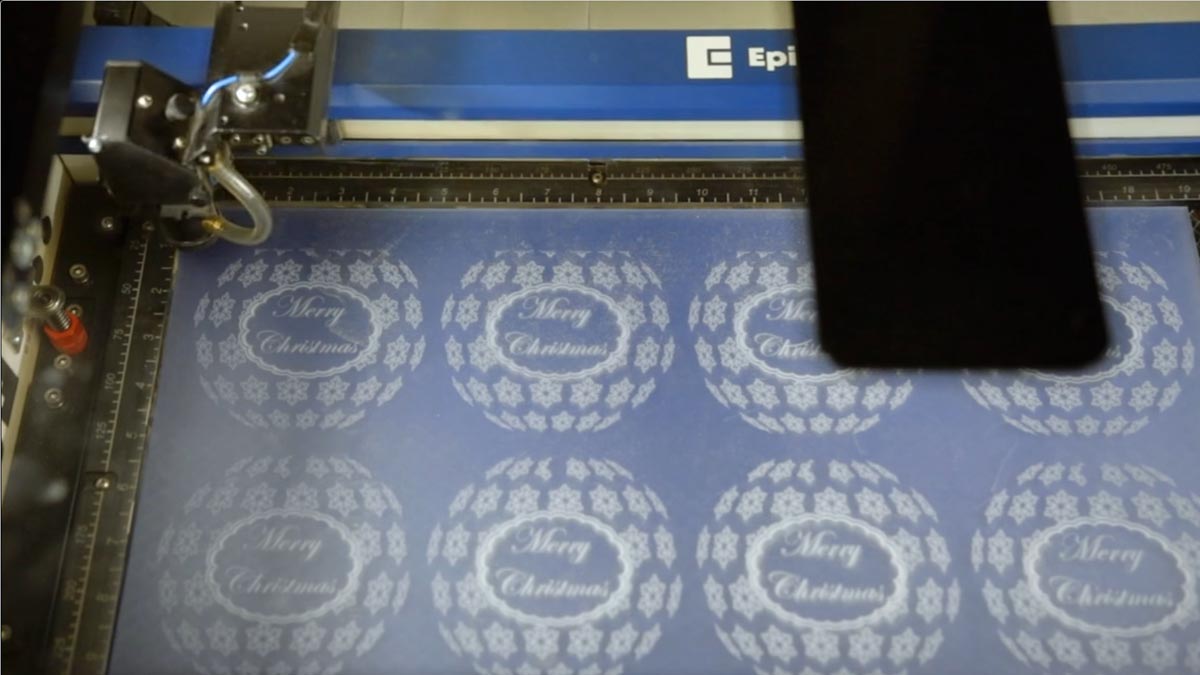
Engrave using one of our CO2 Machines

Final product hanging on a christmas tree

Center-Center vs Custom Center Engraving

Using Center-Center

There are many ways to use Center Engraving on the Epilog Laser Dashboard.

Let’s take a logo we want to engrave at the center of a coaster.

Choose the logo and add to the Epilog Laser Dashboard

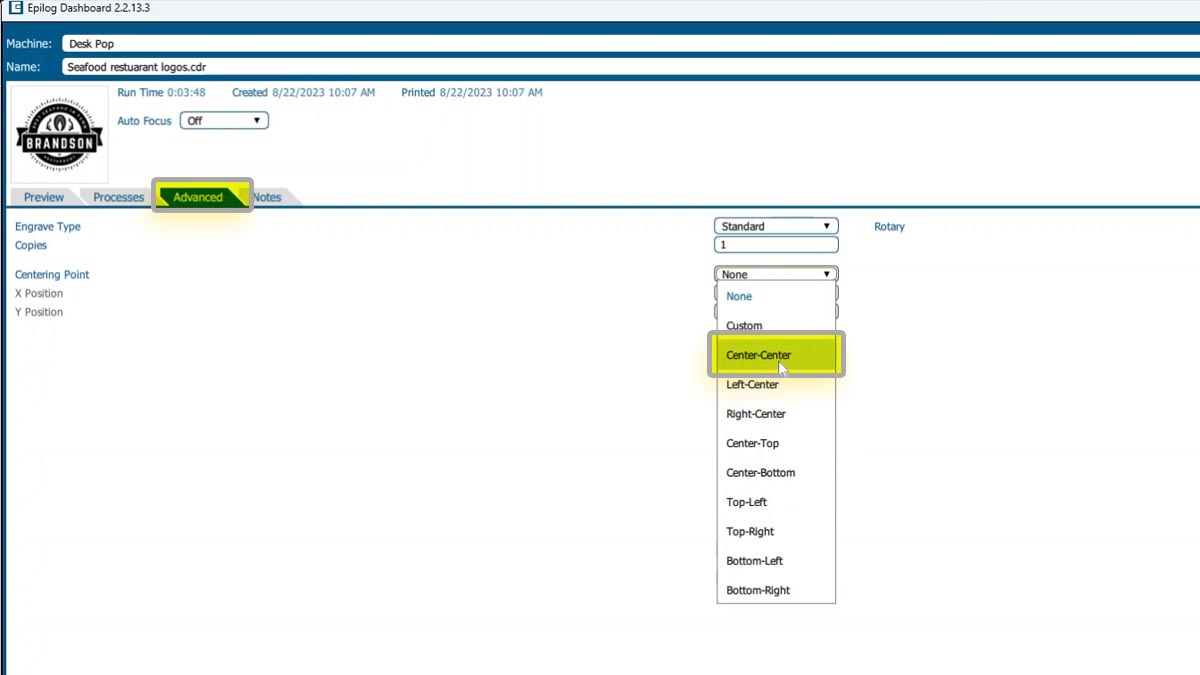
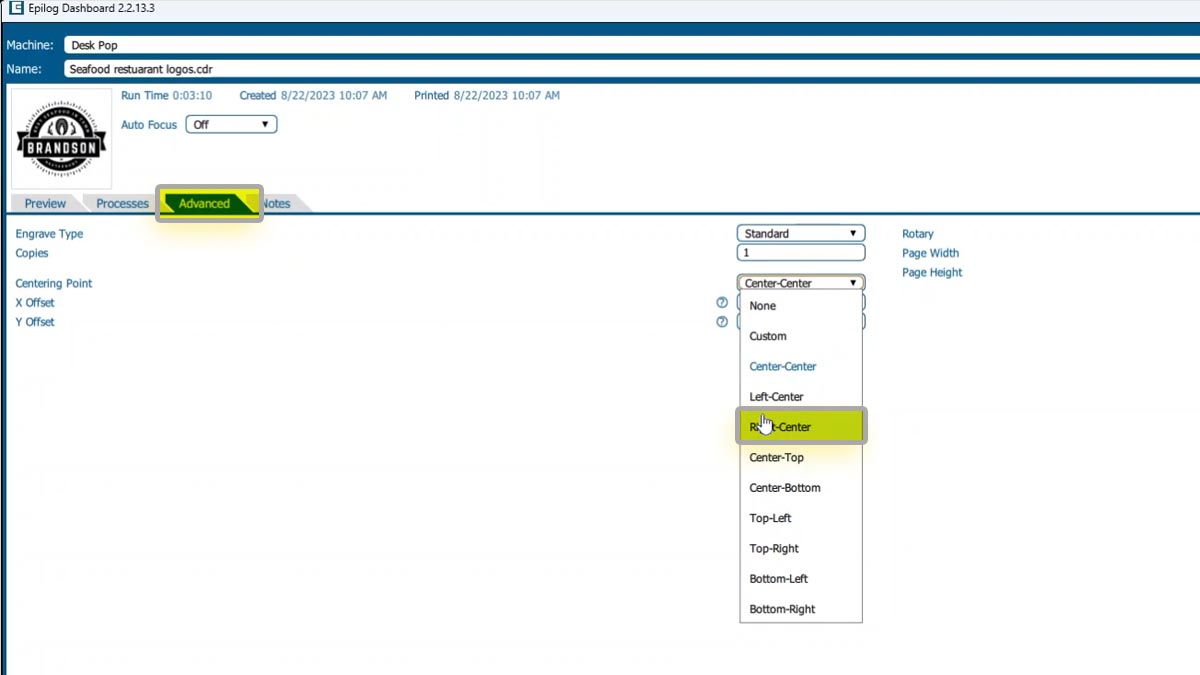
In the Epilog Dashboard, choose the Advanced Tab.

Next to Centering Point you’ll see a list of all of options.

We’ll choose Center-Center.

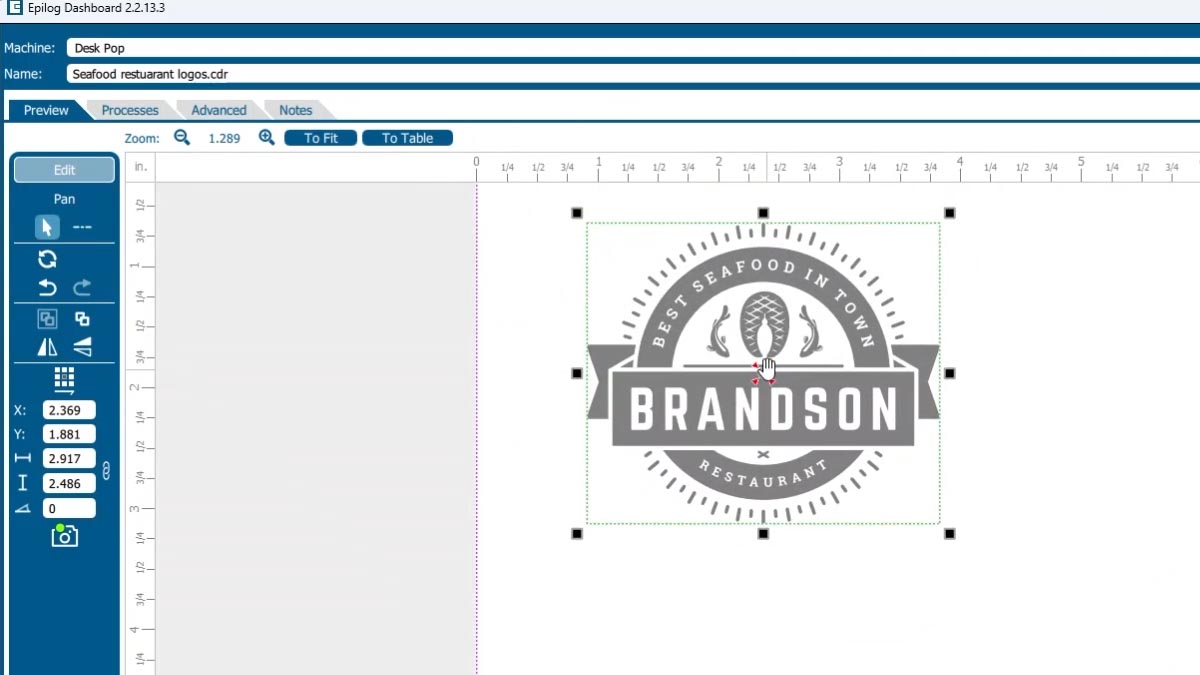
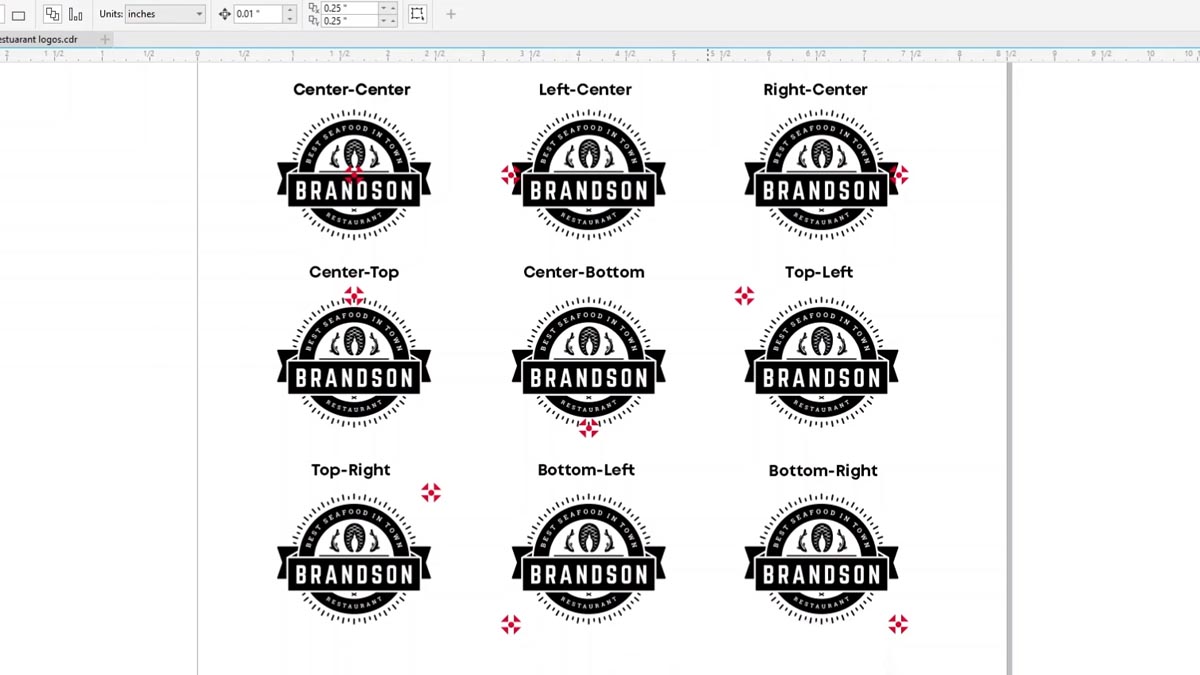
We can now see a red dot placed at the center point of the graphic.

a red dot now appears at the center of the logo

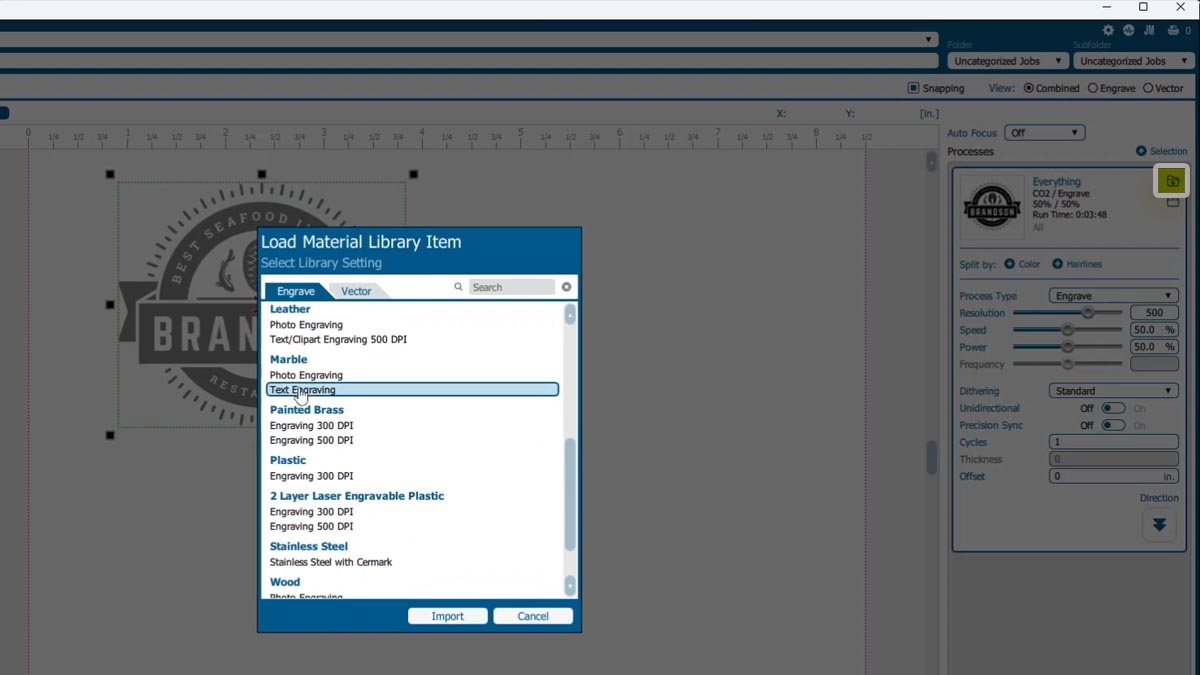
We’ll choose our material settings and print it to the laser.

select material settings

Position with Joystick

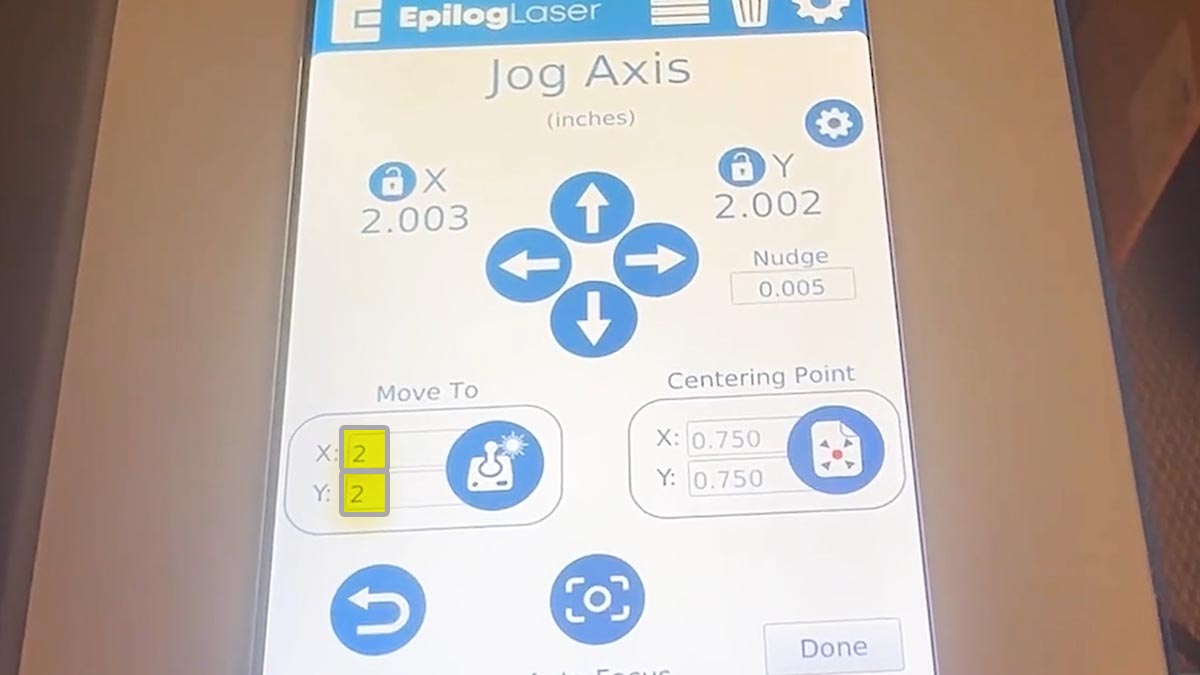
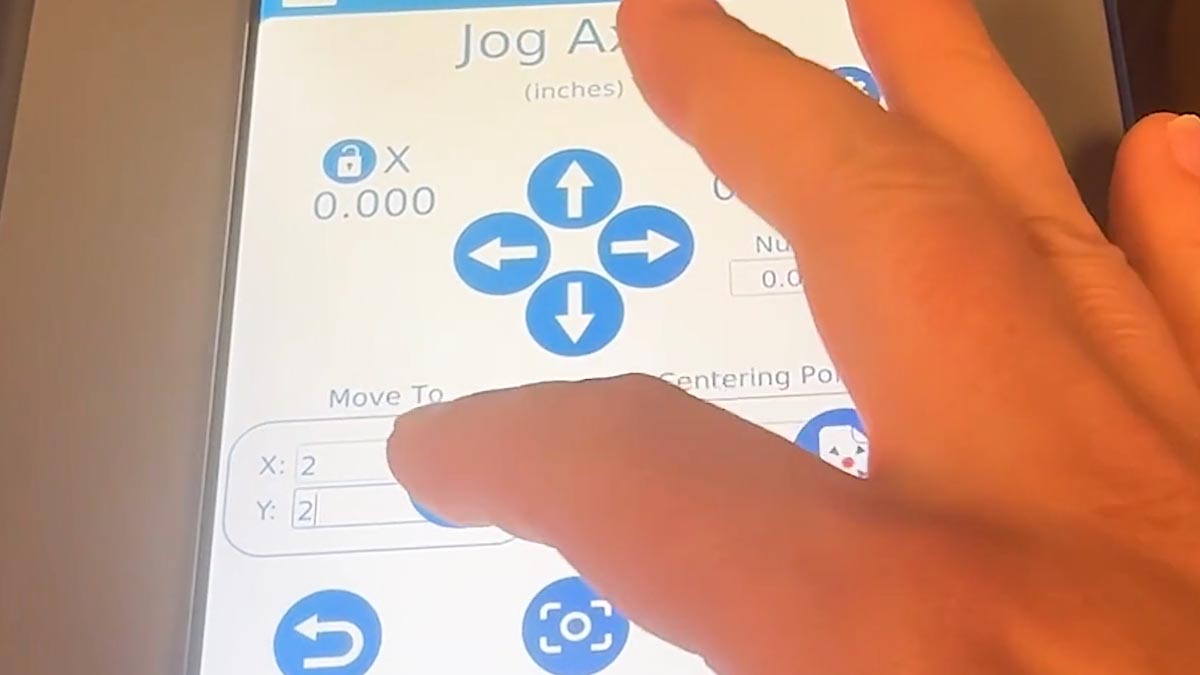
At the laser choose the Joystick icon.

The coaster is 4” x 4”, so set the Move To dimension to 2” and 2”.

Set Move-to dimensions to 2 and 2

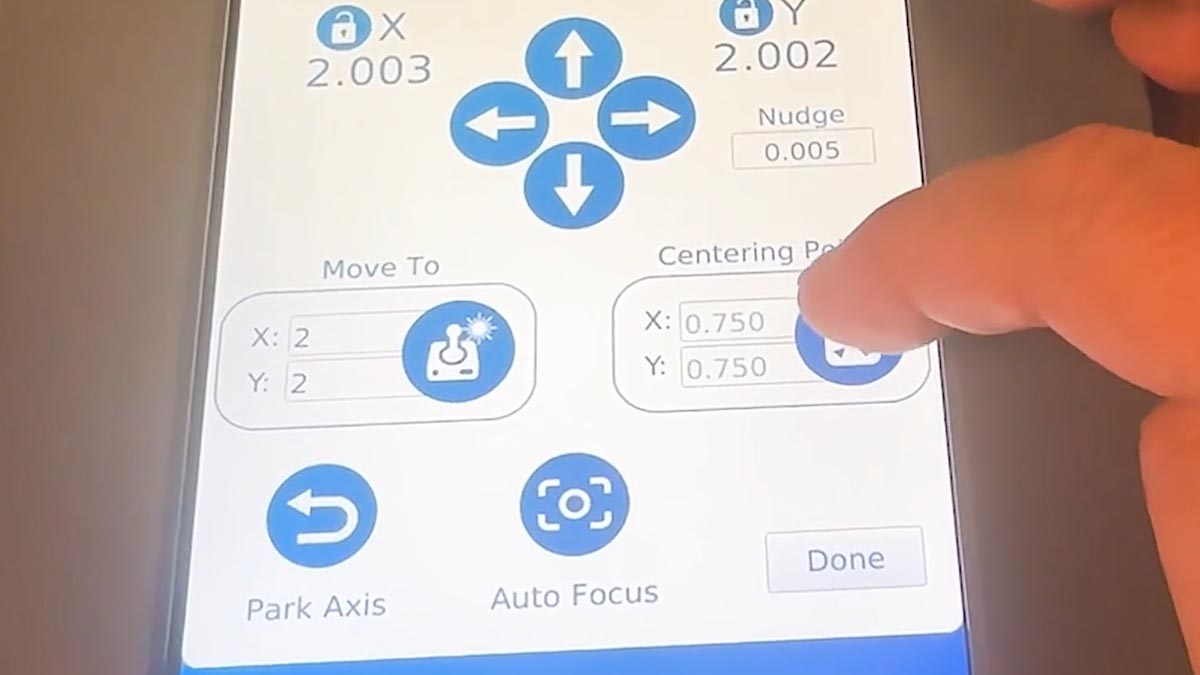
Click the joystick icon to move to this setting.

Click the joystick icon to move to this setting

Click the center icon to match the Centering Point to 2” x 2”.

Click the center icon to match the Centering Point to 2 x 2

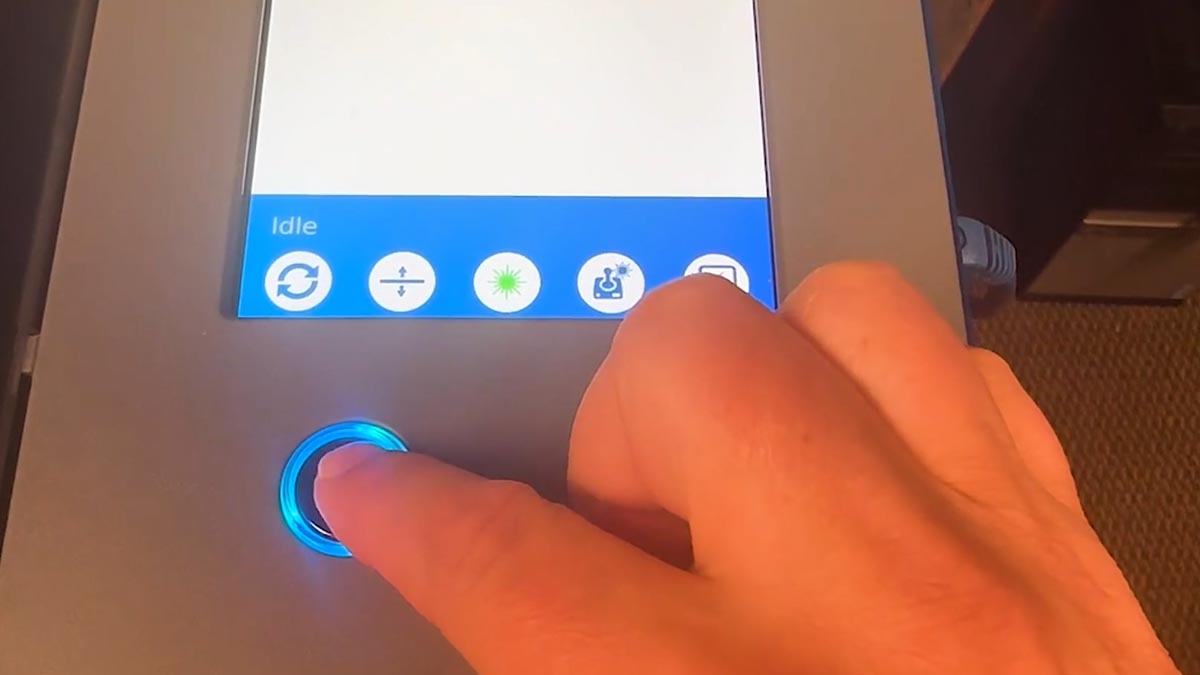
With your job selected, press the Go button.

With your job selected, press the Go button
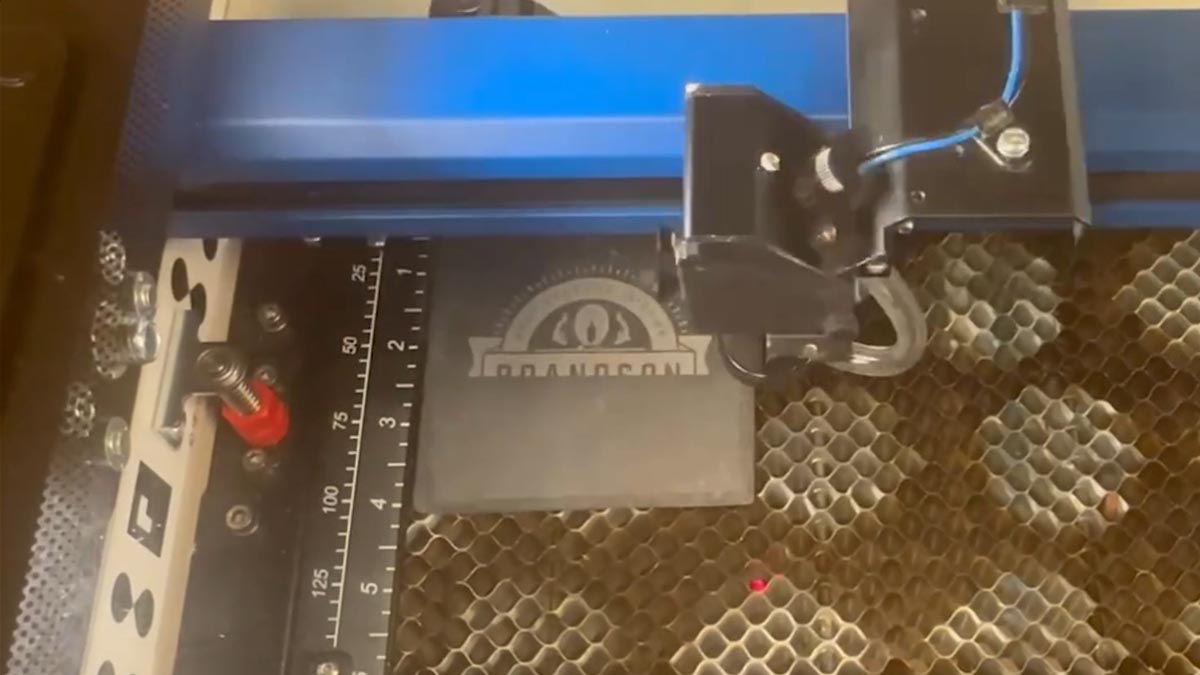
engrave your logo to the sample material

Using Custom Center

You can see the variety of places you can set your center point depending on your item to be engraved.

You can choose Left-Center, Right-Center, or many others.

there are multiple presets for center

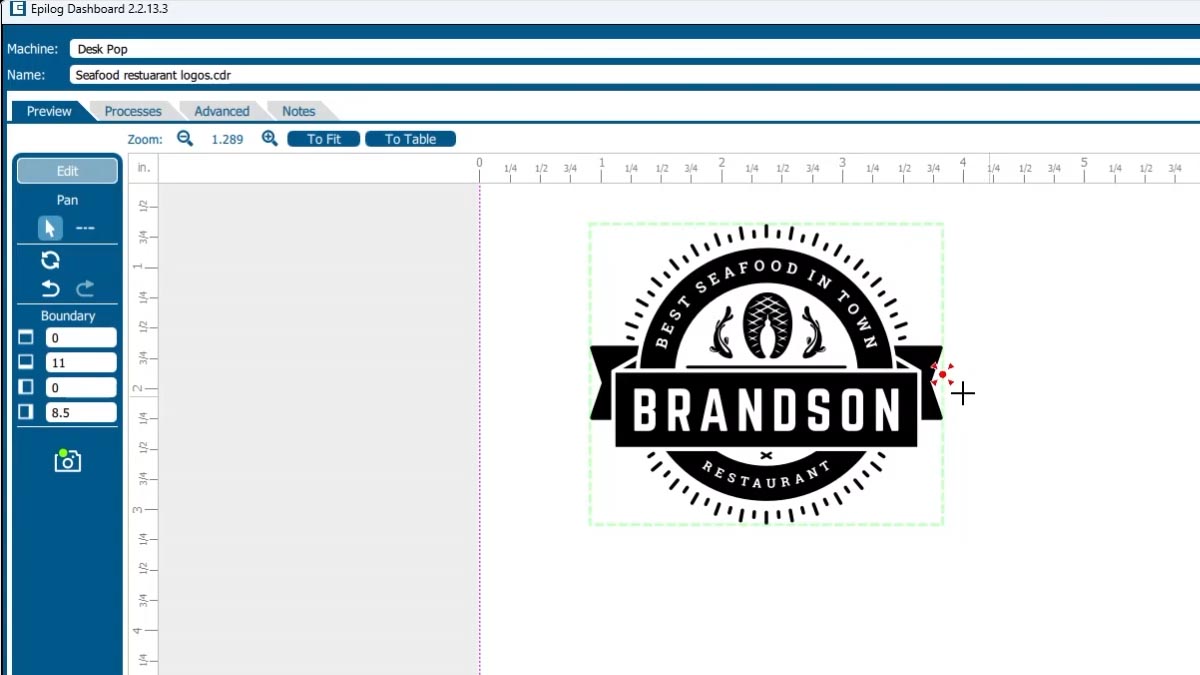
Back in the Epilog Dashboard if we change to Right-Center, the red dot representation changes on screen as well.

change to righ-center
see the righ-center red dot representation change

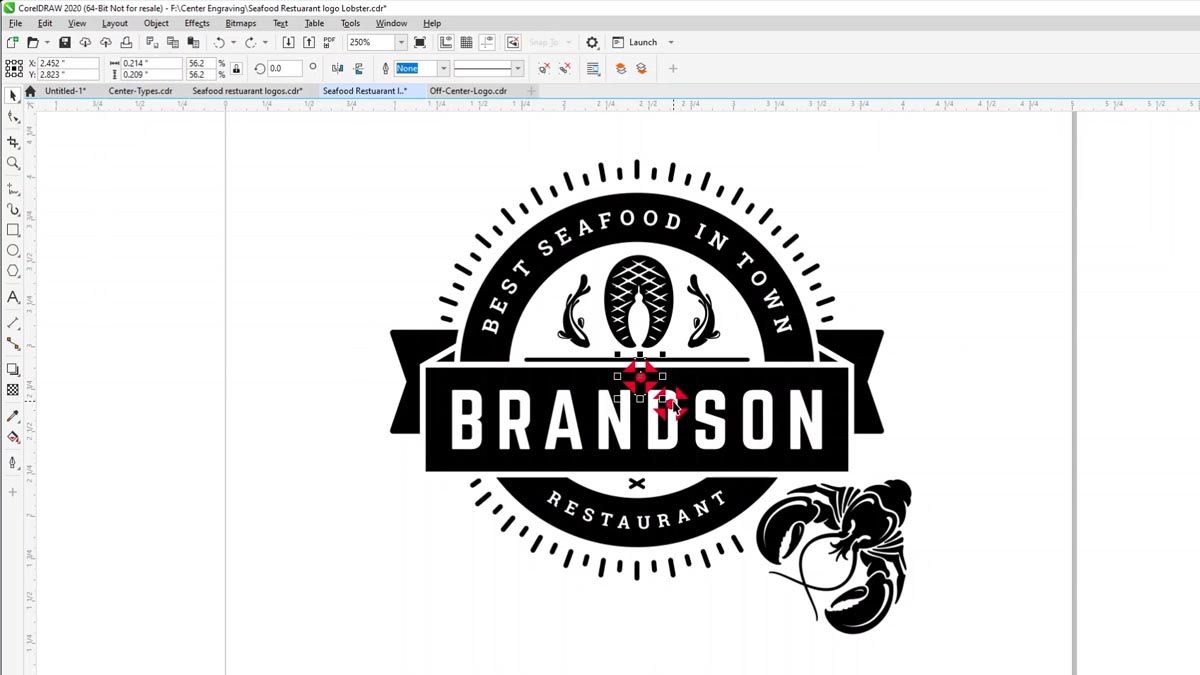
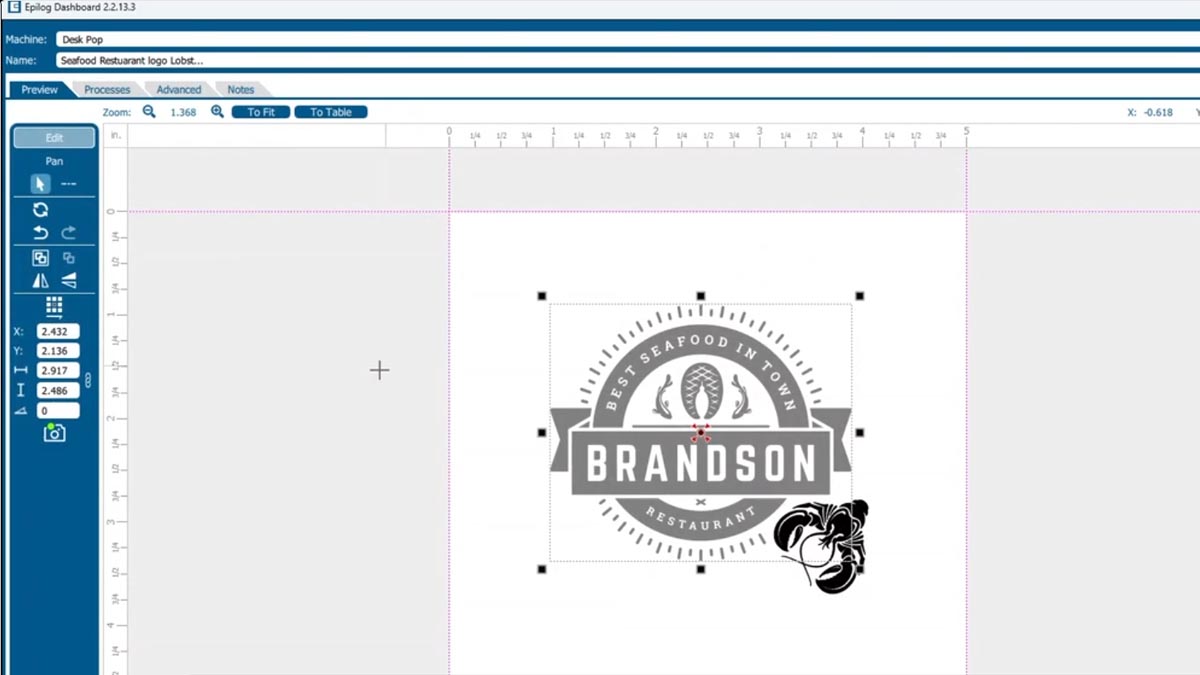
Our customer changed their logo to add a lobster to the right side of the circle.

If we use Center-Center engraving, the artwork placement will be off.

We want the center point to be at the center of the circle, not the whole artwork.

determine the appropriate center

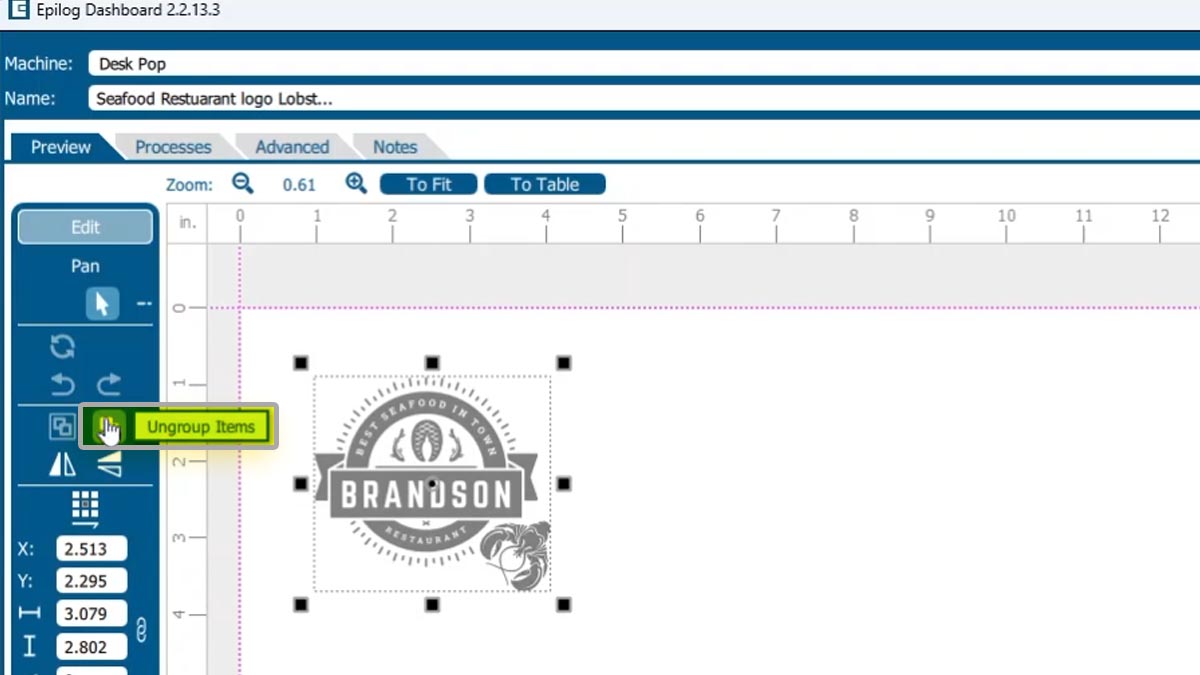
To find the center point we want to use, ungroup the artwork.

ungroup the artwork

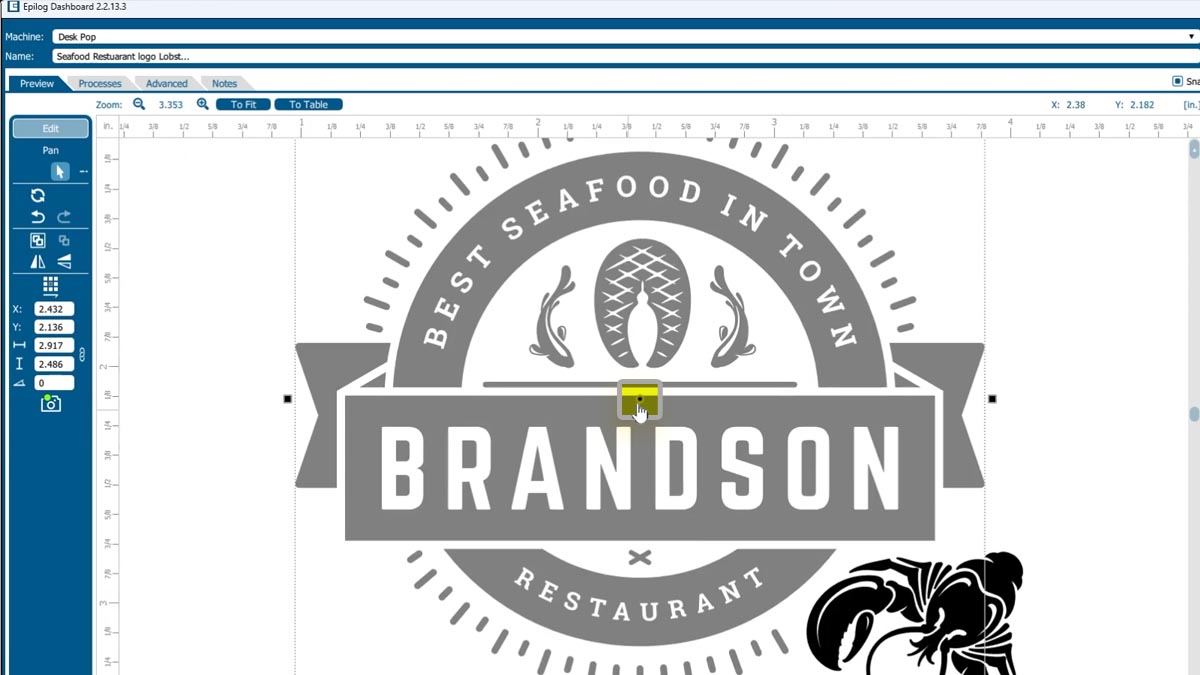
Select just the circle logo without the lobster.

select logo without the lobster

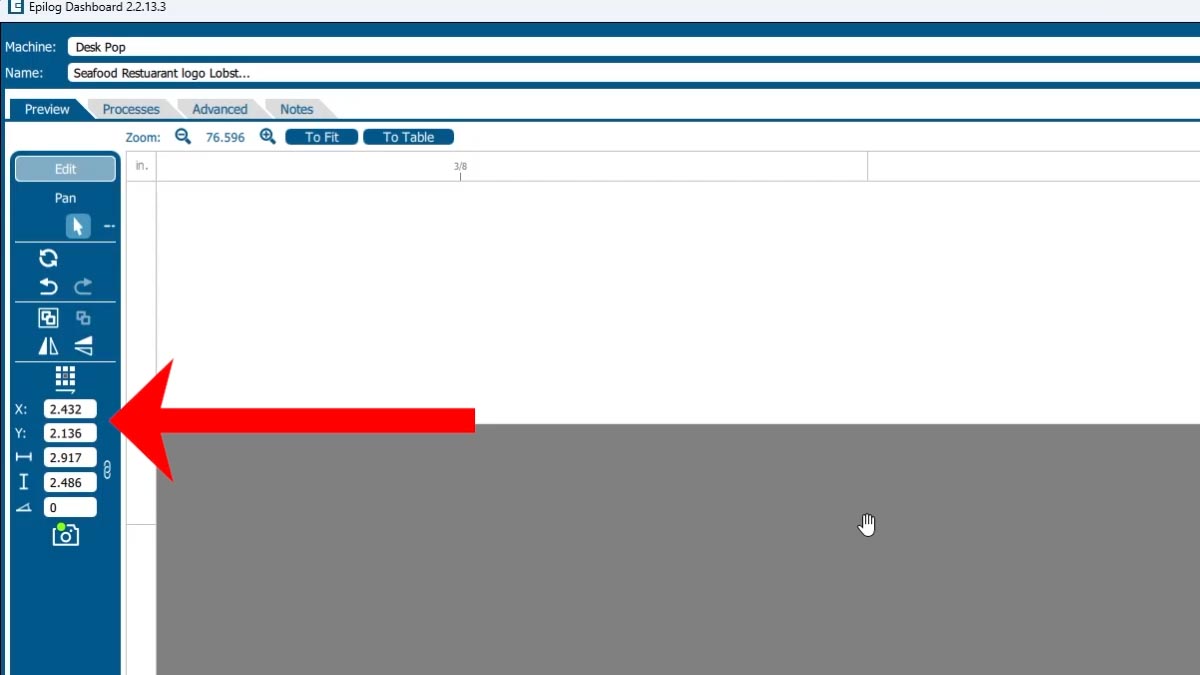
Place the cursor over the center point and we can see the X Y coordinates.

Place the cursor over the center point and we can see the X Y coordinates

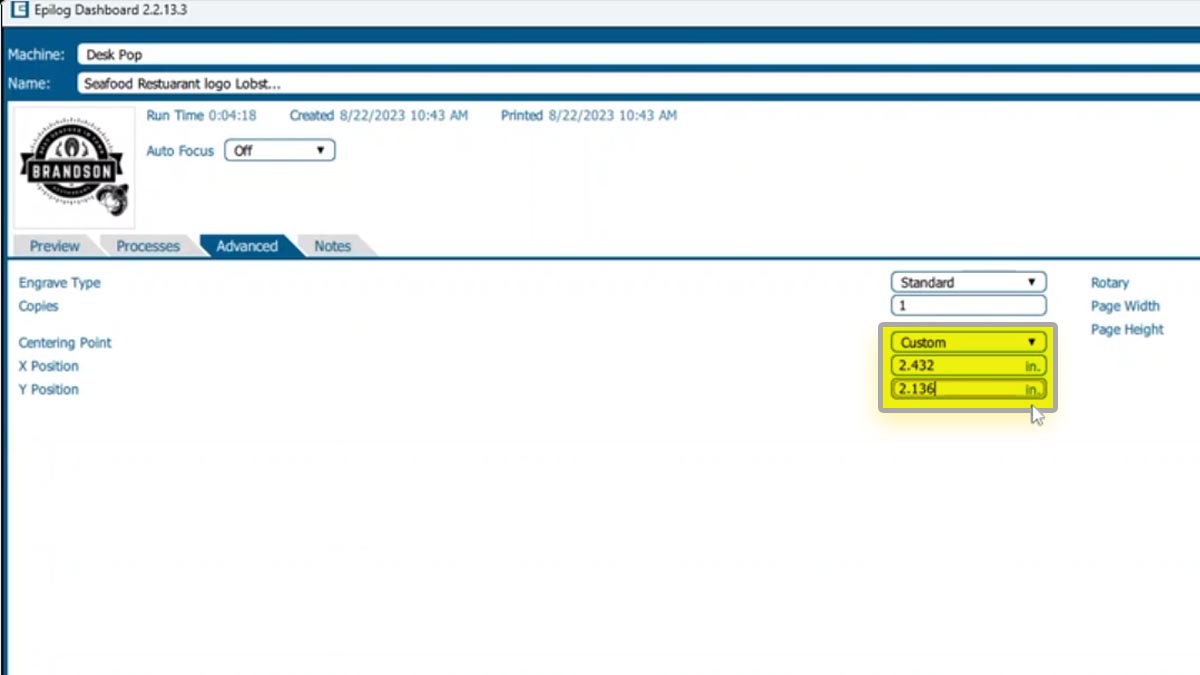
If we choose Custom Center, we can match these coordinates.

choose custom centering point and enter coordinates

Now the Red Dot is at the center of our graphic and will engrave around point.

the Red Dot is now at the center of our graphic

Our center point is still correct, so select the new job and press the Start button.

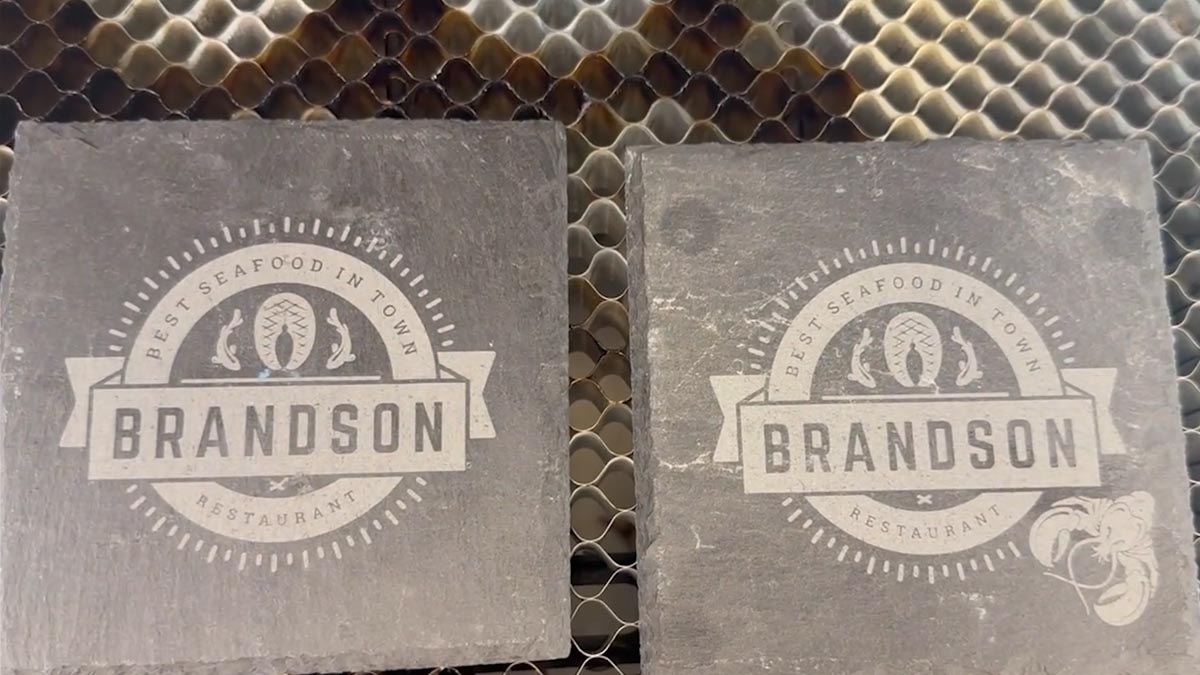
Now we can see both our old and new logo, both perfectly engraved!

both our old and new logo, both perfectly engraved!

Precisely place artwork using the IRIS Camera

Artwork Setup

Here we have a graphic we want to engrave on a blade of knife.

this is the graphic to be engraved on a knife blade

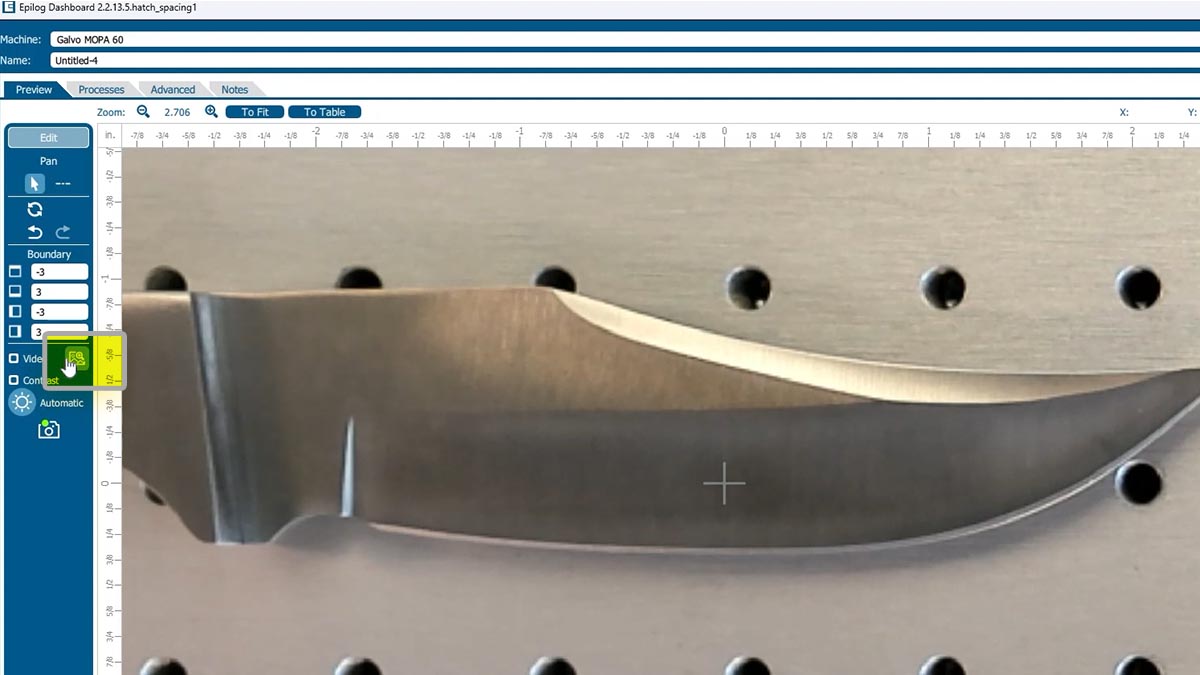
In the Laser Dashboard we can see the knife blade placed in the laser.

Start by clicking the Copy Background Image icon.

laser dashboard software knife on laser bed

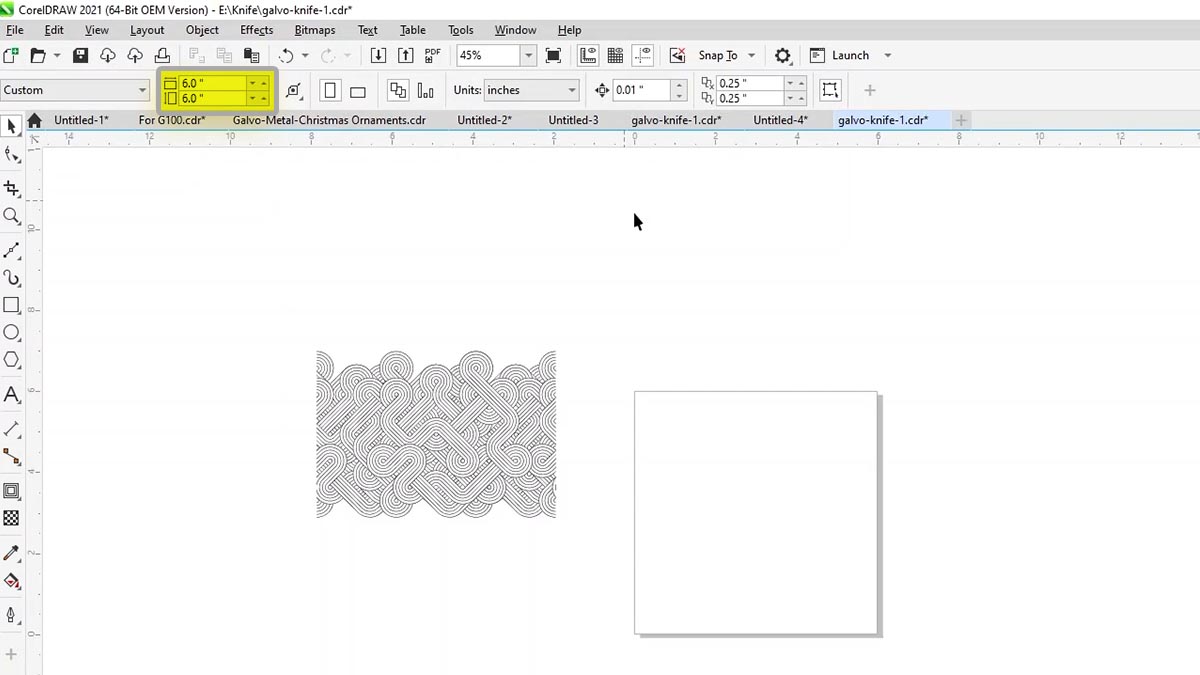
Back in our graphic software, change the page size to the size of the work area: 6” x 6”.

artwork setup in CorelDraw

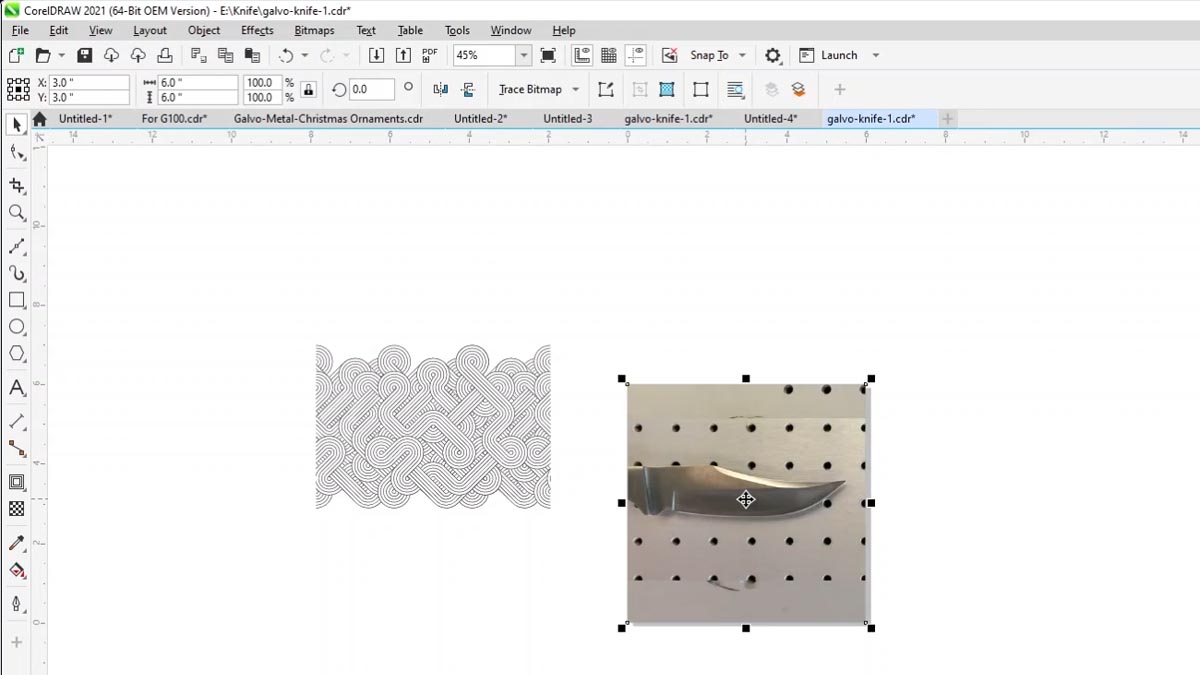
Paste the copied background image on the page.

pasted image of knife

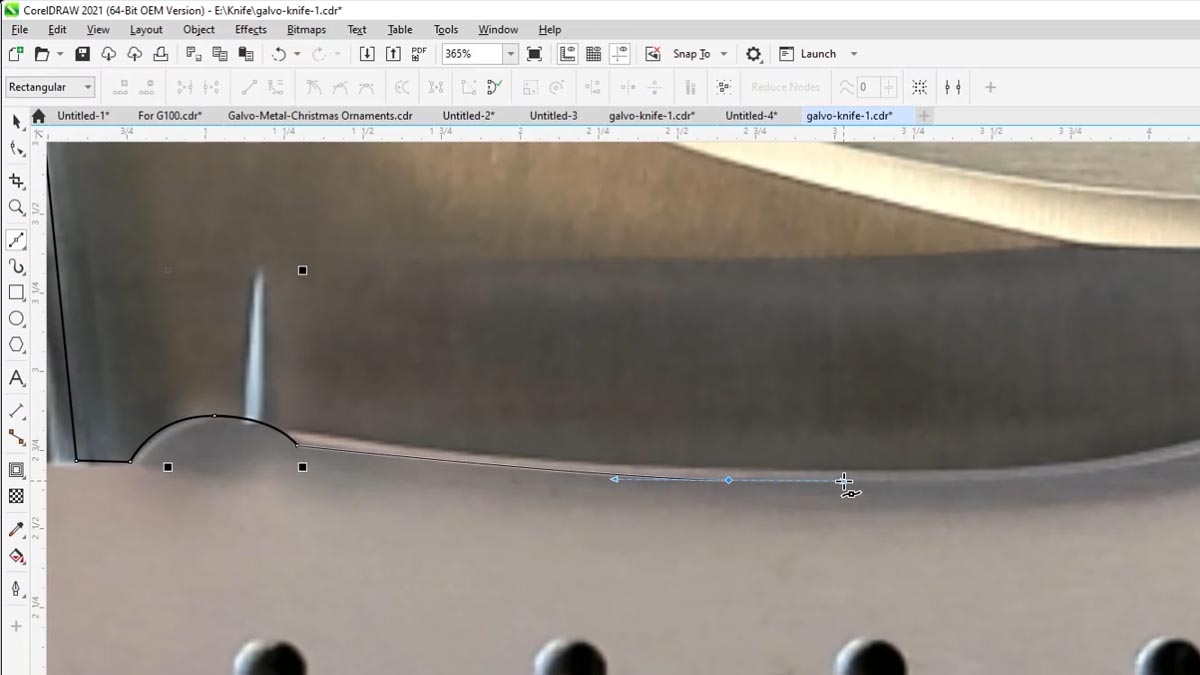
We’ll use the Bezier tool to draw an outline around the area of the blade we want to etch.

Click and drag to create curves as you draw your lines.

tracing knife shape in CorelDraw

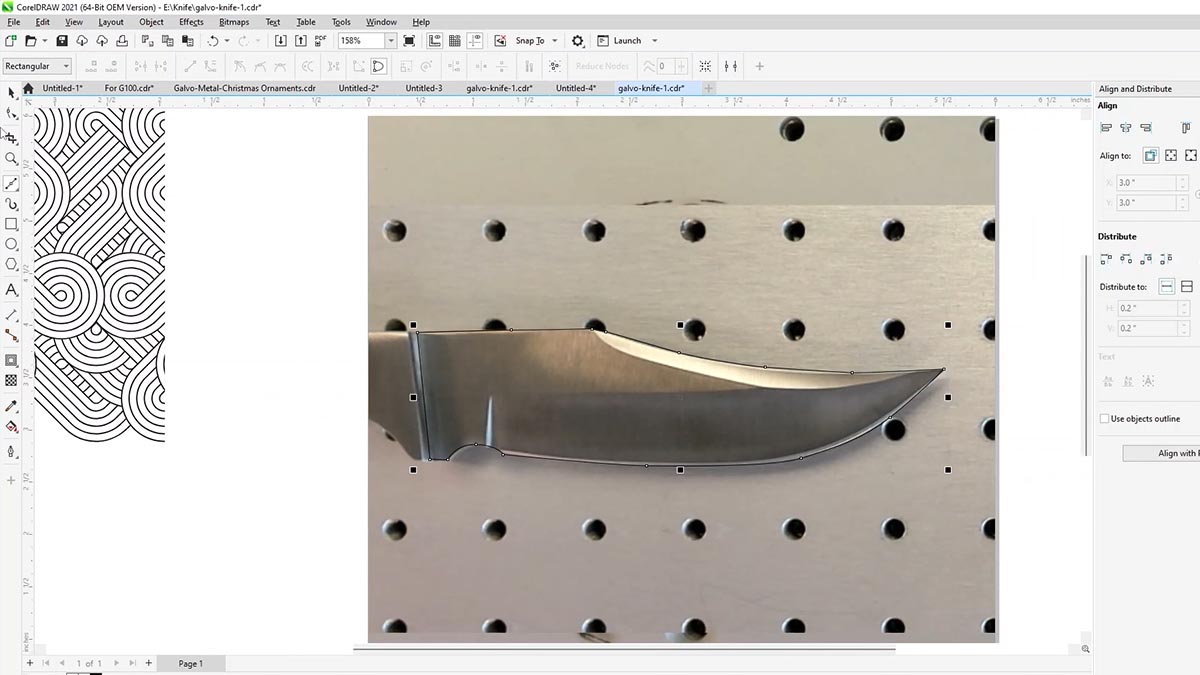
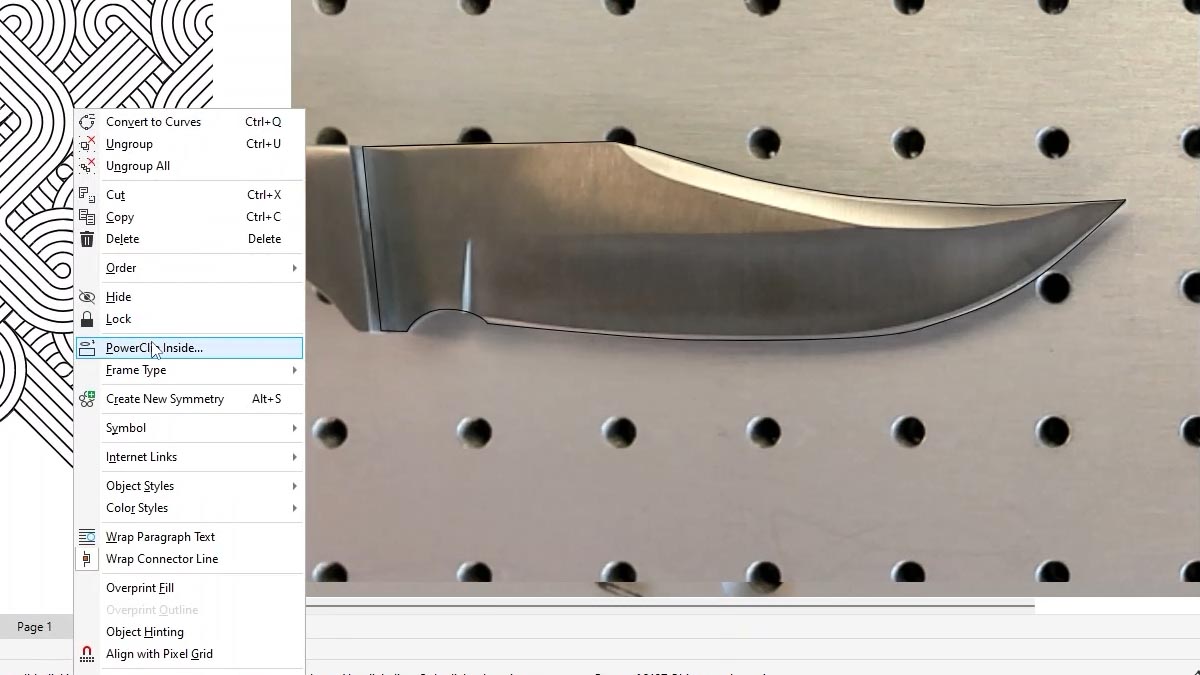
When you have your shape as you’d like, right click on the graphic and choose PowerClip Inside.

fine tune the outline shape as needed until it matches
setting up artwork in CorelDraw

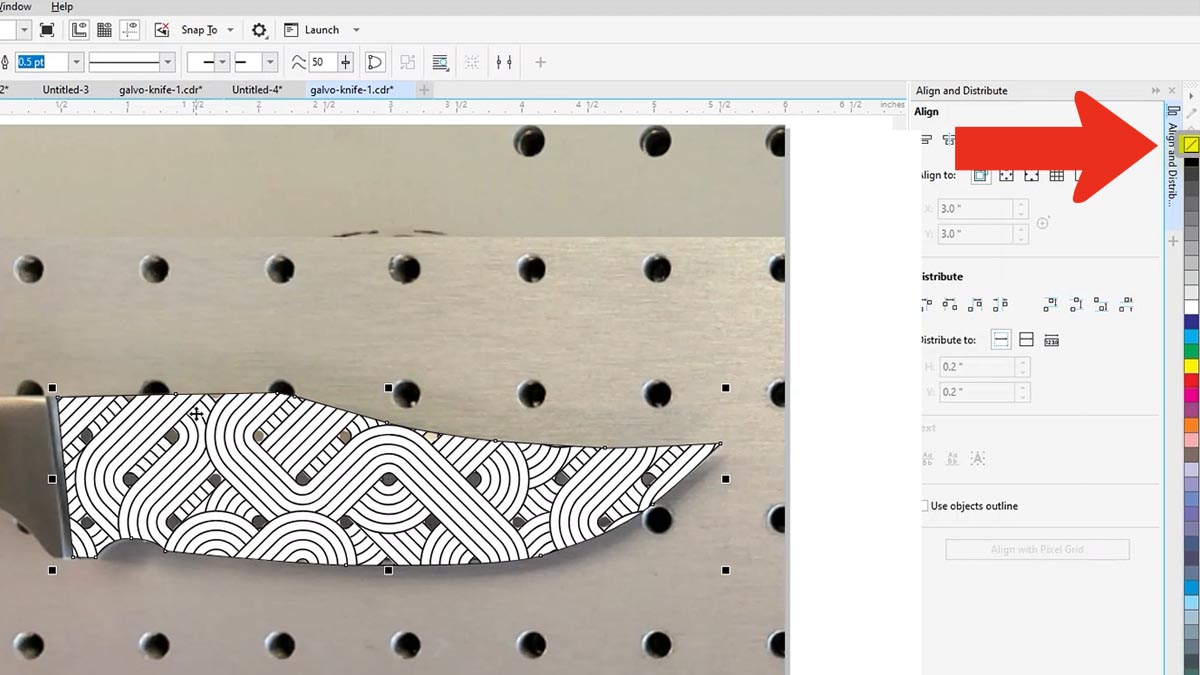
Click inside the shape to reveal the pattern. Make sure to remove the fill color from the outline.

Click inside the shape.v

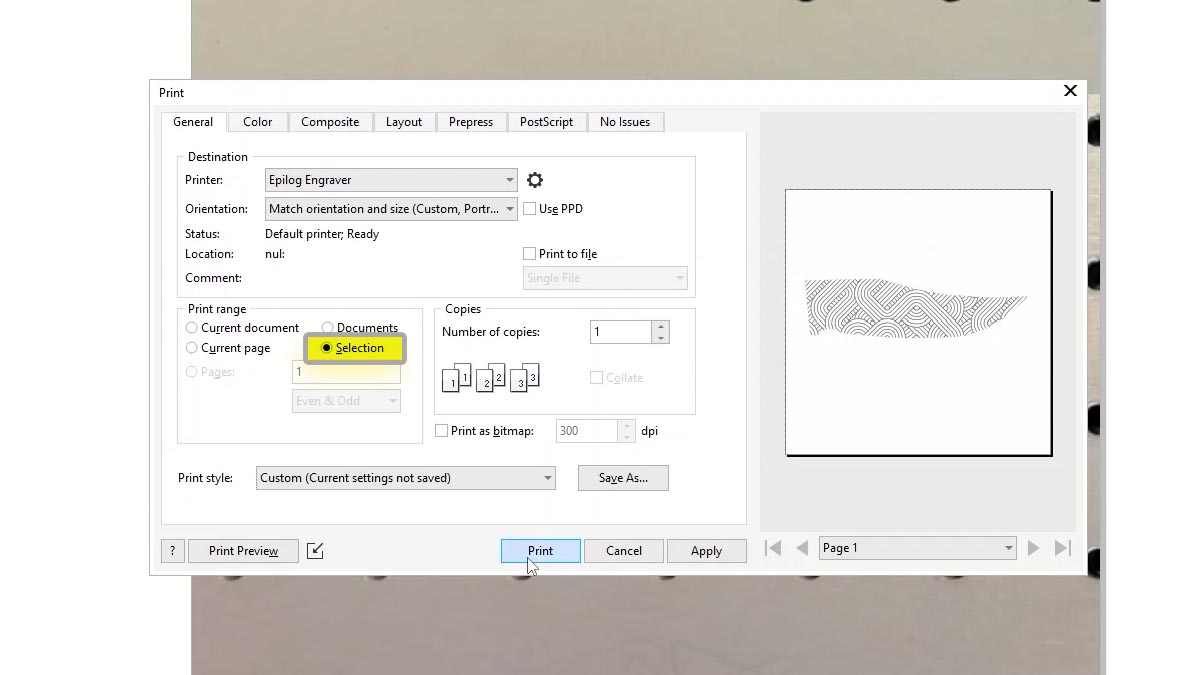
Print the file to the laser, choosing Selection for the Print Range so you don’t send over the background image.

print to the Epilog Laser Dashboard

Engrave the Pattern

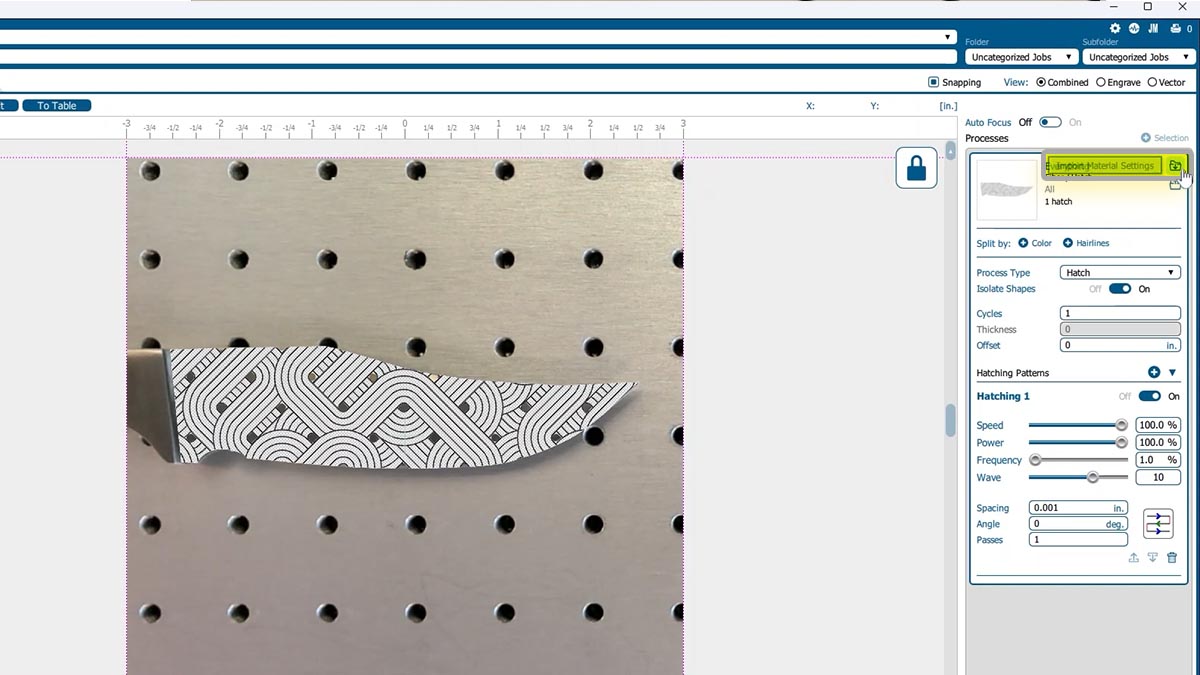
Back in the Laser Dashboard you can see that our image is still perfectly aligned in the laser.

Import the material setting for Metal Etch.

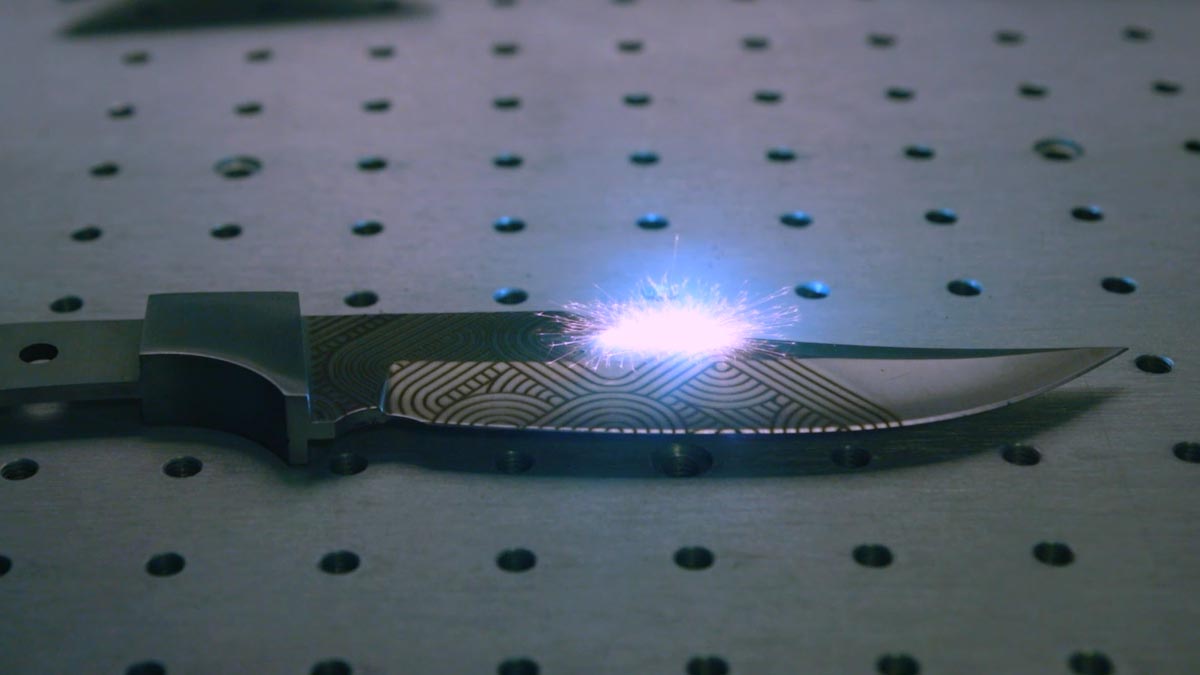
knife being laser engraved with the Epilog Fusion Galvo

Print the file to the laser.

knife engraving in process
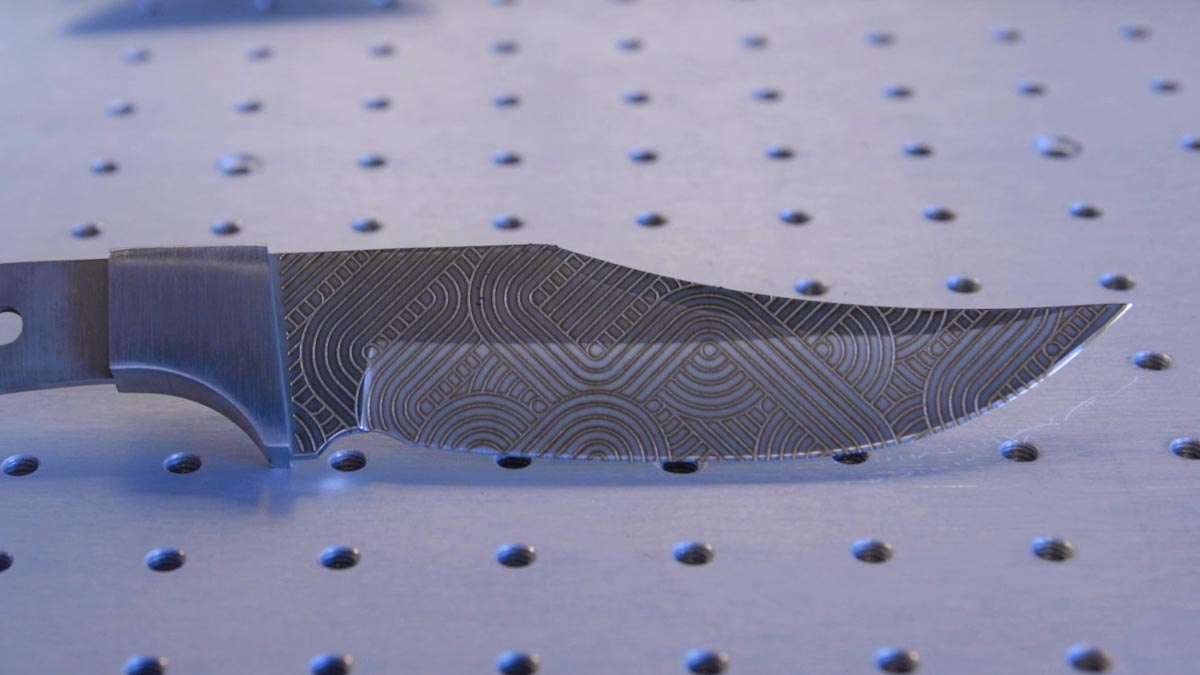
laser engraved knife

Mirror and Align the Artwork

Place the unengraved side of the knife face up on the table.

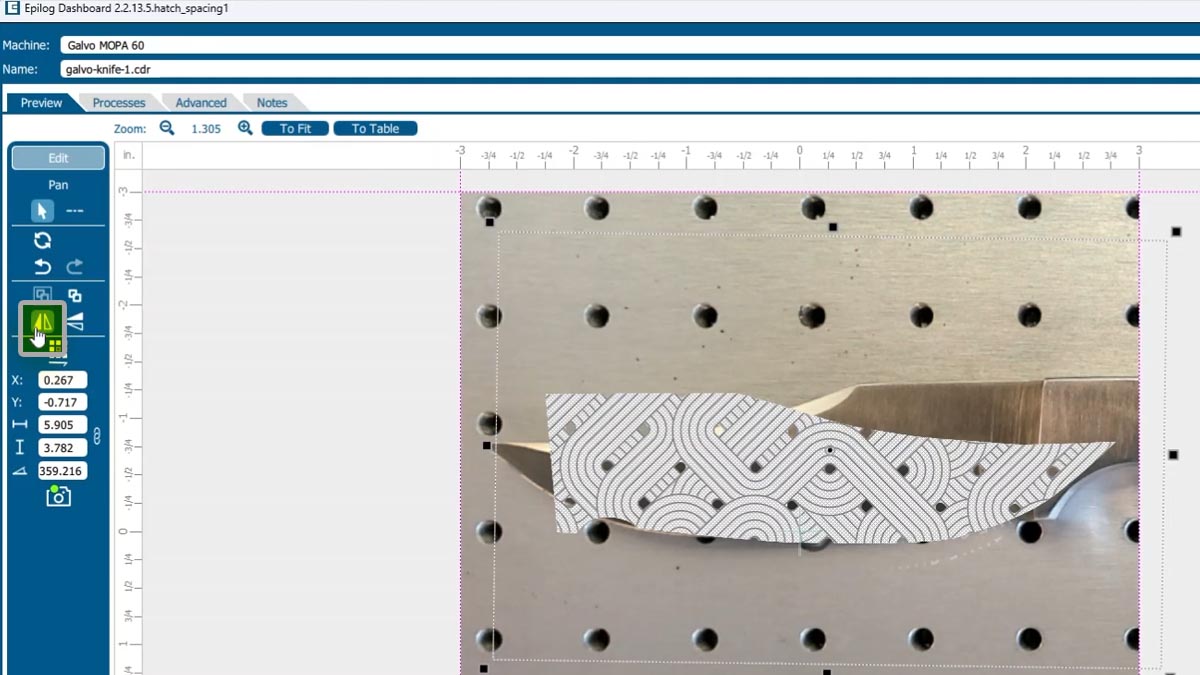
Back in the Laser Dashboard, select the image.

Click on the Mirror Horizontally icon.

Click the artwork and then click on the Mirror Horizontally icon.

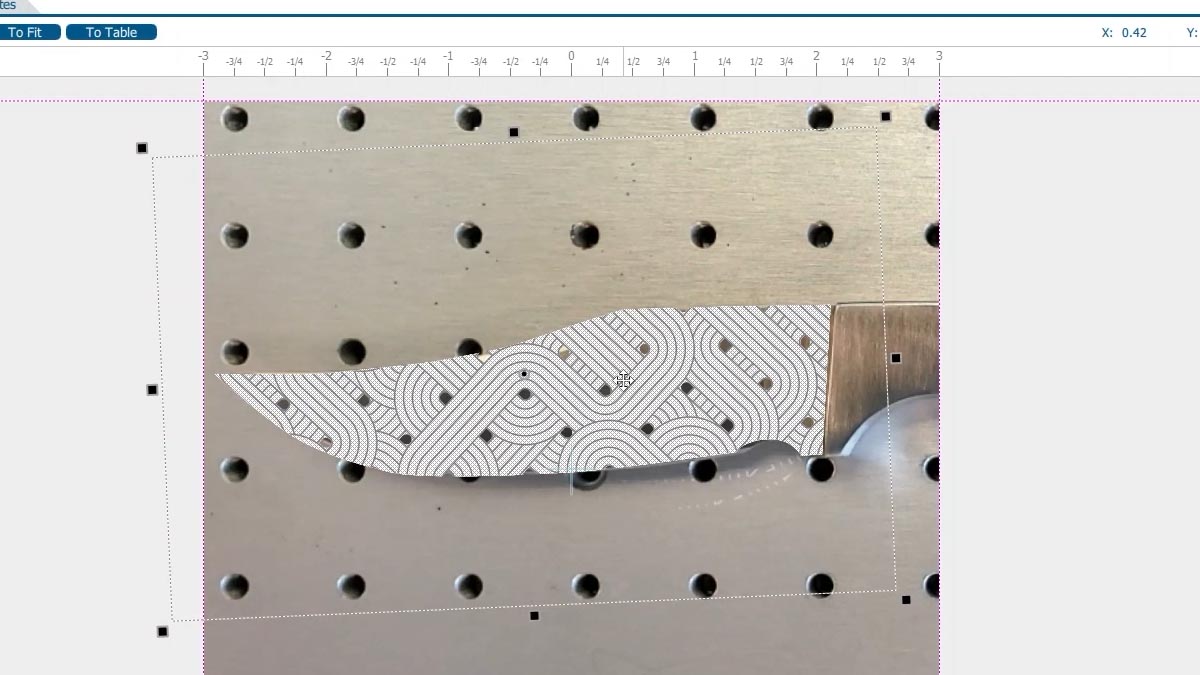
Use the camera to line up your artwork to the knife blade.

artwork setup in the Epilog Laser Dashboard

When you’re happy with the alignment, print the file to the laser.

Use Print Merge to Customize Multiple Items

Import Data

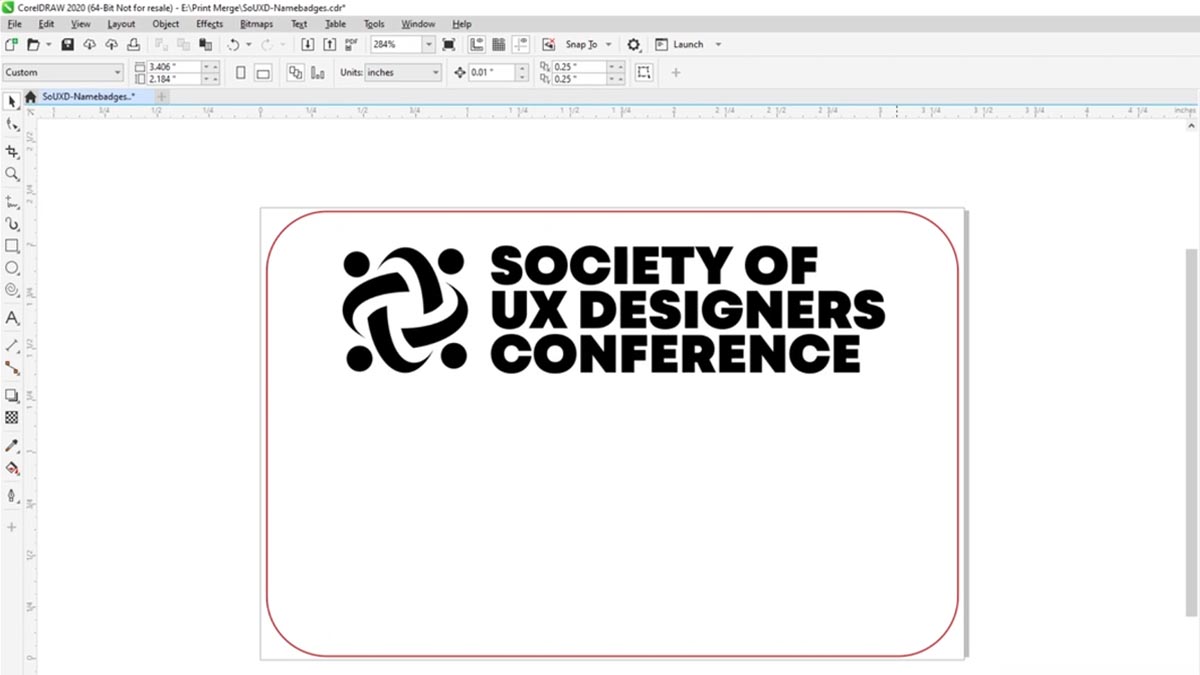
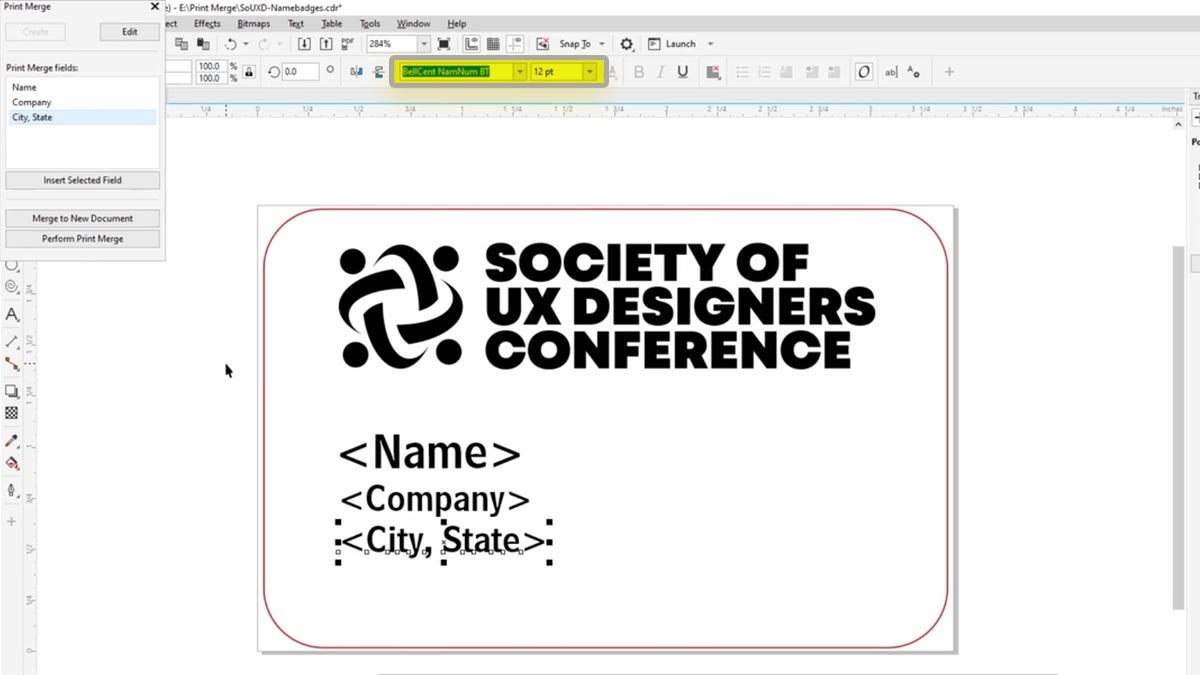
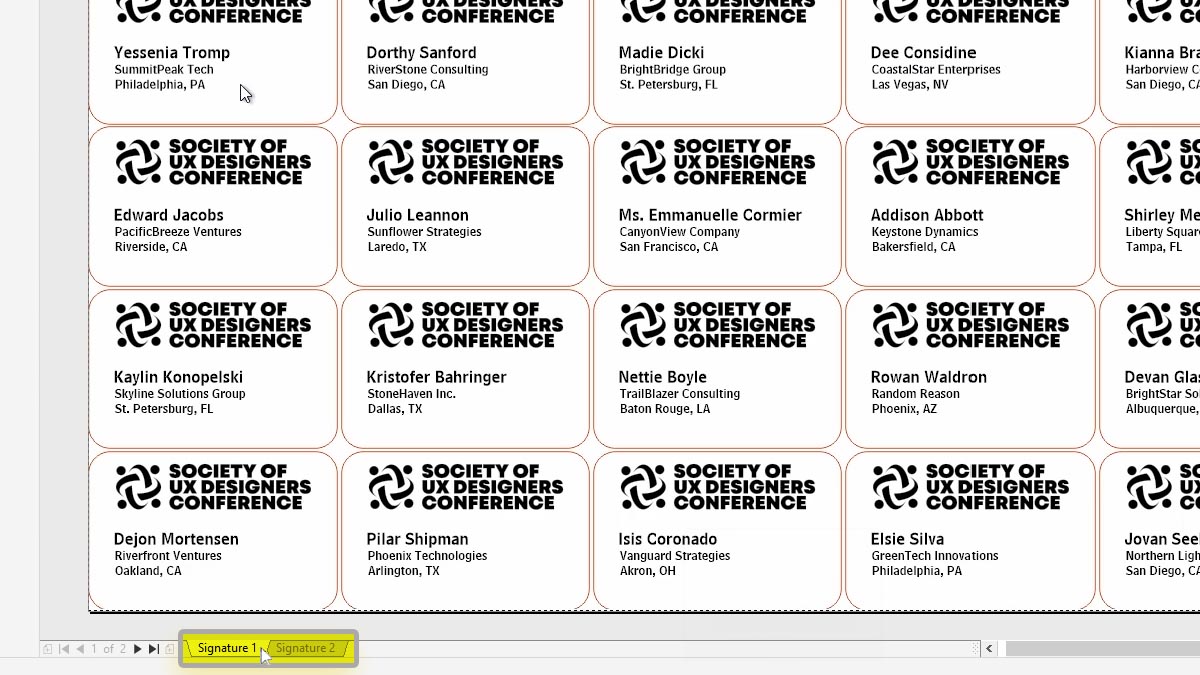
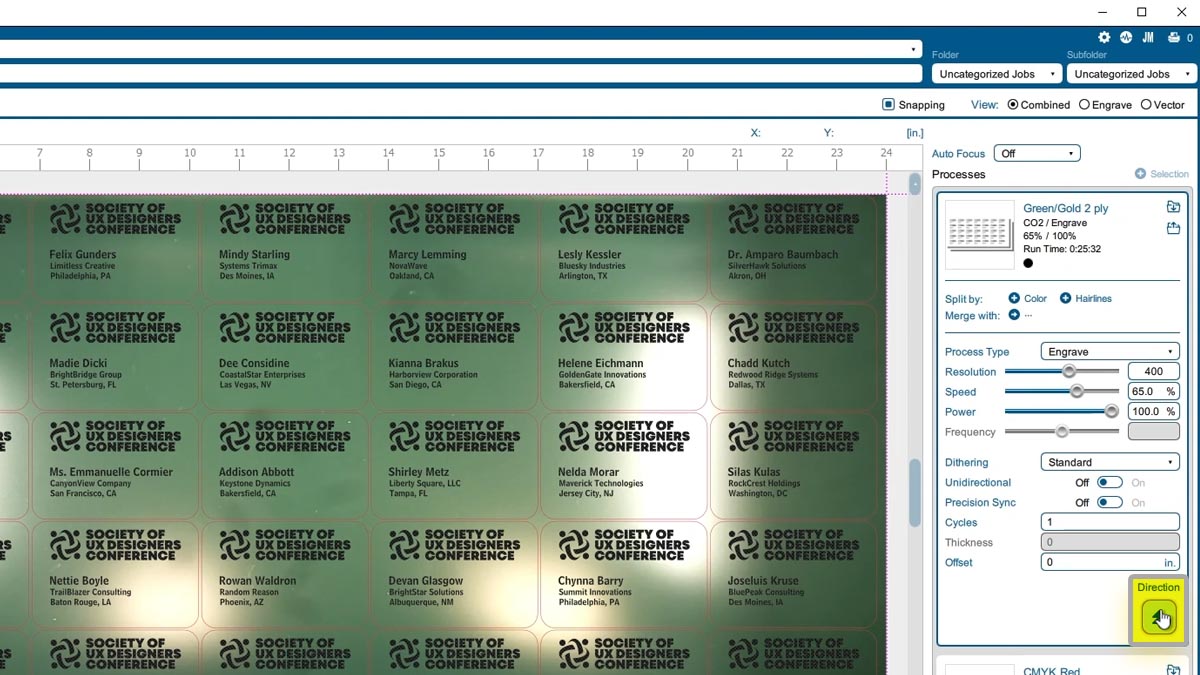
Here we have a series of name badges to engrave and cut on the laser.

name badge template ready to customize

First we’ll need to pull in the list of names.

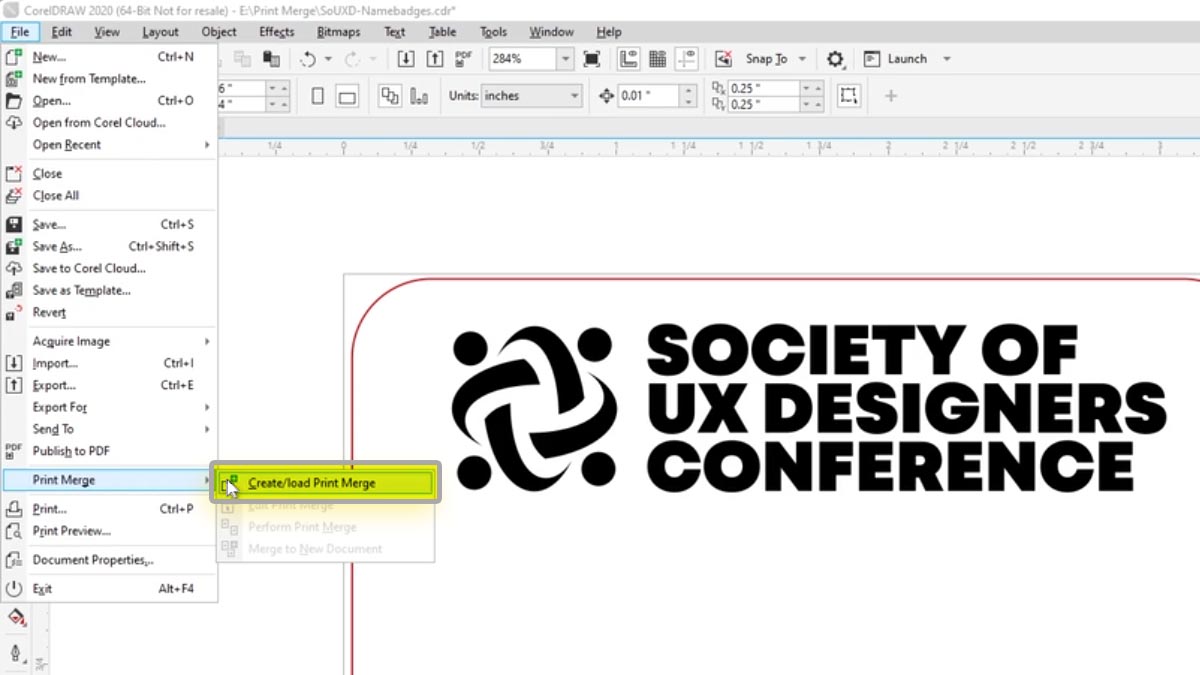
Select File > Print Merge > Create/Load Print Merge

Pull in the list of names

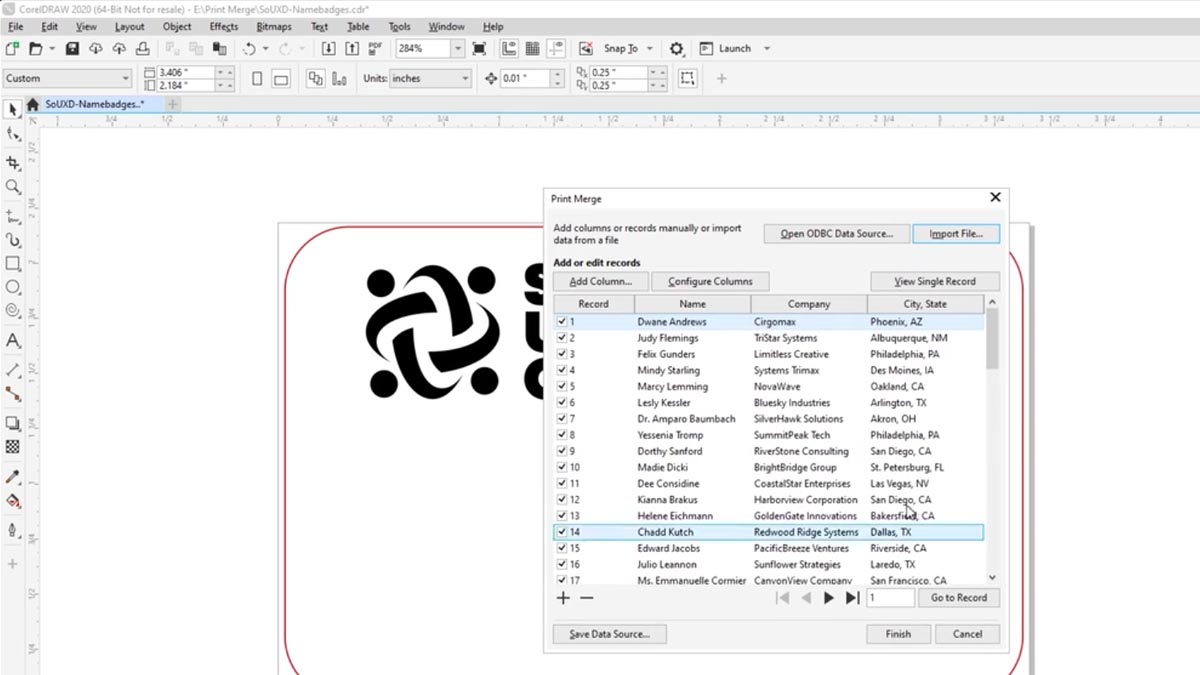
Click Import File and navigate to your .csv, .rtf, or .txt file.

We can deselect any names we don’t want to use here.

prompt allows you to modify data selection

Click Finish

Format Artwork

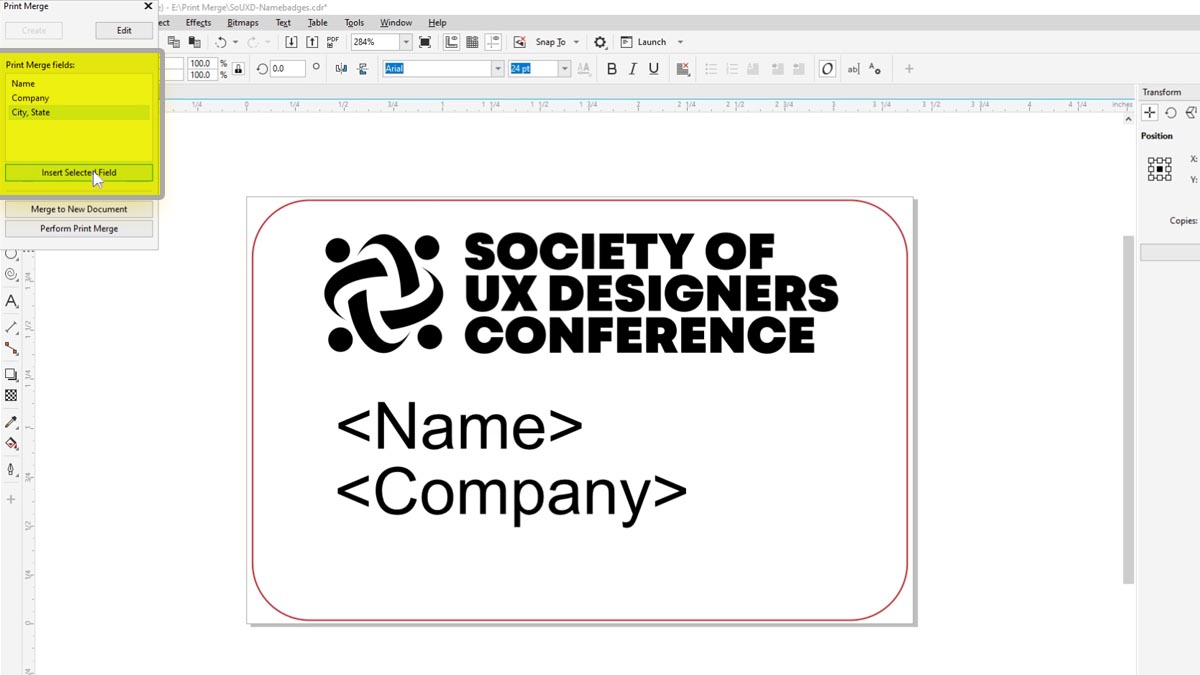
For each column in our spreadsheet, select Insert Selected Field.

Select Insert Selected Field for each column

Now we can format the text fields.

Format the text fields

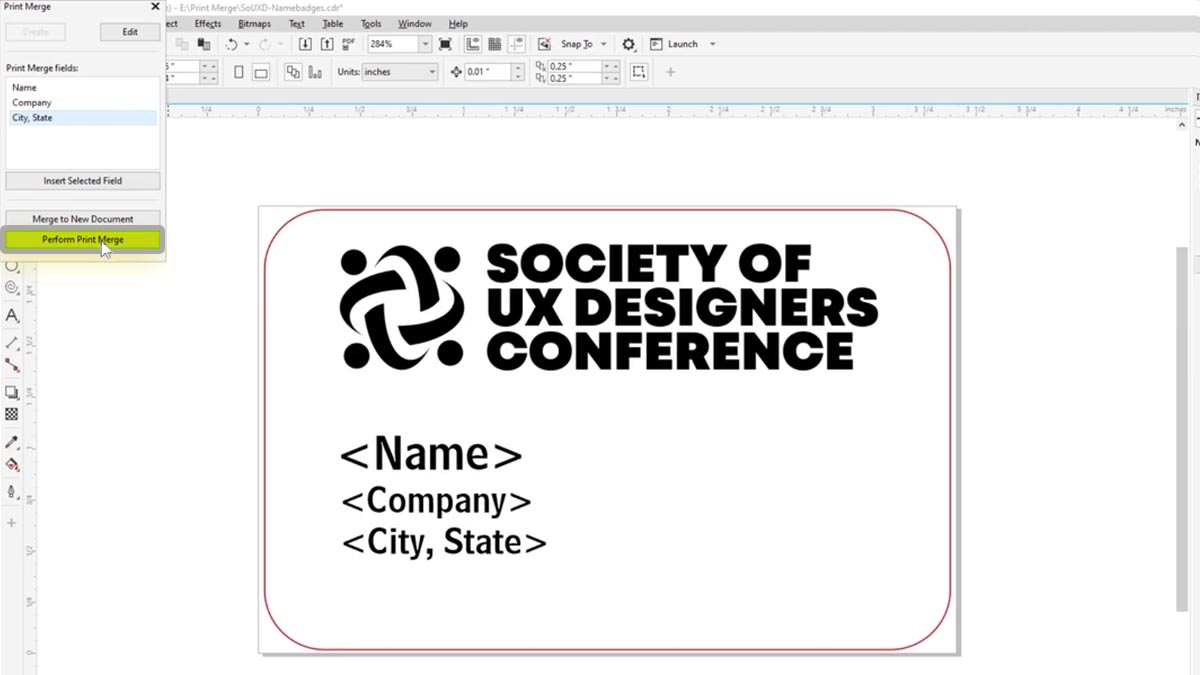
Click Perform Print Merge

Click Perform Print Merge

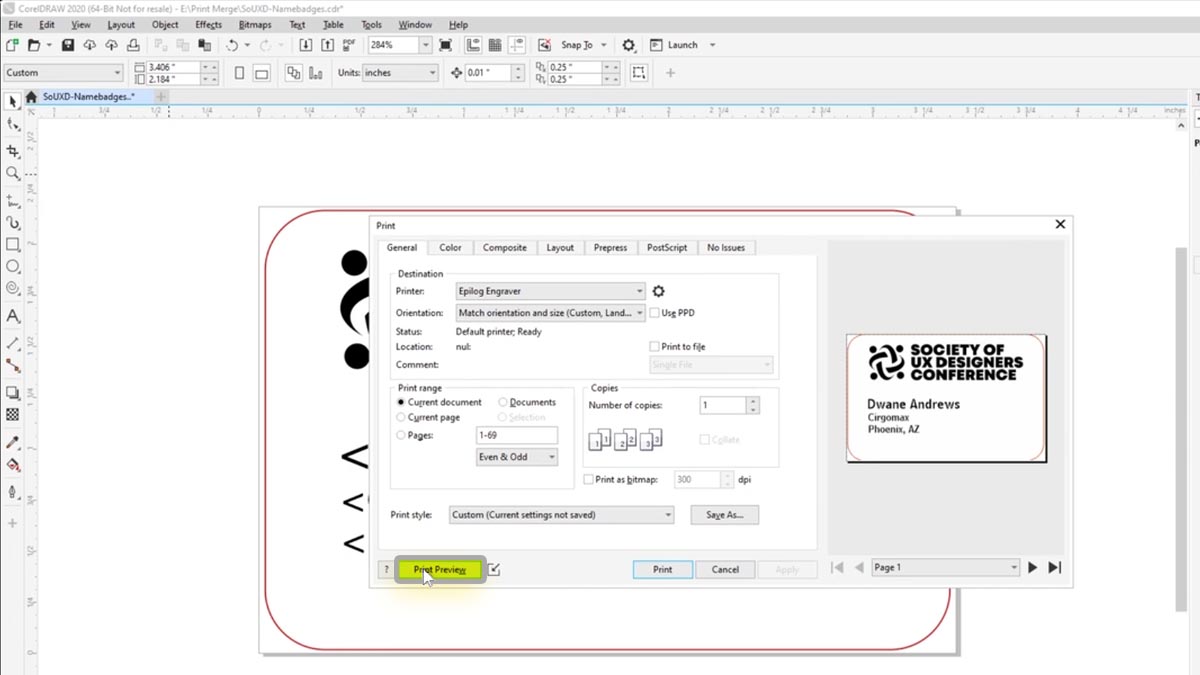
Select Print Preview

Select Print Preview

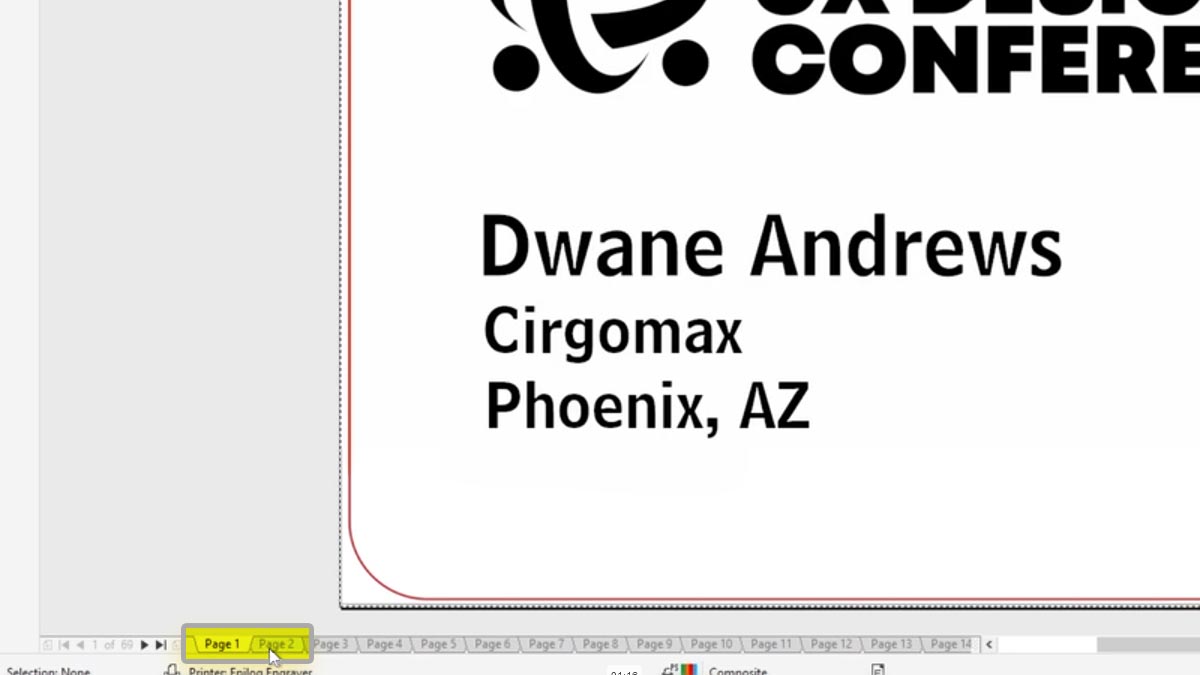
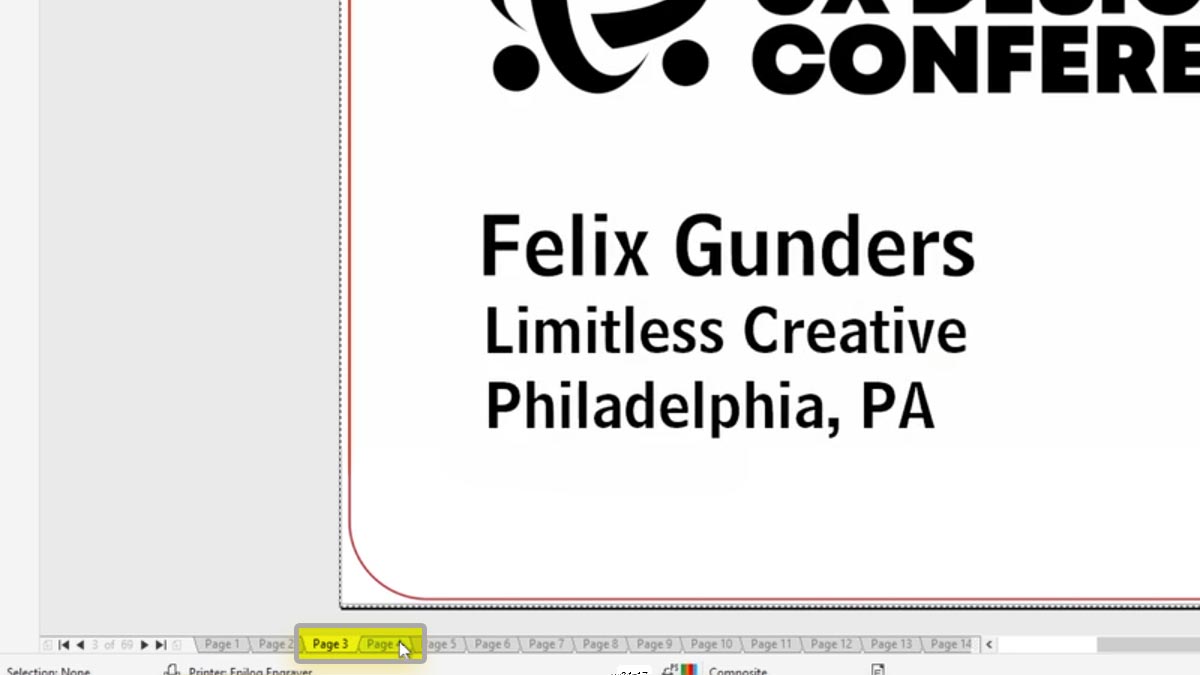
Currently each badge is on a separate page and will be a separate file at the laser.

each badge is on a separate page, this one is page 1
each badge is on a separate page, this one is page 3

This would be useful if running large customized items one at a time.

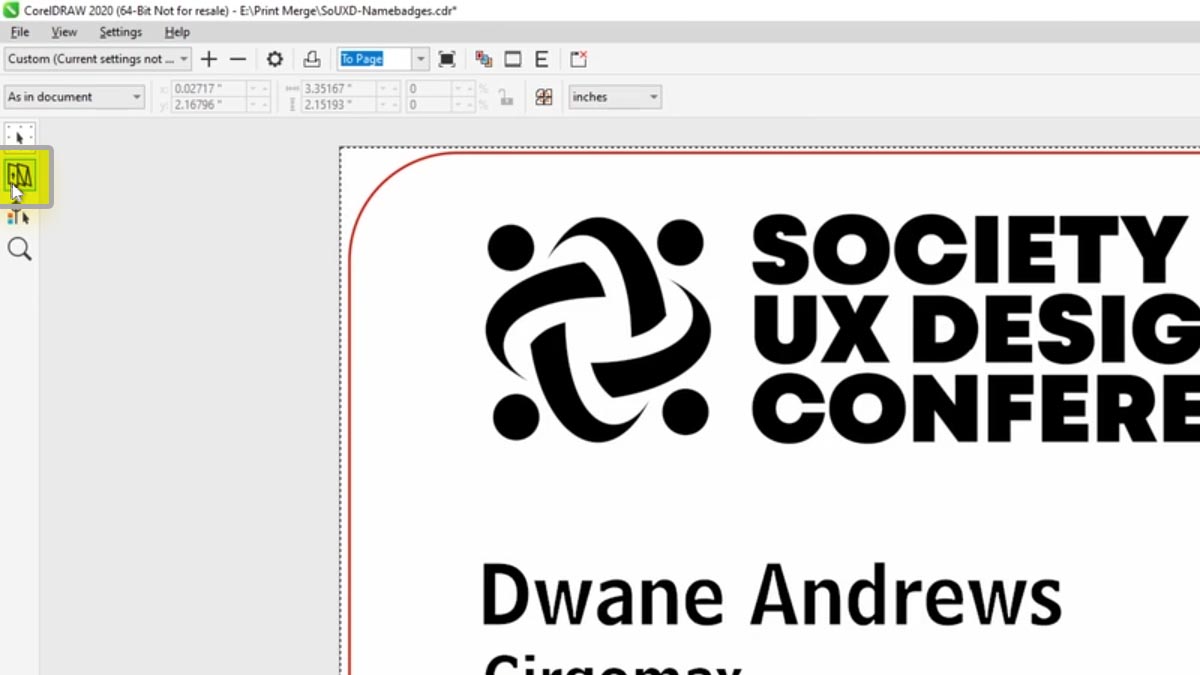
To print multiple on a page, select the Imposition Layout Tool button.

Select the Imposition Layout Tool button

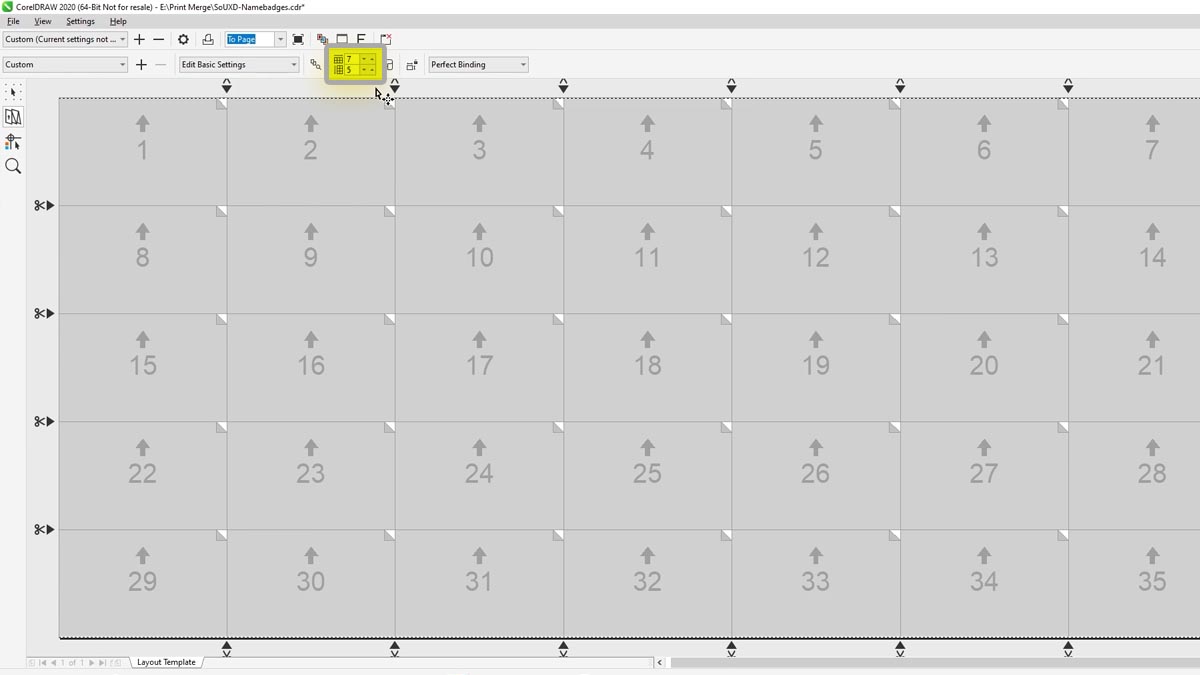
Set up how many will fit on your plastic sheet. In this case it is 7 by 5.

Set up how many will fit on your plastic sheet

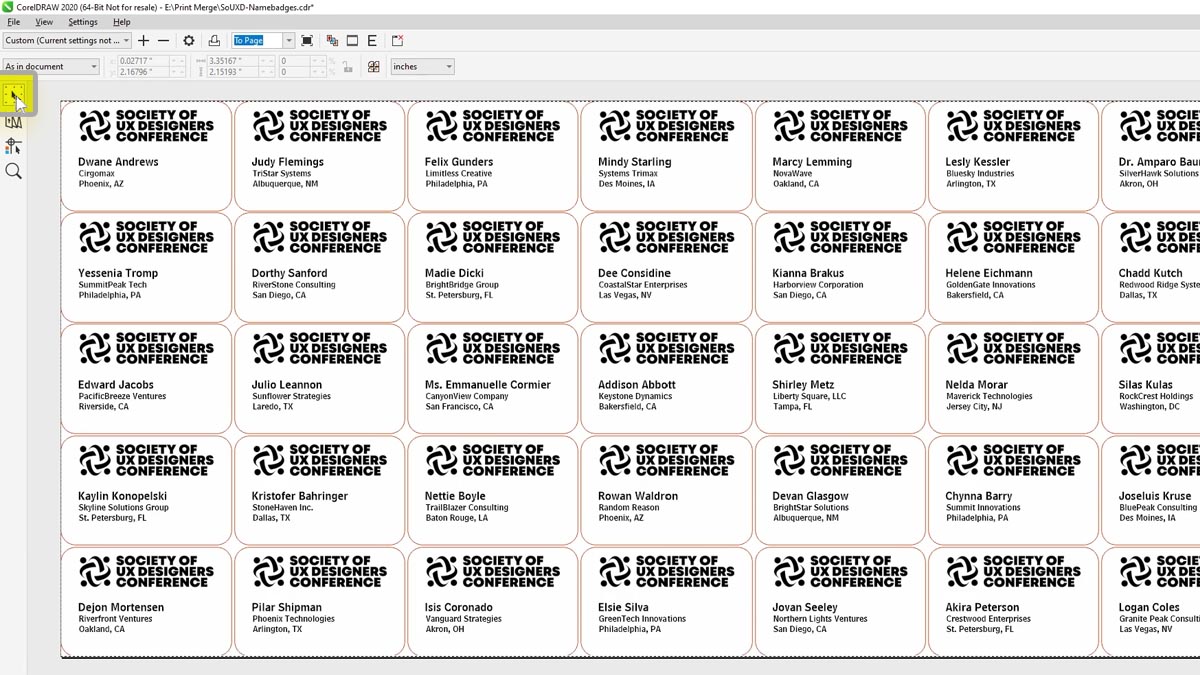
Select the Pick Tool to see how they will appear at the laser.

Select the Pick Tool to see how they will appear at the laser

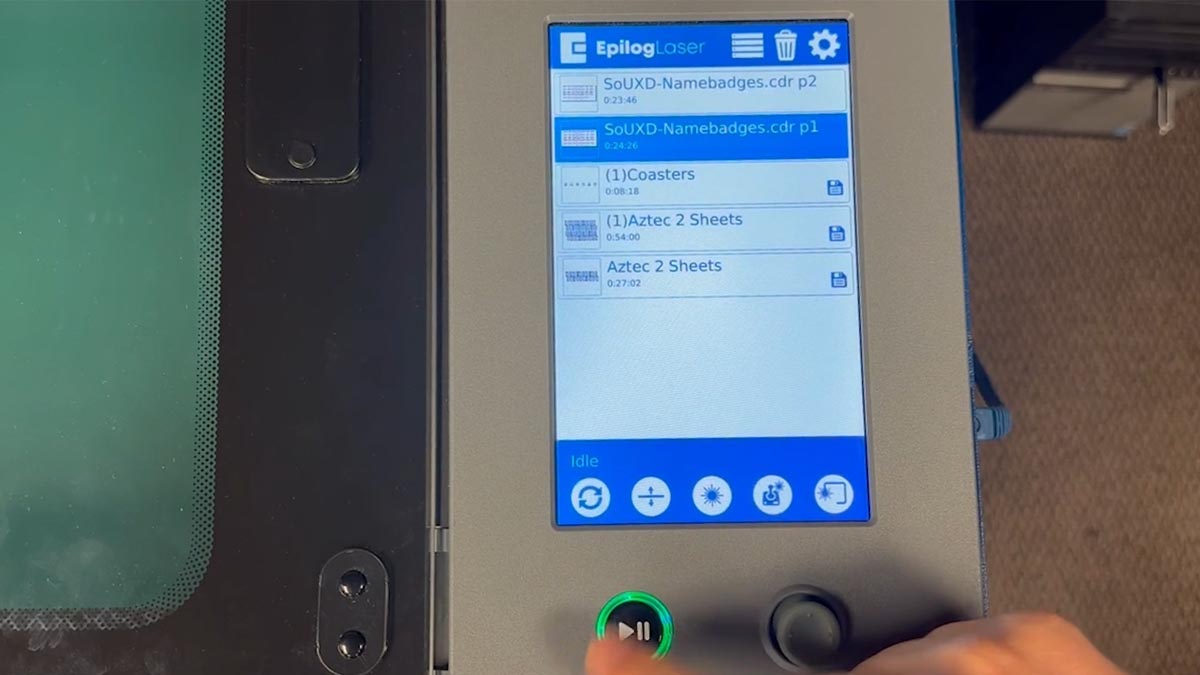
There are two files that will go the laser to print all of the badges we need.

There are two files that will go the laser

Print the files to the laser.

Laser Settings

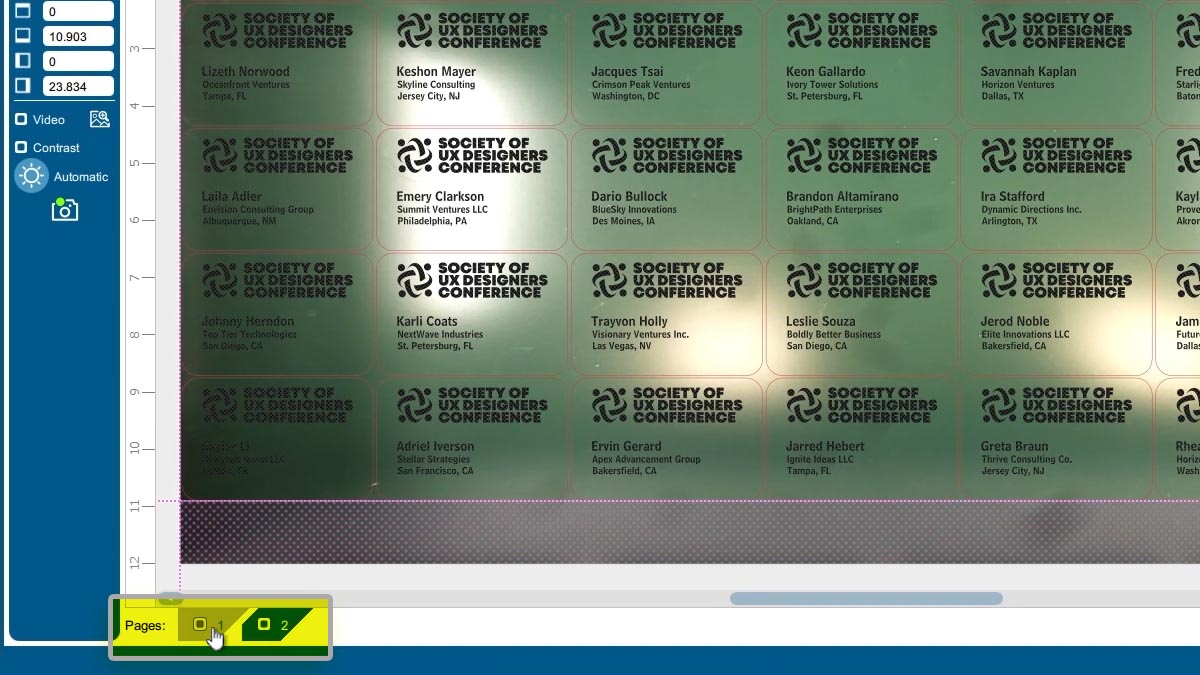
With the file at the laser we can see two pages of badges at the bottom of the screen.

Two pages of badges at the bottom of the screen

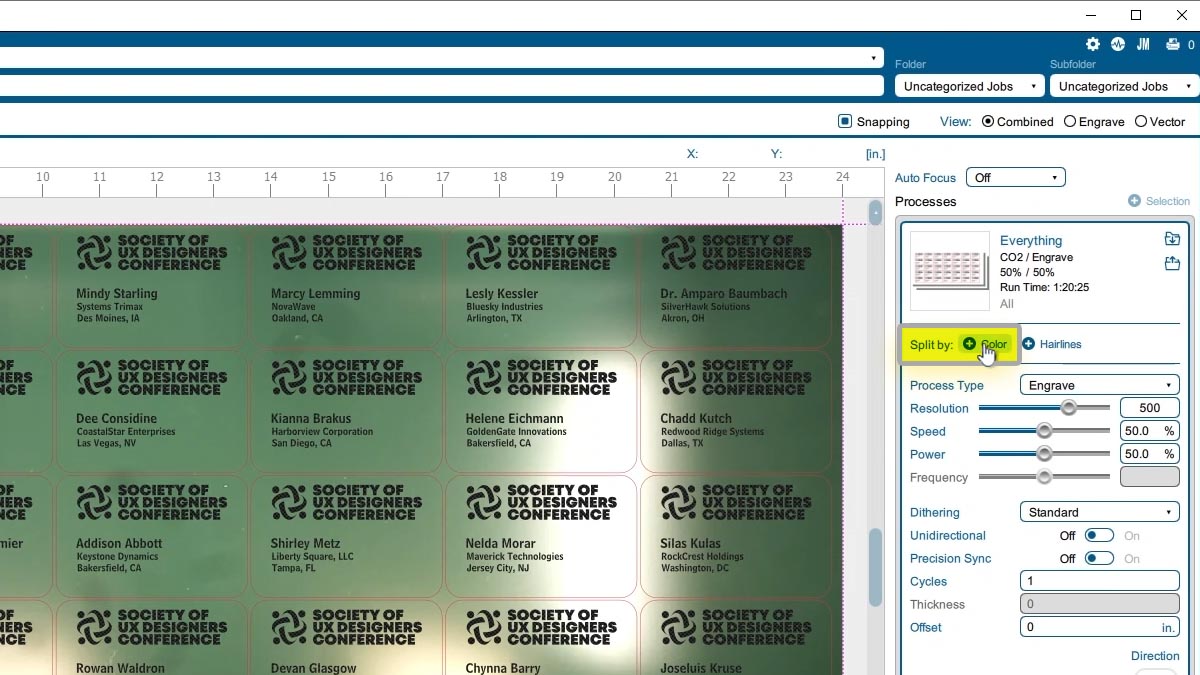
Split by Color to separate the engraving from the red cutting lines.

separate the engraving from the red cutting lines

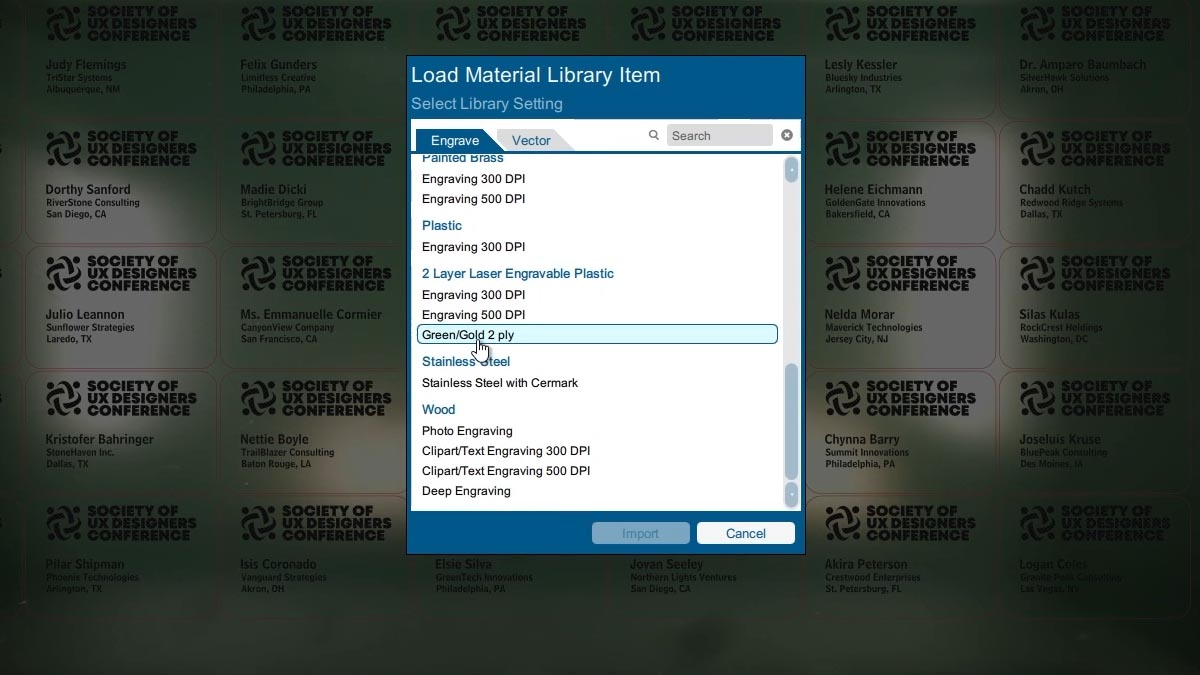
Import your material settings. We have set up a setting for this type of plastic.

Import your material settings

We’ll change the engraving process so it engraves from the bottom to the top.

Change the engraving process so it engraves from the bottom to the top

Import the cutting settings.

And print the job to the laser.

Run the Job

Both badge files are at the laser. Select the first and press Start.

Select the file and press Start

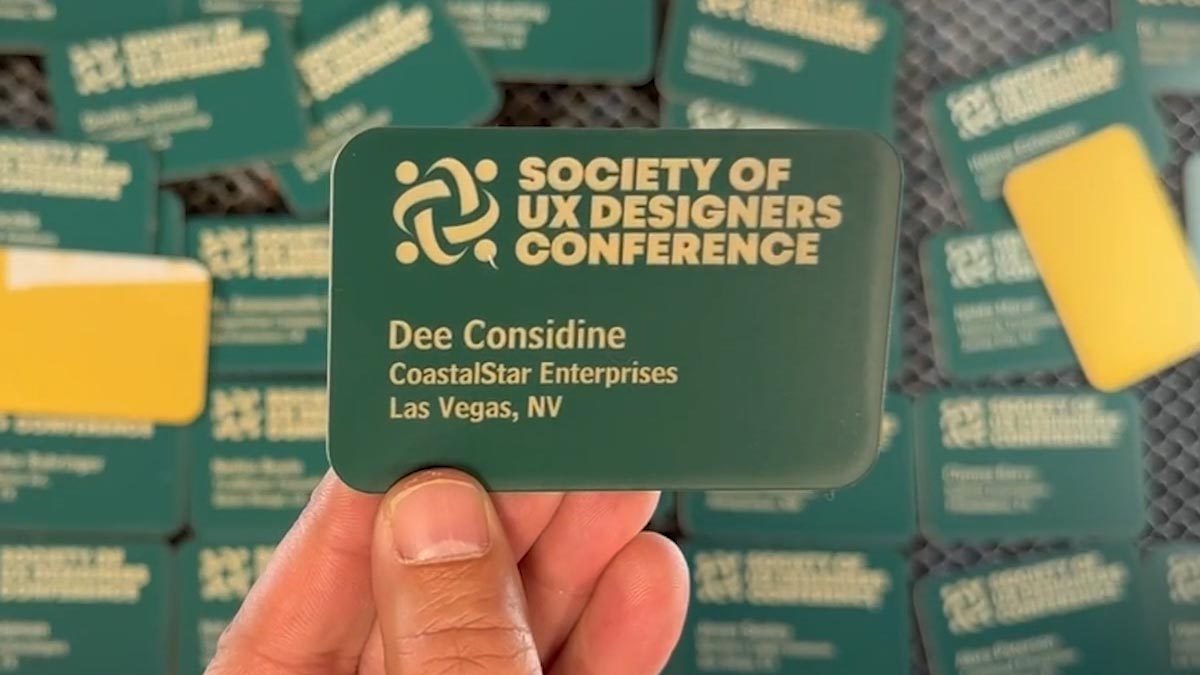
Wipe off the badges to remove debris and you are ready to run your next set of badges!

Example of finished badge

Raster vs Vector Engraving

Raster Images

Let’s begin by talking about raster images. A raster image is an arrangement of cells, called pixels, which form an image when displayed on screen.

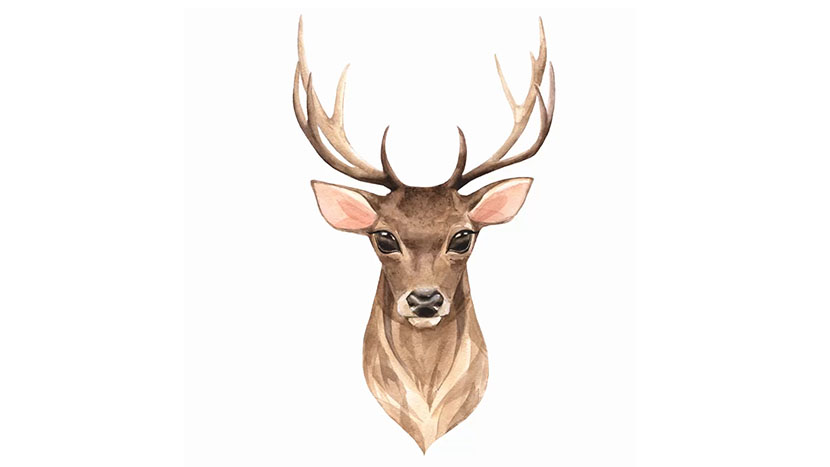
A raster image of a deer.

This deer image is an excellent example of a raster image. It looks like a highly detailed picture, but is actually made up of thousands of tiny dots, or pixels.

Close-up of a raster image with large pixels visible.

When viewed up close, there are thousands of colored pixels that make up the image. The smaller these pixels are, the higher the quality of the image, and the better the engraving will turn out on the laser.

While raster images produce great engraving results, if you increase the size of your image, each dot expands and your engraving quality decreases.

The most important thing to remember is that raster artwork is always going to engrave on the laser, it is never used for cutting. As long as there are pixels that make up your image, you will be engraving it with the laser.

Vector Images

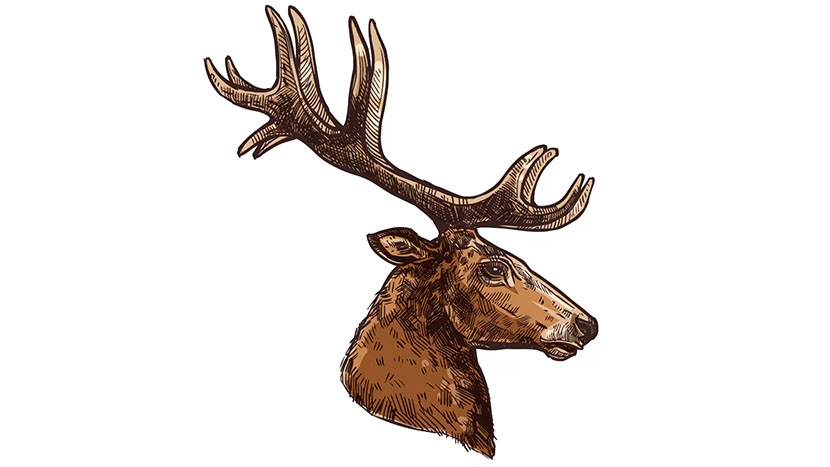
Now, let’s look at a vector image and how it works with the laser. A vector image is an image created with a series of lines and shapes filled with a solid color instead of pixels. Let’s zoom in to this second deer image to see how vector artwork looks close up.

A vector image of a deer.

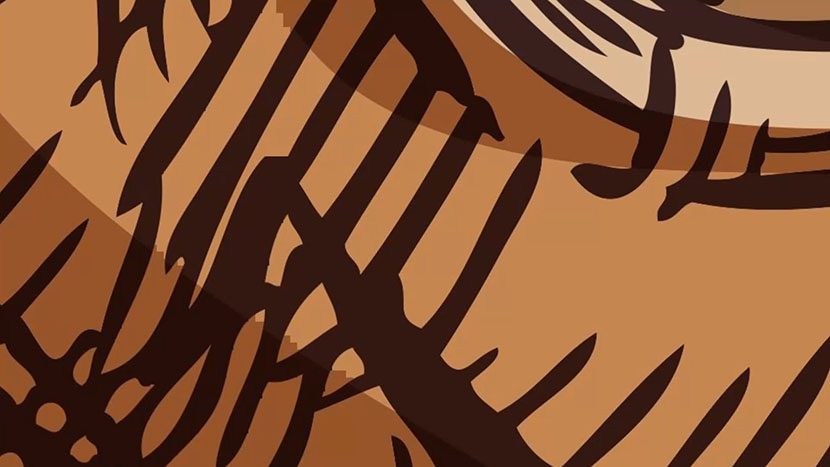
When you zoom in, you won’t find dots that are used to create the lines and colors in the image, but only continuous lines created with continuous fills.

Close-up of a vector image.

This is one of the big benefits of working with vector artwork, because it means you can expand the image as much as you want and never lose engraving quality.

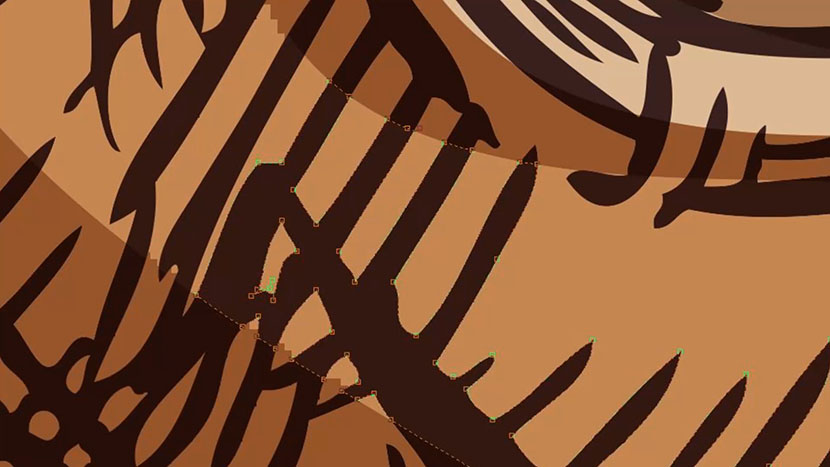
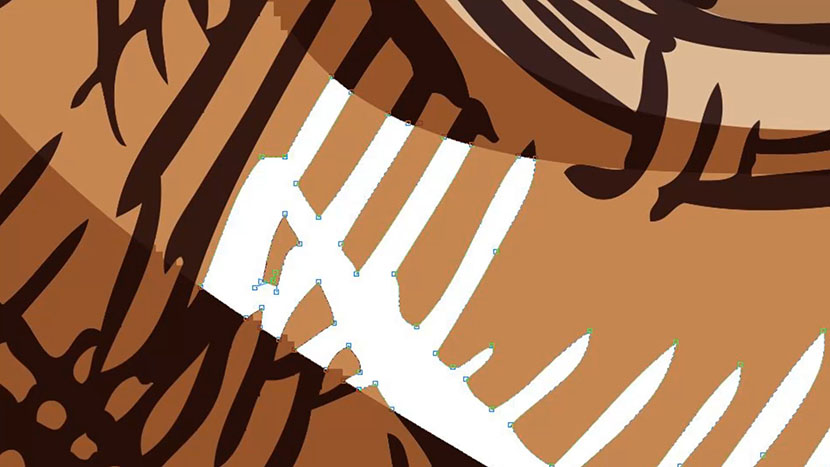
Close-up of a vector graphic, with lines selected.

We can select each different line and fill within the graphic and make changes.

Close-up of a vector graphic with one shape changed to a white fill.

Here we have changed the color of this part of the image to white.

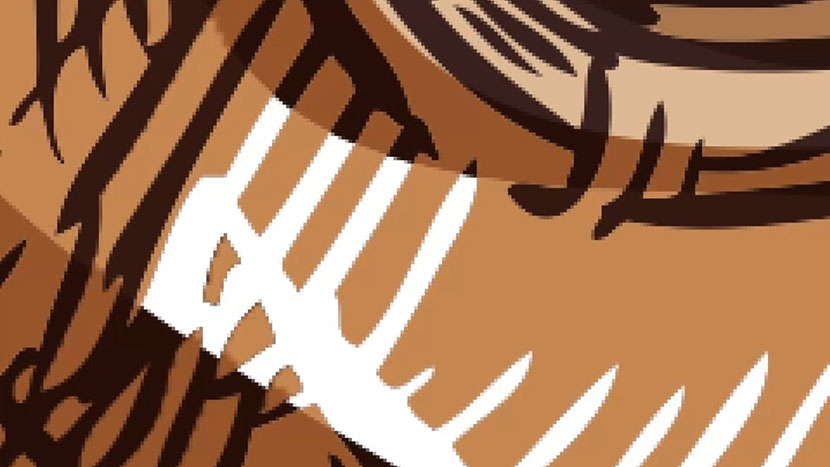
Close-up of a vector graphic after being converted to a bitmap image.

If this deer head image was a raster image, it would look like a series of different dots. When we convert the image to a bitmap, which is a raster image file format, we can see all of the dots making up the image when we zoom in.

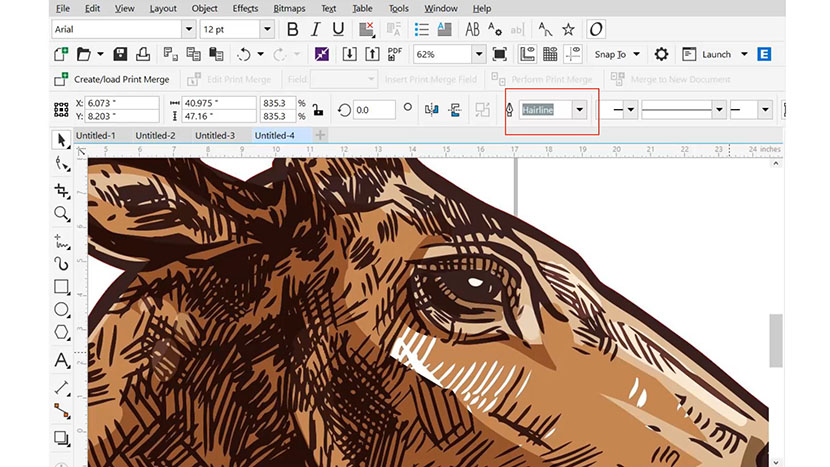
A vector graphic in CorelDRAW with the selected line's thickness set to 'Hairline.'

While raster images can only be engraved, vector artwork can be both engraved and cut with the laser. Any filled area, such as the tan or grey portions of the image, will be engraved with the laser. Lines within the image will either be engraved or cut based on the line thickness. If the thickness is under .004”, or set to hairline width in CorelDraw, the line will be cut with the laser. If it is over .004” it will be engraved. Here we have selected the outline to the head and can see that it is set to hairline width, so it will cut out this image. To make sure that this line engraves and does not cut, we will change it to .028”.

Example

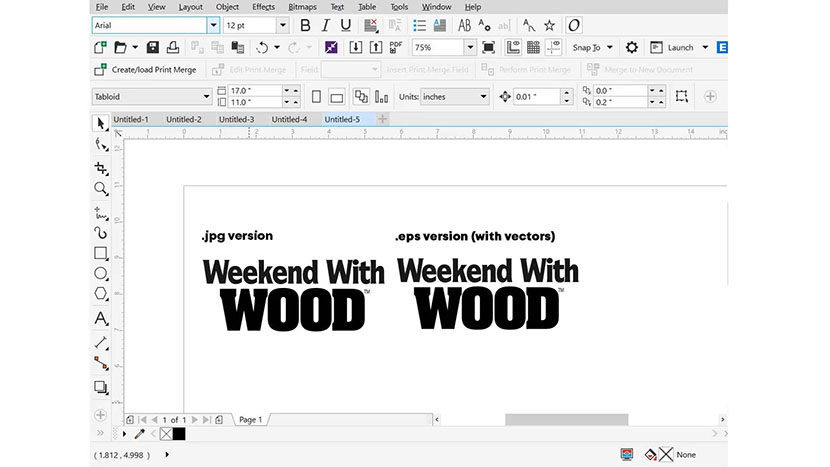
Next, let’s look at two different logos a company sent us to engrave. The first is a .jpg file, the second an .eps file with vectors.

A .jpg and an .eps graphic open in CorelDRAW.

When we try to expand the .jpg file to fit the workspace, we can see the quality of the logo degrade because it is a raster type file.

A .jpg graphic increased in size, with blurry, slightly aliased edges.

But when we expand the size of the vector .eps file, we can see that the logo is still in good condition for engraving since there are vectors in this file type.

An .eps graphic increased in size, with crisp, quality edges.

Communicating with Customers

A good practice for your engraving business is to set up a graphics standards document, which outlines for your customers that you require vector images, or high-resolution photos and logos. By requiring high resolution images, you can be proud of the engraving quality you achieve, and your customer will be happier with the final results!

Review

Let’s review what we learned about raster and vector images.

  • Raster images always engrave on the laser.
  • Vector shape fills will always engrave.
  • Vector lines will cut if set to hairline width or under .004”
  • Vector lines will engrave if set to .004” or greater.
  • Raster files do not resize well, but vector images will resize without losing quality.

Creating City Maps (Illustrator)

City Map Image Capture

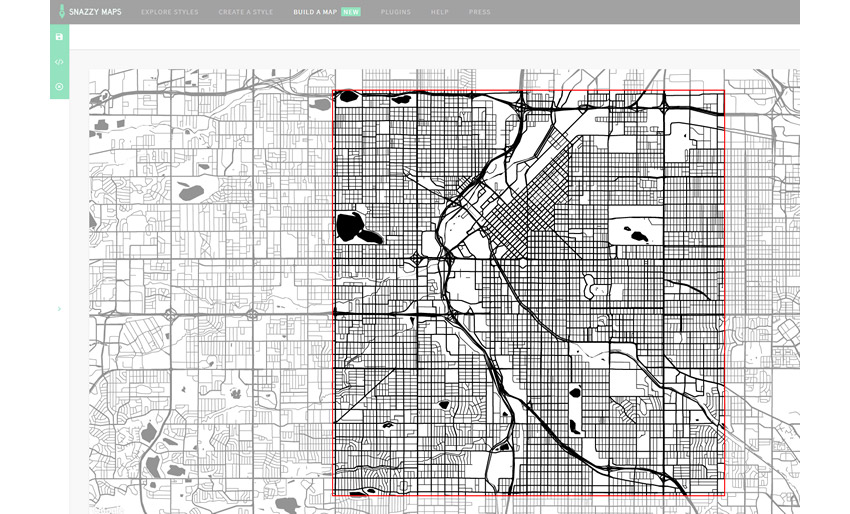
Start off by visiting snazzymaps.com to create a custom map for laser engraving or cutting. Creating an account is not required, but if you are interested in creating different maps for customers or friends, signing up will give you the ability to save map locations and custom styles for later use, and don’t worry it’s completely free!
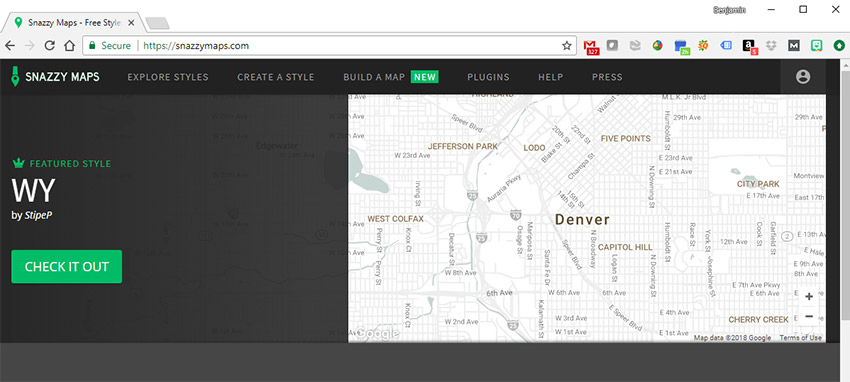
Once you’re on the Snazzy Maps website, click on the Build a Map button near the top of the page.

Now you’re ready to create a custom map. Begin by clicking on Choose a Snazzy Maps style button under Style.

In the Search field type Epilog and then click the Search button.
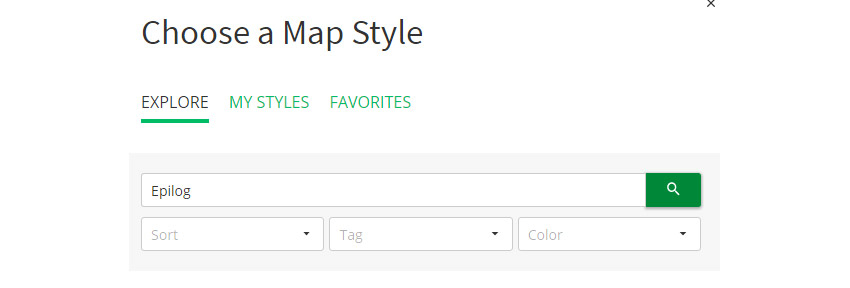
Select the “Epilog Laser – Laser Cut Maps” style in the results section by Clicking on the option, then click on Apply Style at the bottom of the page.

Now click on the Size & Location option in the Build a Map panel.

In the Size section change the Height option to 100%.

In the Center Location section, click the “Or search for a location” button below the latitude and longitude coordinates.

Fill in the city name and press Enter, or select your city from the prefilled drop-down options.
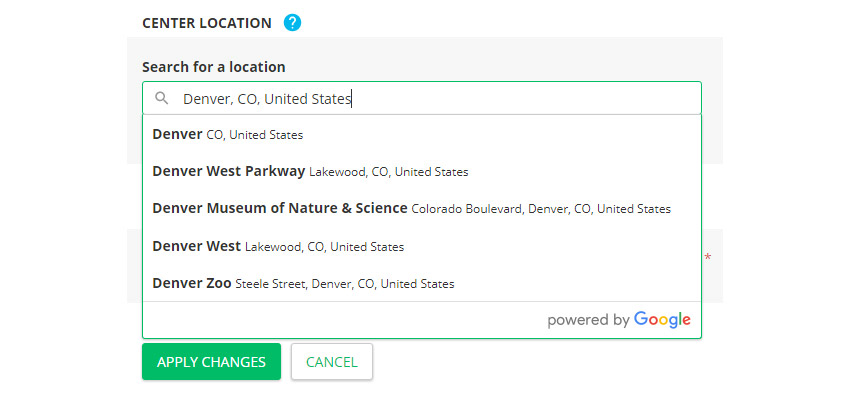
In the Zoom Level section set the Zoom to 13, then click Apply Changes. This might need to be adjusted by the overall size of the city you are working with and the crop you would like to achieve. You’ll be able to adjust the Zoom Level later, by using your scroll wheel with the mouse over the map screen.

We won’t be using the Markers section for this map, but we’ll go over a good use for them that you might find useful. Click on the Markers section and give you a brief tour and ideas for how to use it.

The Markers section includes a Name, Location, and Icon style that can be used to add custom locations to your map. We could add markers for a home, favorite restaurants, wedding location, etc. to add an additional level of personalization.
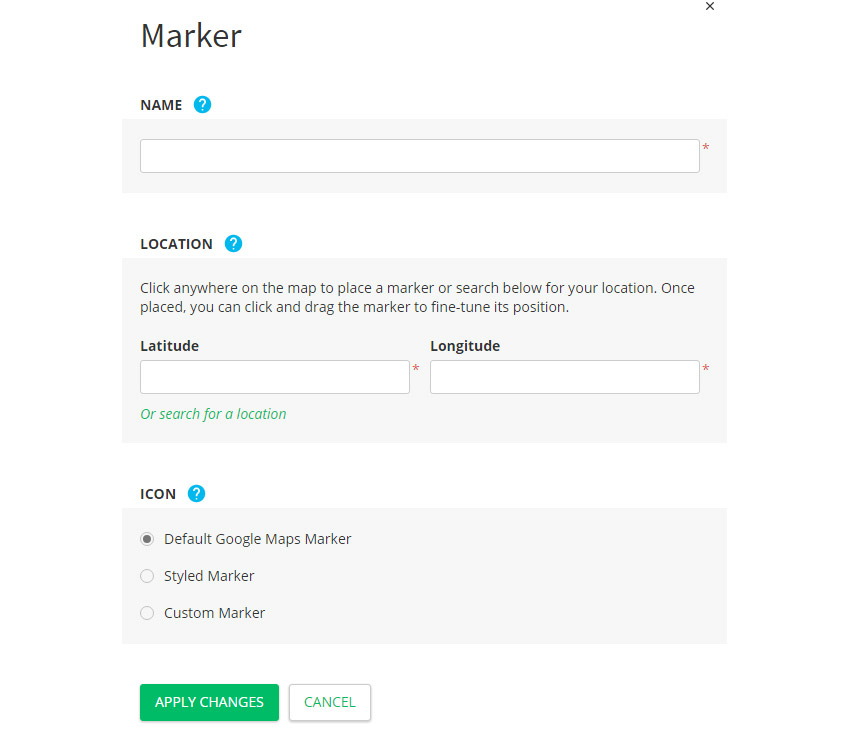
Click cancel to back of the Marker section.

Next click the Advanced Settings section.

Most of the settings in this section apply to using maps on a website, so you can ignore most of them. Under the Controls section, click on the button next to Hide all controls – this will make it easier to capture an image of the map. Then click Apply Changes.

Now click on the Hide Panel button on the right side of the Build a Map panel.
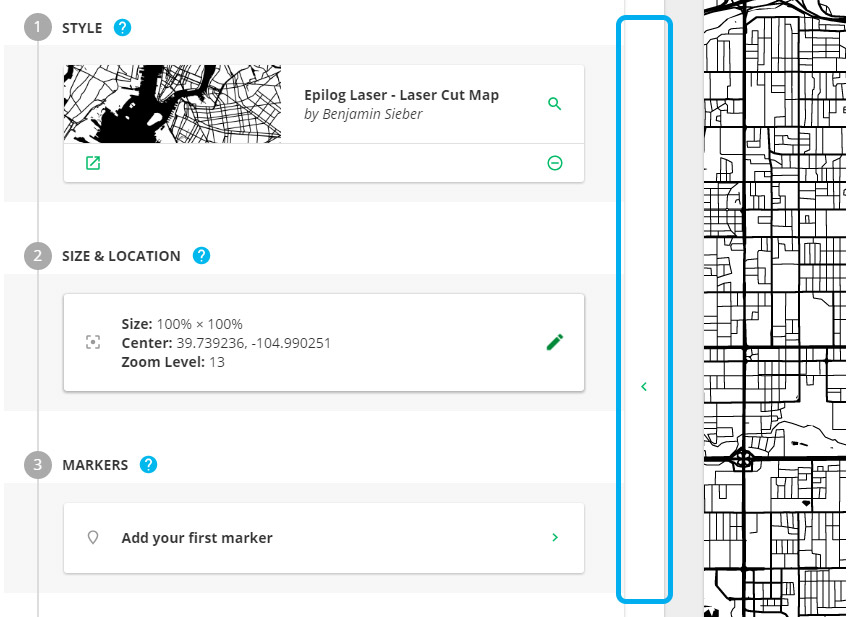
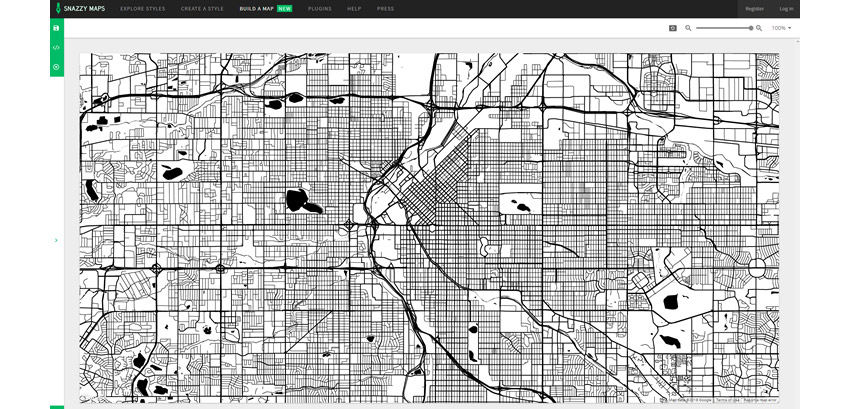
At this point we are ready to capture an image of the map, which we will later bring into Adobe Illustrator and vector trace.
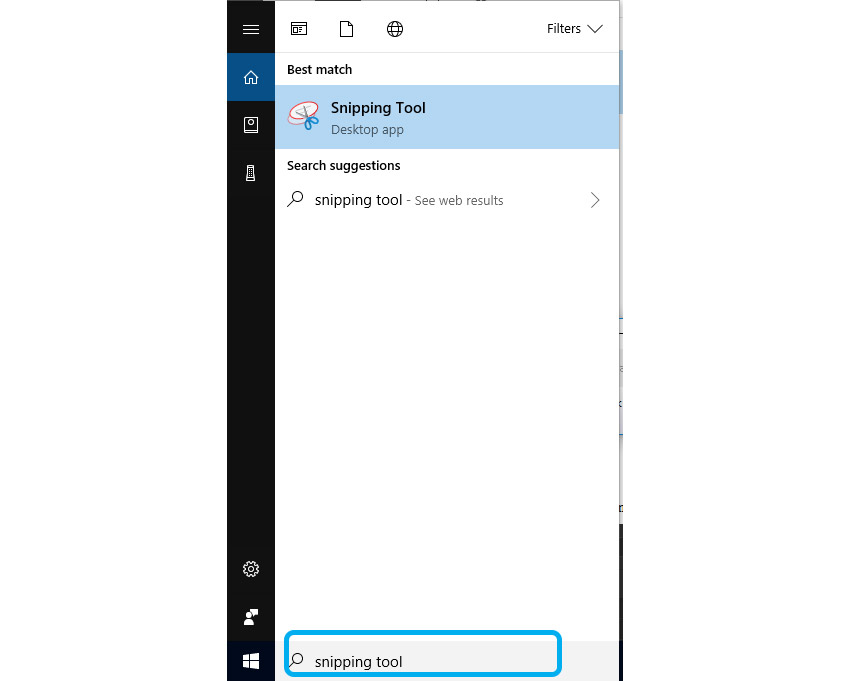
Open the Windows Snipping Tool app.

Select the New option.
Then click and drag over the top of the map section on the screen to create a Snip capture (screen shot) of the map.
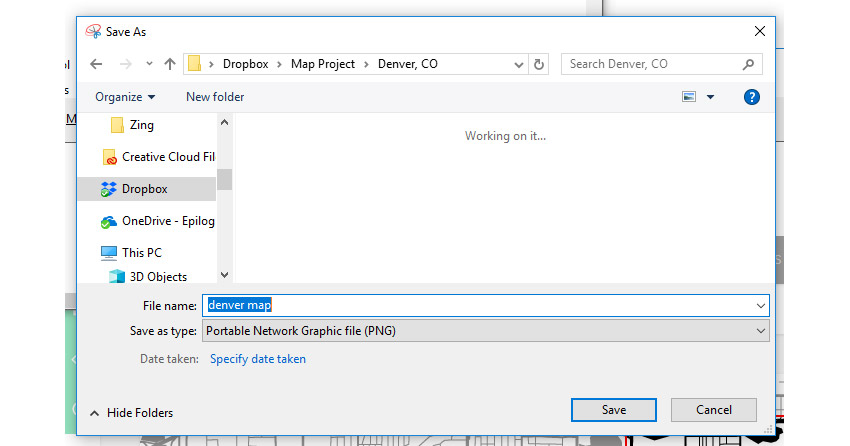
Next click the Save Snip option (Disk icon) near the top of the screen.

Name the file and select the .PNG option from the Save as type drop-down menu, then click Save. (Note: the .PNG file format will give you the best image, with little compression, for the vector trace in Illustrator.)

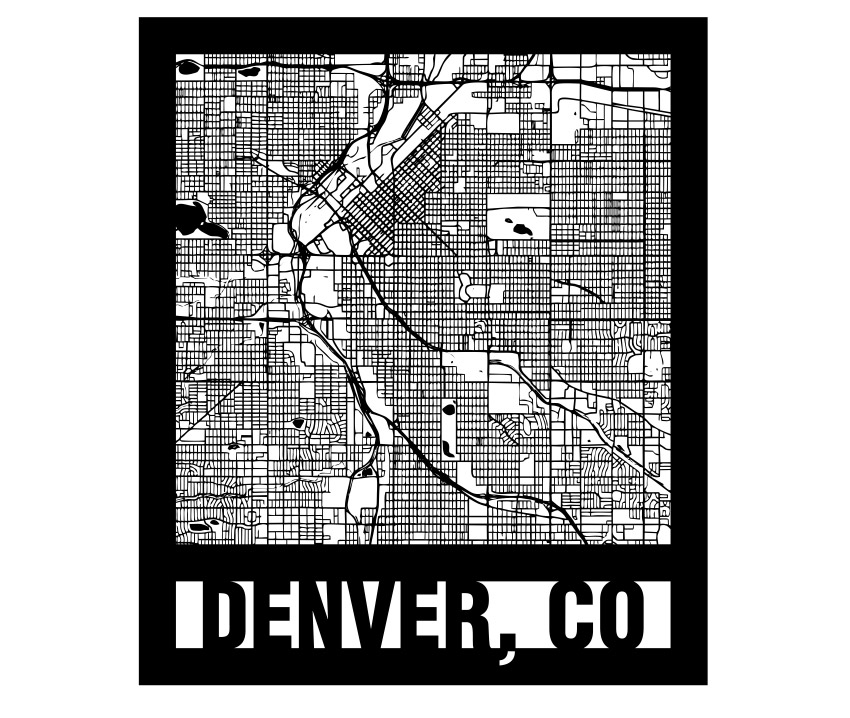
To finalize the map for laser engraving or cutting with your Epilog Laser system, we’ll use Adobe Illustrator to create a quick vector trace of our screen capture image, add a frame, and city name text to the frame.

Vector Trace

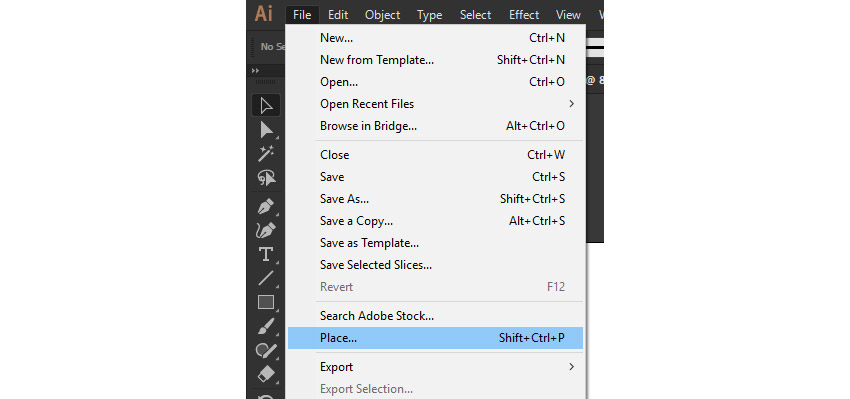
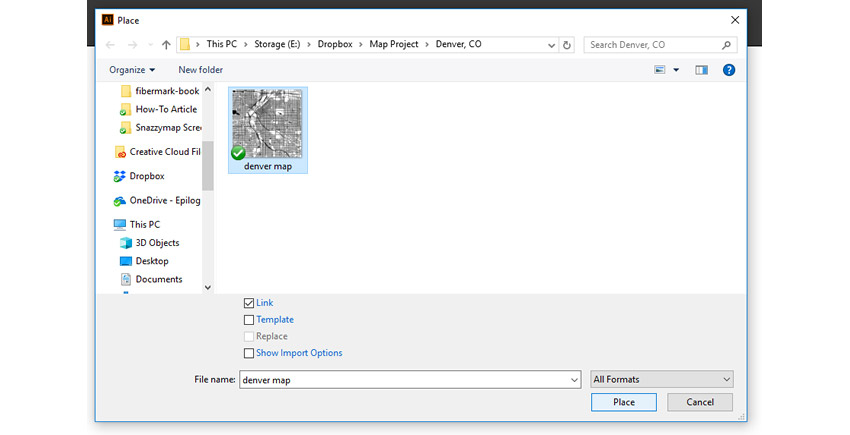
With Adobe Illustrator open and a new page created, start by selecting the Place option from the File menu at the top of the page (Ctrl + Shift + P).
Using the file browser window, navigate to where you saved the map Snip, click the .PNG file, and then the Place button.

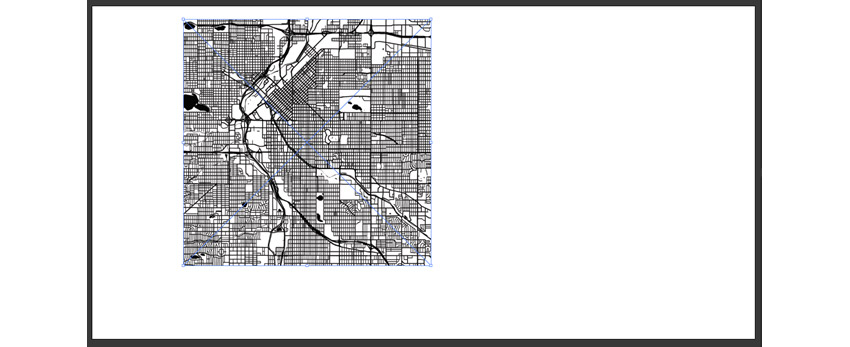
Click anywhere on the page to Place the artwork.
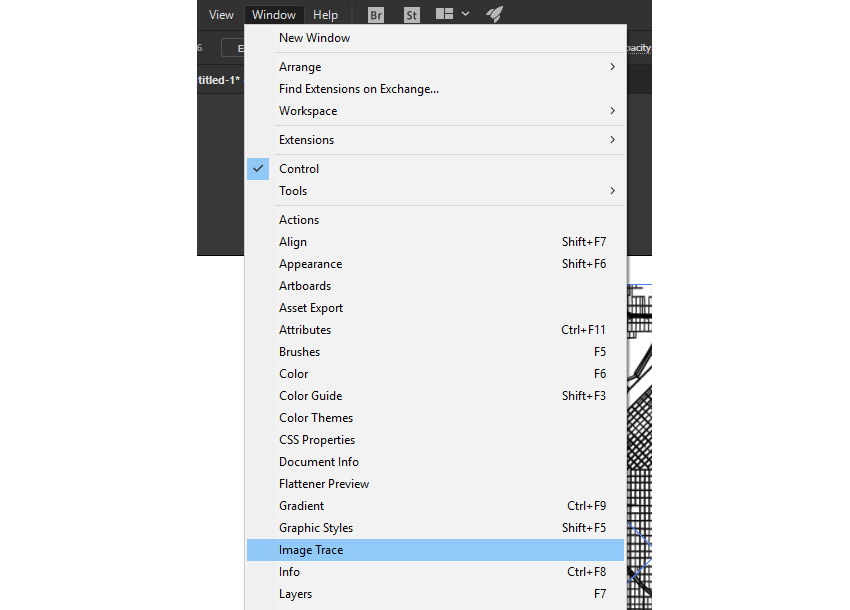
With the artwork still selected, open the Image Trace panel by clicking Window from the menu at the top of the page, then click on Image Trace.
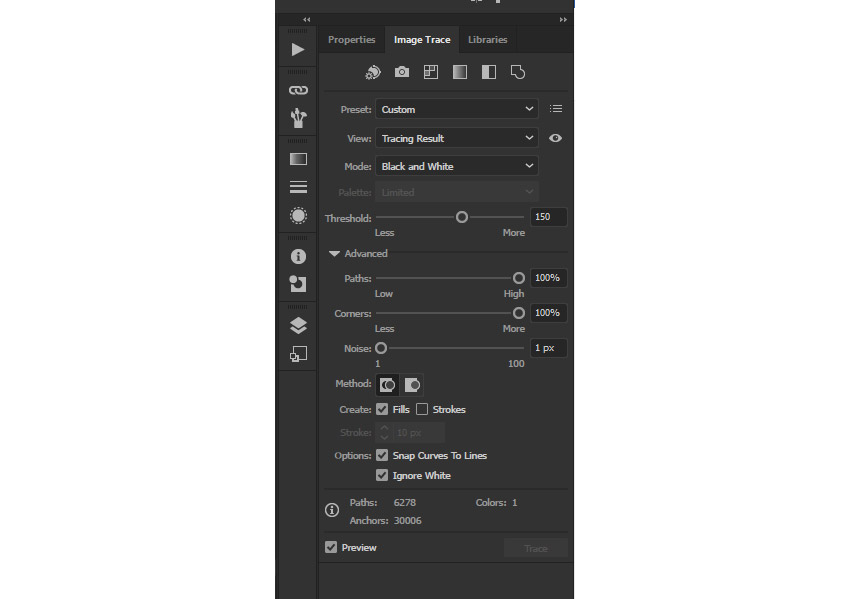
In the Image Trace Panel change the following settings:

  • Change Preset to Black and White Logo (this will change to Custom when you start editing the other settings)
  • Set Threshold to 150
  • Click on Advanced to open the Advanced options
  • Set Paths to 100%
  • Set Corners to 100%
  • Set Noise to 1 px
  • and turn on Ignore White

Then click on the Expand button, near the top of the screen in the Control Bar, to finalize the live preview of the Image Trace.
Now we’ll create the frame that goes around the map using the Rectangle tool.
Select the Rectangle Tool (M) and draw a rectangle overlapping the city map. Make sure the rectangle is just inside the outer bounds of the map.
With the Rectangles still selected, change the Rectangle Fill color to none, and Stroke to black using the Control bar options at the top of the screen.
Open the Stroke panel (Ctrl + F10) by selecting Window / Stroke from the menu at the top of the screen, then change the line Weight to 0.75 in (or 54 pt), and select Align Stroke to Outside, next to Align Stroke.

Now we’ll create a frame for the city text. Select the Rectangle tool and draw a rectangle starting from the inside lower corner of the frame created around the city map. Then move the top of the text frame rectangle to overlap with the bottom of the map frame. This rectangle will become the frame for the city text.

(Note: It may help to turn on Smart Guides with Snap to Point set to on for this step to make aligning the rectangles easier.)

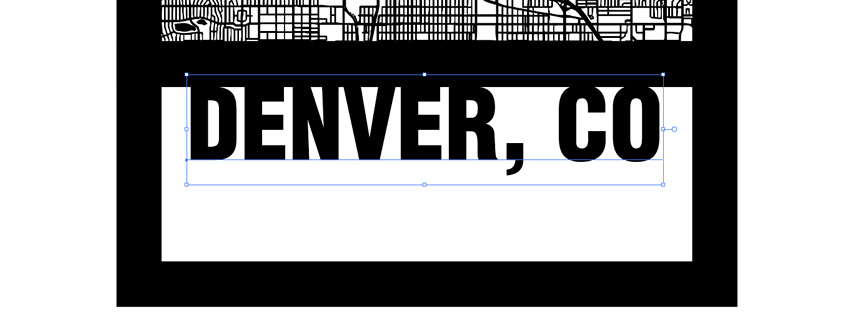
Next we’ll create the city text. Using a typeface with a bold condensed font will work well for this design, so we’ll be using Helvetica Condensed Black for this example. Start by selecting the text tool, click in the Font Name search box in the Control bar at the top of the screen, and type “Helvetica Condensed Black”, then press Enter. If you do not have Helvetica, Arial or Myriad Pro make good alternatives.

With the Type tool still selected, click inside the text frame you created in an earlier step, then type the city name in all caps, and adjust the size so there is approximately .5” to 1” of space between the text and the frame on either side of the text. Then position the text so the top of the text is slightly overlapping the bottom of the map frame.

Now create a copy of the city text and drag it to the side. We’ll use the copy of the city text to add the comma descender back to the artwork once we Unite the text with the frame in a later step.
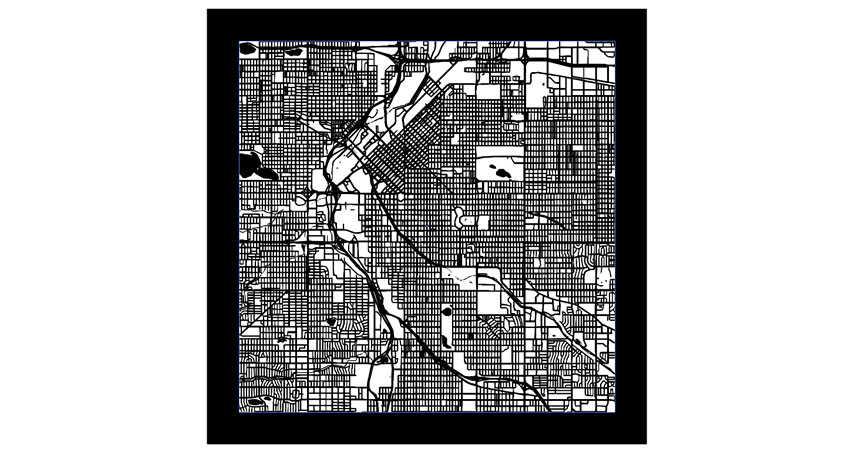
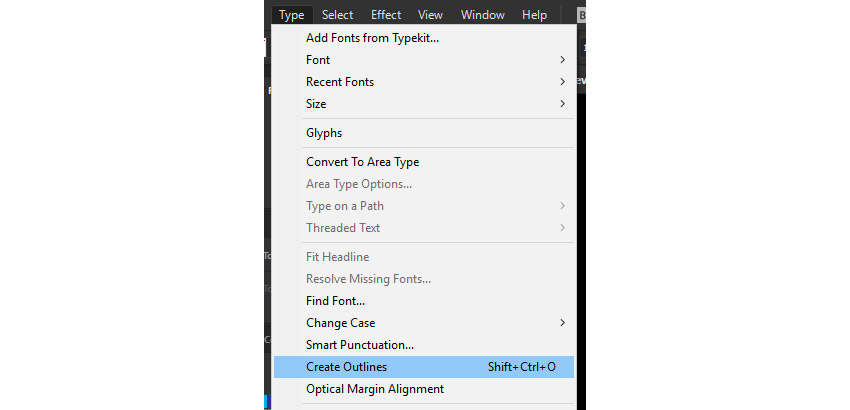
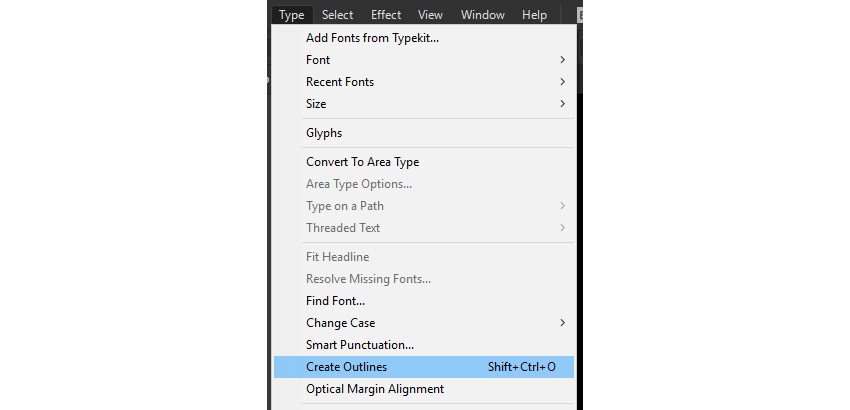
With the text still selected, convert the text to outlines by selecting Type / Create Outlines (Ctrl + Shift + O) from the menu at the top of the screen.
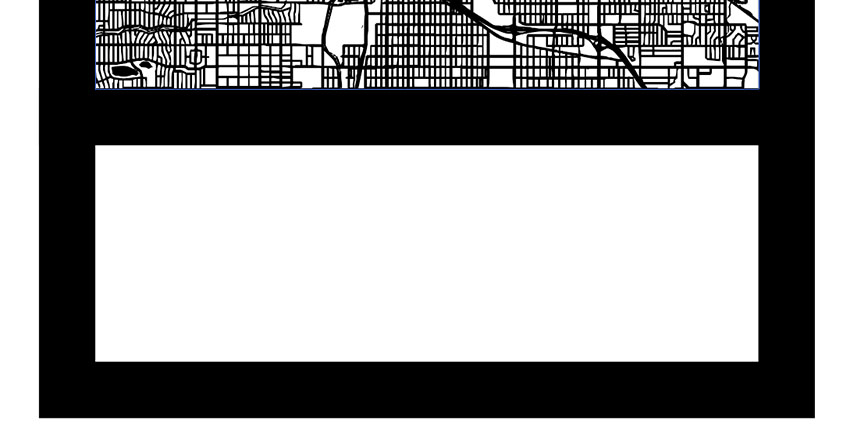
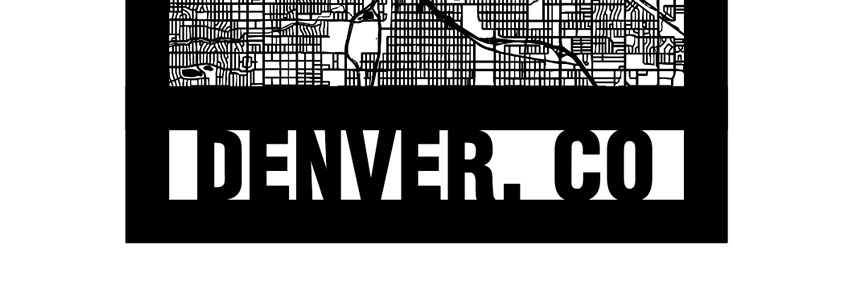
Use the Direct Selection Tool to select the text frame and drag the bottom of the frame up to overlap the bottom of the text objects.

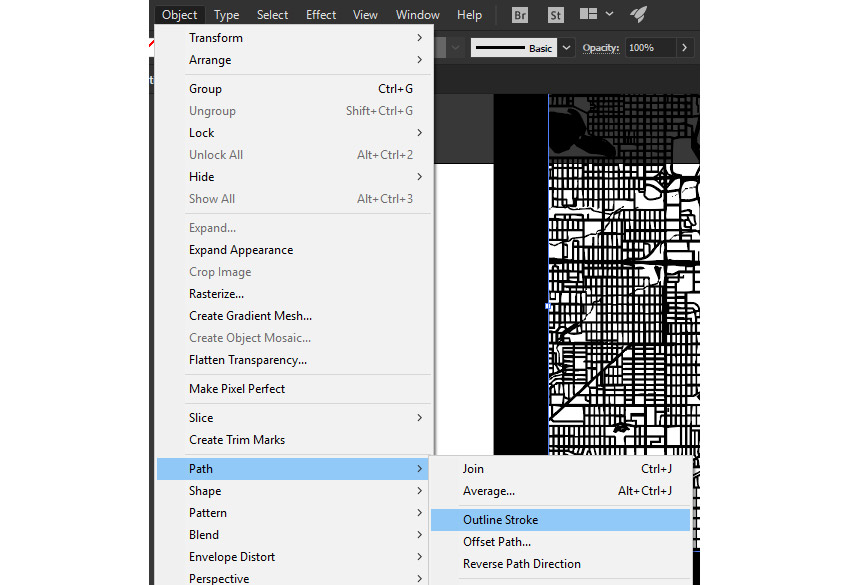
Next, we’re going to outline the frame stroke by selecting both the map frame and text frame lines with the Selection Tool. With the Selection Tool selected, hold Shift key, then click on both of the frames. Now select Object / Path / Outline Stroke from the menu at the top of the screen to convert the strokes to outlined objects.
With all the objects for the city map completed, all that is left is to Unite the objects together. Start by using the Selection Tool to select all the city map objects, then open the Pathfinder Panel by going to Window / Pathfinder (Ctrl + Shift + F9).
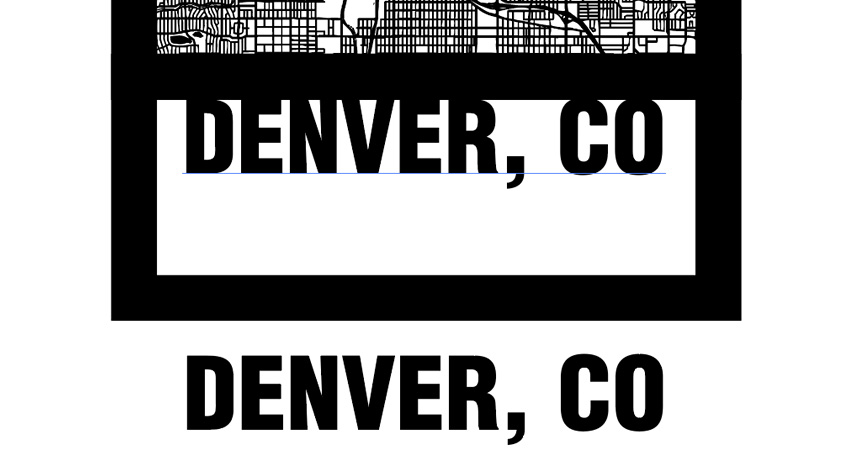
In the Pathfinder Panel, under Shape Modes click the Unite option to combine all of the vector objects together.
As a final detail, we’re going to add back the comma descender, by using the Exclude feature. Start by deleting all characters but the comma from the city text copy you created in the earlier step.
Next select the comma and convert the comma to outlines by selecting Type / Create Outlines (Ctrl + Shift + O) from the menu at the top of the screen.
Click and hold on the Pen Tool in the Tools panel to reveal the hidden tools options, then select the Delete Anchor Point Tool option.

Now click on the top 3 nodes of the comma to delete the top section of the comma, and leave only the comma descender.

With the Selection Tool, move the comma descender just under the comma attached to the city map frame.

Select both the city map artwork and the comma descender, with the Selection Tool, and in the Pathfinder panel, under Shape Modes click the Exclude option to knock out the object from the frame.

At this point if you’d like to engrave the artwork, you’re finished. If you’d like to cut out a version of the map, change the Fill color to None, change the Stroke Color to Black, then set the Stroke Weight to .001” for cutting with your Epilog Laser system.

  • 1
  • 2